


Reference [Recorder]
ZOOM MRS-802
40
internal setting so that the recording track(s) will also play
back.
1.
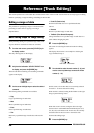
From the main screen, press the [UTILITY] key.
The indication “UTILITY TR EDIT” appears on the display.
2.
Use the cursor left/right keys to bring up the
indication “UTILITY BOUNCE” on the display, and
press the [ENTER] key.
3.
Use the cursor left/right keys to bring up the
indication “BOUNCE RECTRACK” on the display,
and press the [ENTER] key.
• MUTE
The recording track(s) will be muted (default setting).
• PLAY
The recording track(s) will play back.
4.
Turn the dial to change the setting to “PLAY”.
5.
To return to the main screen, press the [EXIT] key
several times.
■ Selecting the recording destination
V-take
In the default condition of the MRS-802, the result of the
Bounce operation will be recorded on the V-take that is
currently selected for the recording track(s).
If you want to play back a track while bouncing onto another
V-take of that track, you can use the following procedure to
change the recording destination V-take. (For information
on V-takes, refer to page 33.)
1.
From the main screen, press the [UTILITY] key.
The indication “UTILITY TR EDIT” appears on the display.
2.
Use the cursor left/right keys to bring up the
indication “UTILITY BOUNCE” on the display, and
press the [ENTER] key.
3.
Use the cursor left/right keys to bring up the
indication “BOUNCE REC TAKE” on the display,
and press the [ENTER] key.
The V-take currently selected for recording is shown.
• CURRENT
The bounce result will be recorded on the V-take currently
selected for the recording track.
•1 - 10
The bounce result will be recorded on the V-take of the
number you specify here.
4.
Turn the dial to specify the recording destination V-
take.
5.
To return to the main screen, press the [EXIT] key
several times.
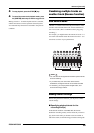
Executing bounce recording
In this example, we will bounce the contents of tracks 1 - 6
onto V-take 10 of tracks 7/8.
1.
Go to the UTILITY screen and verify that the
BOUNCE RECTRACK parameter is set to “PLAY” .
2.
Also on the UTILITY screen, verify that the REC
TAKE parameter is set to “10” (V-take 10).
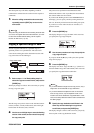
3.
Press the status key 7 so that the keys is lit in red,
and keep pressing the key.
4.
While still holding down status key 7, repeatedly
press status key 8 until both keys are lit in red.
The V-takes 10 of tracks 7/8 are now ready for stereo
recording.
To monitor the two bounce target tracks in stereo, set the pan
parameter for track 7 to L100 and the pan parameter for
track 8 to R100.
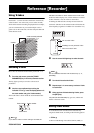
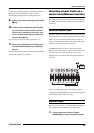
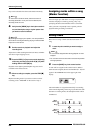
RECTRACK
RECTRACK
MUTE
MUTE
REC TAKE
REC TAKE
CURRENT
CURRENT