192
CD-RECORDE
R
Even if your CD is made up of one long piece of music, you can place track markers at points
throughout the piece. For example, if you have done a remake of the 25 minute opus 'Supper's
Ready' by Genesis, each 'section' can have track markers. Alternatively.....
If you want, you can also mark 'indexes'. These can be used to locate to positions within a track
(for example, intro, verse 1, chorus 1, verse 2, chorus 2, instrumental, final chorus or whatever).
To mark an index, the locate point should be prefixed with an ampersand (&).
NOTE 1:
Marking indexes is optional. Some CD players don't actually have the ability to locate to
indexes so it's entirely up to you if you want to use them.
NOTE 2:
Autolocate points that are not prefixed with either # or & will be ignored (locate memories
2, 3 and 6 in the example shown on the previous page).
NOTE 3:
The locators used for Track IDs and Indexes must be stored in ascending order for correct operation.
NOTE 4:
The minimum time between two Track IDs is 4 seconds.
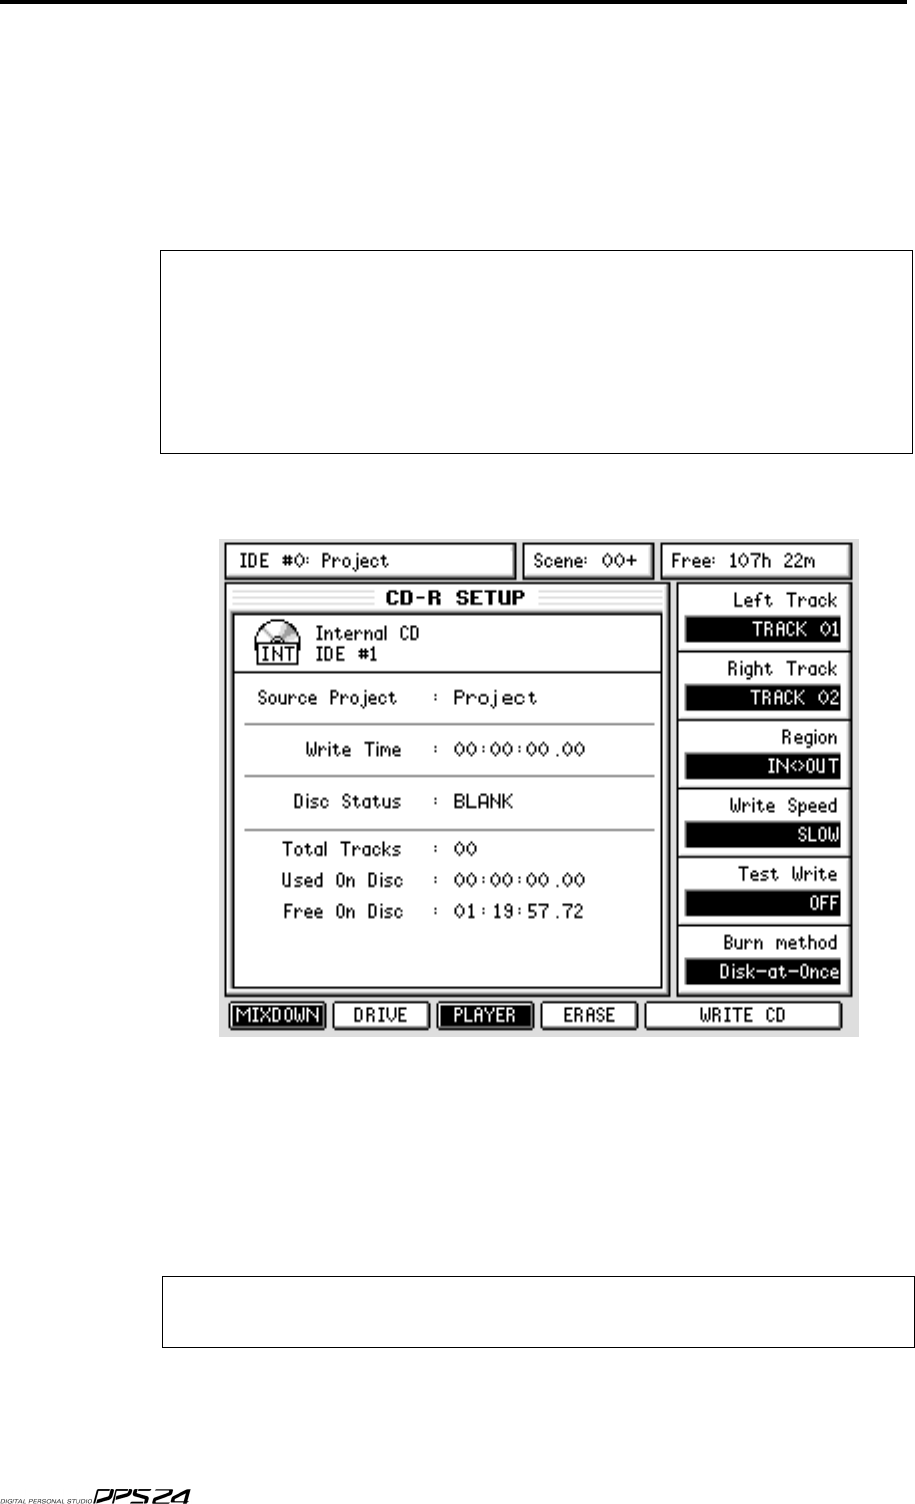
Once you have set up your track markers, you can proceed to the CD-R page. Set the param-
eters as follows:
Assuming you have a blank CD-R inserted in the drive, press WRITE CD. You will be asked
if you want to proceed to which you should respond as appropriate. If you choose to pro-
ceed, you will see a progress display as the audio CD is created. At the end, you will have a
finished audio CD, complete with track markers to play in any audio CD player.
The advantages of DISK-AT-ONCE is that you can create your own playlist and specify the
gaps between the various tracks and also where the track markers and indexes will be placed.
Plus, of course, you can just let the thing run and create your final CD in one pass.
NOTE:
Not all CD-R drives support Disk-at-once operation. If you have an old CD-R drive, this
feature might not be working properly.
v1.6 Operator’s Manual


