


SETTING EXT SYNC OFFSET
203
SETTING EXT SYNC OFFSETS
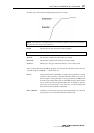
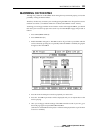
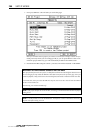
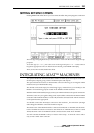
Pressing SHIFT+EXT SYNC allows you to set a timecode offset. This prompt appears on the LCD:
The first digit is highlighted and you should enter a value from the numeric keypad as ap-
propriate.
To set the 'sign' (i.e. + or - ), move the cursor to the sign and press '+' or '-' on the numeric
keypad as appropriate. Once an offset has been entered, press ENTER orSET [F6].
Then, use F3/F4 to enable/disable the offset.
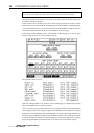
INTEGRATING ADAT™ MACHINES
The optional IB-24ADT ADAT board adds a further 16 ADAT inputs and outputs to the stan-
dard 8 inputs/outputs giving a total of 24 ADAT inputs and outputs.
The option board also features an ADAT SYNC connector allowing you to integrate ADAT
machines into your DPS24 studio setup.
The ADATs can be used simply for transferring 'legacy' material from your ADAT(s) to the
DPS24 or for transferring projects created on the DPS24 to ADAT machines.
With the ADAT board installed, simply connect your ADAT machines to the optical connections.
ADAT #1 (i.e. the one you regard as being tracks 1-8) should be connected to the internal ADAT
connection and ADATs #2 and #3 (i.e. tracks 9-24) should be connected to the ADAT connectors
on the option board as appropriate.
You should connect the ADAT Sync connector to the machines _ this will allow (amongst
other things) the DPS24 to control the ADATs' transport.
The SYNC OUT of the DPS24 should be connected to SYNC IN on ADAT#1 and the SYNC
OUT of ADAT#1 should be connected to the SYNC IN of ADAT#2 and, if ther e's a third
ADAT, the SYNC OUT of ADAT#2 should be connected to the SYNC IN of ADAT#3.
You will note that the DPS24 is always a 'master' in this setup - it cannot be a slave and so
only carries a SYNC OUT connector.
v1.6 Operator’s Manual