Chapter 4: Management with WebPAM PRO
129
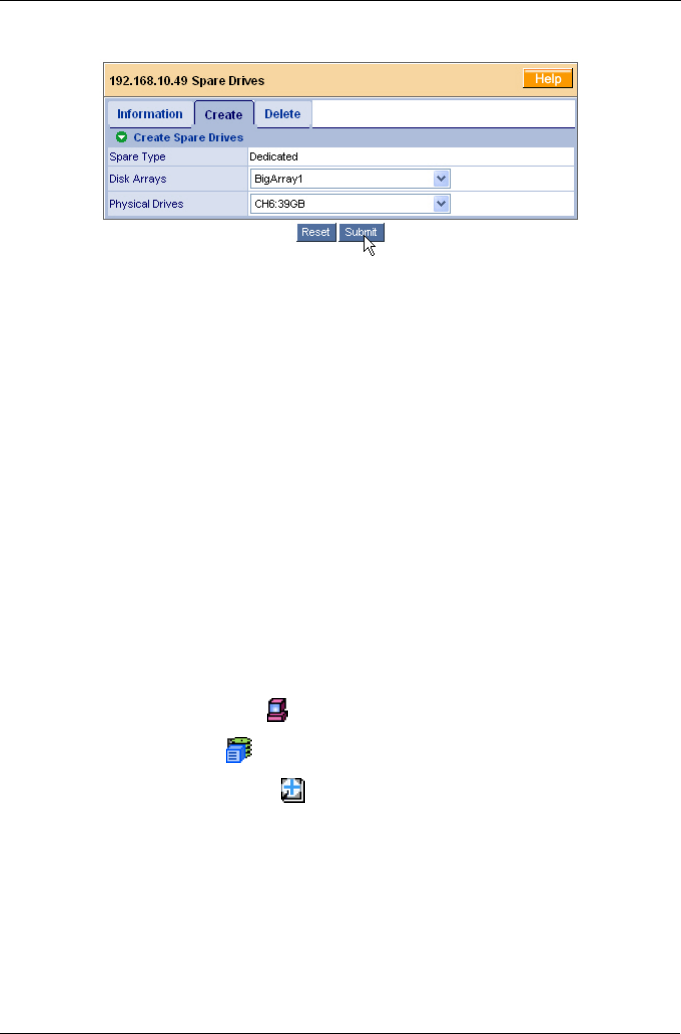
The Create Spare Drives page displays.
5. From the first dropdown menu, select the disk array to which the spare drive
will be assigned.
6. From the second dropdown menu, select an unassigned physical drive as
the spare drive.
Be sure the spare drive is of equal or greater capacity than the largest
physical drive in the disk array.
7. Click the Submit button when you are done.
The new dedicated hot spare drive appears in the list and in the Tree.
If you did not sucessfully create a spare drive, verify that the selected physical
drive was lof equal or greater capacity than the largest physical drive in the disk
array.
Delete a Spare Drive
To delete an existing spare drive is to remove the physical drive from service as a
dedicated hot spare. This action is required if you want to use this physical drive
in a disk array, for example.
1. Click on the Subsystem icon in Tree View.
2. Click on the VTrak icon.
3. Click on the Spare Drives icon.
4. Click on the Delete tab.
The spare drive list displays.
5. Check the delete box beside the physical drive you want to remove from
service as a hot spare.
6. Click the Submit button when you are done.


