


115
Editing a Sample
1.
Press [SAMPLE EDIT <-> LIST] to access the SAMPLE LIST
screen, and select the sample(s) that you want to include in
your new multisample.
If you want to select two or more samples, press [F2 (MARK)] to
add a check mark (
✔
) to the samples that you want to select.
To remove the check mark from a selected sample, select and
press [F2 (MARK)] again.
If the total number of marks exceeds 128, the multisample will
be created from the 128 lowest-numbered samples.
You cannot create a multisample using samples from more than
one group.
* You can press [F6 (PREVIEW)] to audition the selected sample.
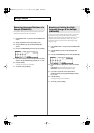
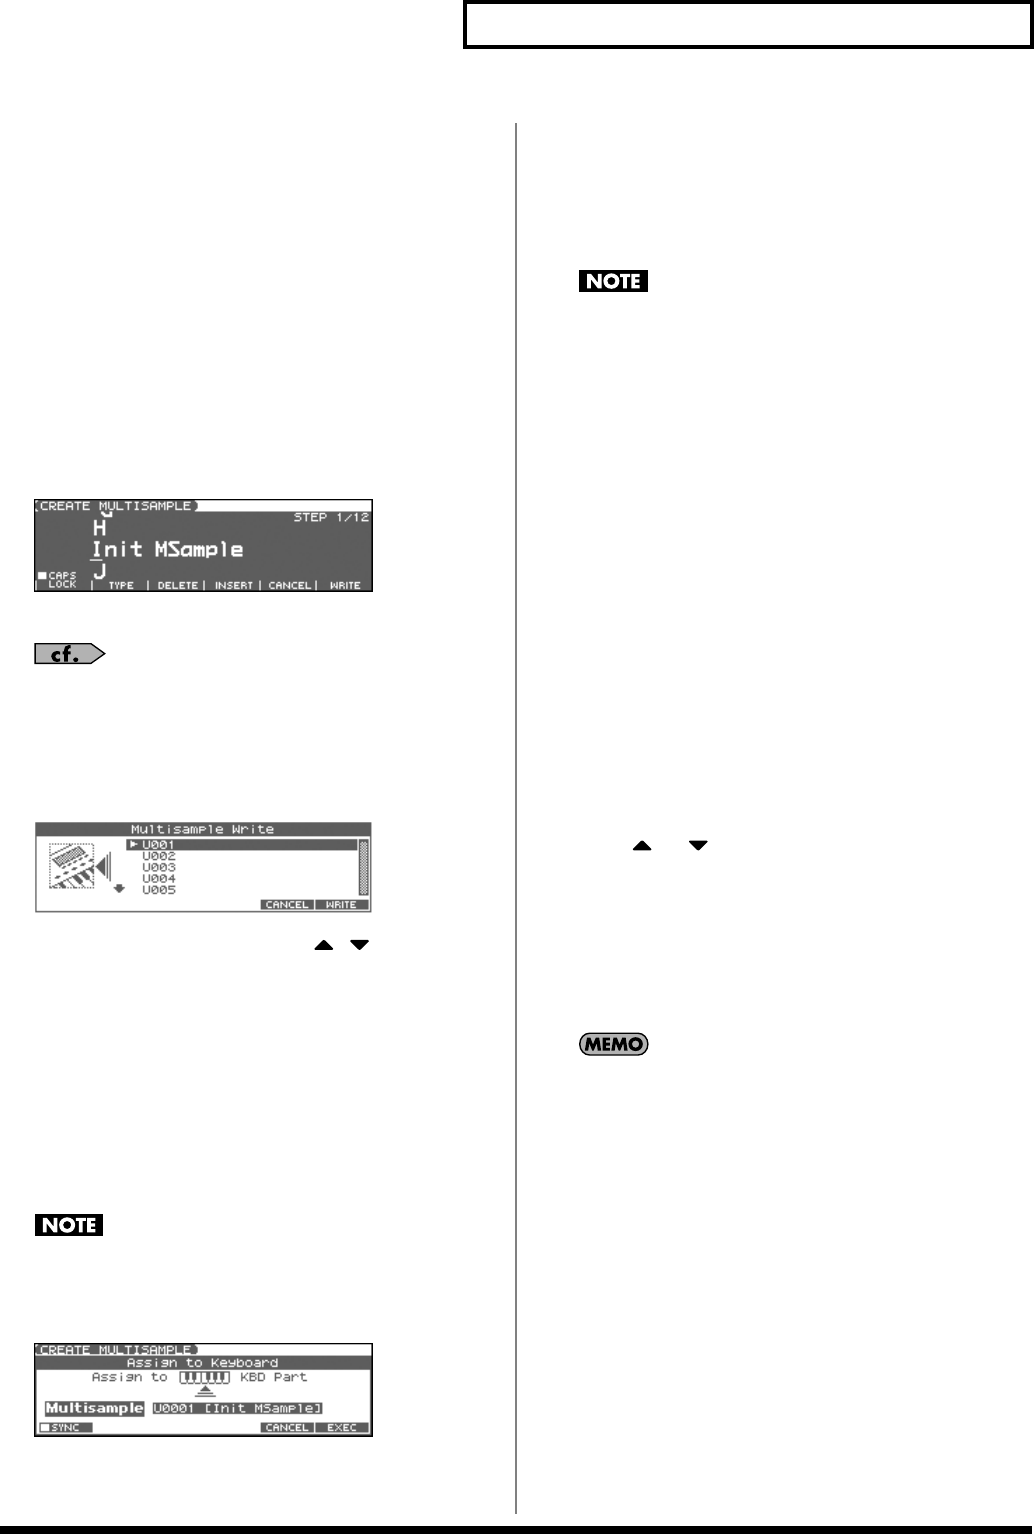
2.
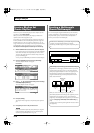
Press [F4 (ASSIGN)], and then press [F2 (MLT SMP)].
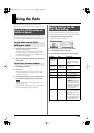
The CREATE MULTISAMPLE screen will appear.
fig.CreateMltSmp
3.
Assign a name.
For details on assigning names, refer to p. 28
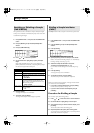
4.
When you have finished inputting the name, press [F6
(WRITE)].
A screen will appear, allowing you to select the destination for
the write.
fig.MltSmpWrite
5.
Use the VALUE dial, [INC] [DEC], or to select the
write destination.
Multisamples consisting of user samples will be written to User,
and multisamples consisting of card samples will be written to
Card.
6.
Press [F6 (WRITE)].
A message will ask you to confirm the operation.
7.
If you are sure you want to write the multisample, press [F6
(EXEC)].
* To cancel, press [F5 (CANCEL)].
Never switch off the Fantom-Xa while data is being saved.
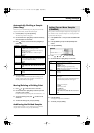
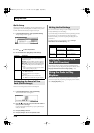
8.
When the data has been written, the Assign to Keyboard
window will appear.
fig.AsgnToKbd1
* If you press [F1 (SYNC)] to add a check mark (
✔
), the Wave Tempo
Sync parameter (p. 43) will be turned ON for the patch that is
assigned.
9.
If you want to use the multisample as a patch, press [F6
(EXEC)].
A message will ask you for confirmation.
10.
Press [F6 (EXEC)].
* To cancel, press [F5 (CANCEL)].
Never turn off the power while data is being written.
* You can’t listen to a multisample unless it’s assigned to a part as a
patch. If you press [F5 (CANCEL)] at this point, the multisample will
be saved, but you’ll need to perform the additional step of assigning
the saved multisample to the keyboard in order to actually play it (p.
113).
Assigning a multisample to the
desired keys
In order to assign a multisample to the desired keys, you’ll need to
set the Original Key of each sample to the appropriate keys. Then,
when you execute the Create Multisample operation, the Fantom-Xa
will assign the samples to the keyboard and set the split points
automatically.
1.
Press [SAMPLE EDIT <-> LIST] to access the SAMPLE LIST
screen, and select one of the samples within the
multisample.
2.
Press the [SAMPLE EDIT <-> LIST] button to access the
SAMPLE EDIT screen.
3.
Press or to move the cursor to “Org Key.”
4.
Use the VALUE dial or [INC] [DEC] to set the Org Key to the
note number of the key to which you want to assign the
sample.
5.
Press the [SAMPLE EDIT <-> LIST] button to return to the
SAMPLE LIST screen, and set the Org Key for the other
samples in the same way.
When creating a multisample, you’ll need to change the
Original Key of more than one sample. After you’ve made the
setting for the first sample, you can simply press [SAMPLE
LIST] to access the Sample List screen, select another sample
and press [ENTER] to go directly to the Sample Param screen.
* The Original Key you specify here needs to be saved for each sample.
6.
When you’ve finished setting the Original Key of all
samples, create the multisample.
Fantom-Xa_e.book 115 ページ 2004年10月22日 金曜日 午後2時3分