Input signal patching
101
AW2400 Owner’s Manual
Patching and signal flow
11
The indication in the screen will be as
follows.
4
Move the cursor to the symbol for the
recording-destination track, and press the
[ENTER] key.
The selected input channel and track will be internally
connected.
At this time, the connected [INPUT SEL] key (or the
input channel’s [SEL] key) and the track channel’s
[SEL] key will change to blinking red.
The blinking track channel [SEL] key indicates that
the corresponding track is in record-ready mode.
For example if input channel 1 and track 1 are con-
nected, the top panel keys will be as follows.
The indication in the screen will be as
follows.
5
If you want to record multiple instruments
or mics simultaneously, assign other input
channels to other tracks in the same way.
6
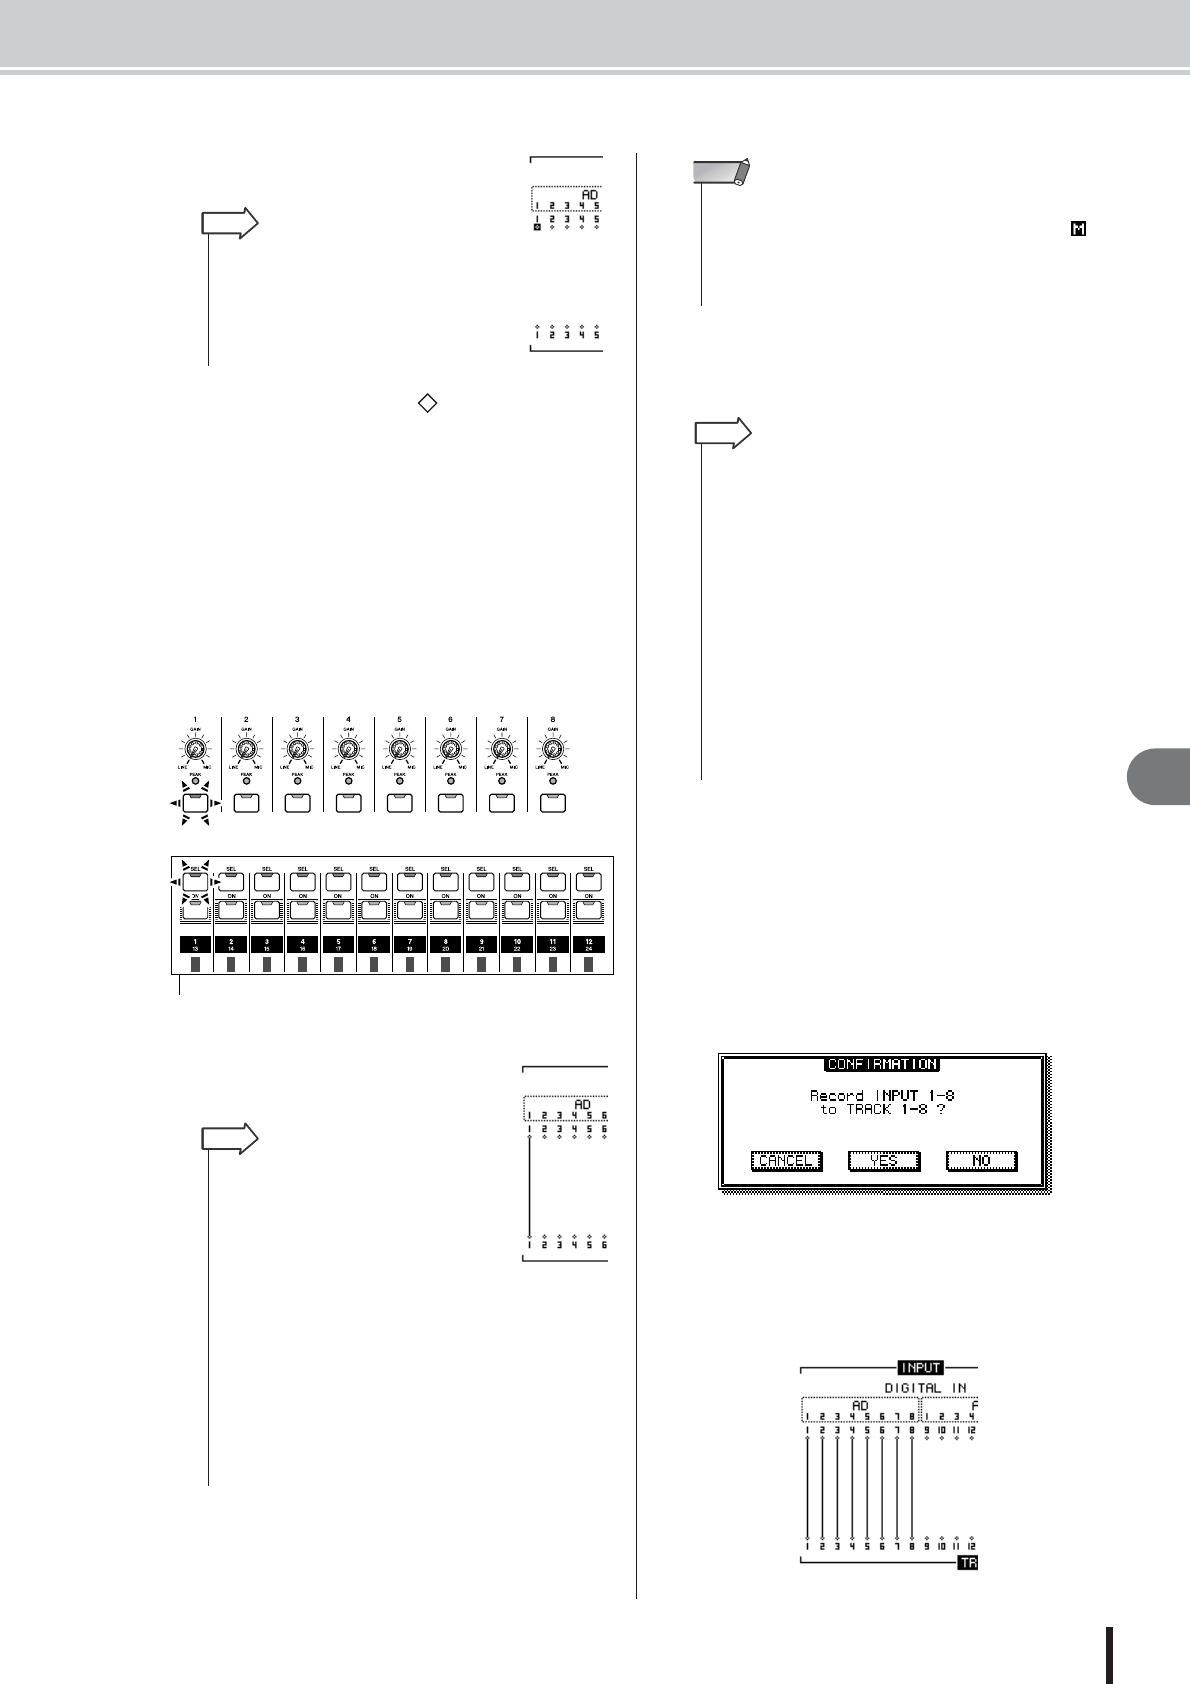
If you want to connect a set of eight input
channels and eight tracks in a single opera-
tion, turn the MULTI CONNECTION ON/OFF
button on.
For example if the MULTI CONNECTION ON/OFF
button is on, and you select any one of input channels
1–8 as a recording-source and any one of tracks 1–8 as
a recording-destination, the following popup window
will appear.
Move the cursor to the YES button and press the
[ENTER] key to execute the connection; input chan-
nels 1–8 will be connected to tracks 1–8. Move the
cursor to the NO button and press the [ENTER] key to
connect the selected input channel and track.
•You can also select the record-source input
channel by pressing an [INPUT SEL] key
(or the [SEL] key of an input channel).
• The [INPUT SEL] keys always control input
channels 1–8, regardless of the settings of
the Layer section
HINT
Tr ack channels
(Layer section [TRACK 1-12] key lit)
flash
•You can also select the record-destina-
tion track by pressing a track channel’s
[SEL] key.
• The same internal connection will be
established even if you perform steps 3
and 4 in the reverse order.
• The fader will automatically be set to 0
dB for input channels that are internally
connected to a track.
• If an input channel is selected as a recording-source, its
assignment to the stereo bus will automatically be turned off.
If you want to monitor the signal you’re recording, you’ll need
to raise the fader of the recording-destination track channel.
• EQ and dynamics settings will be set to a flat state for track
channels corresponding to tracks selected as recording-desti-
nations.
HINT
• Input channels and tracks are always connected one-to-one.
• The track numbers of muted tracks will be displayed as
(mute), but you can still record to muted tracks.
• Since 24-bit songs can have a maximum of 12 play tracks (
→
p. 165), tracks 13–24 are muted and will not play back.
NOTE
•To cancel a connection you established, simply repeat the
same operation you did when establishing the connection.
•To change a recording-destination (track) that you’ve already
connected, move the cursor to the recording-source and
press the [ENTER] key; then move the cursor to a different
track and press the [ENTER] key.
•To change a recording-source (input channel) that you’ve
already connected, move the cursor to the recording-destina-
tion and press the [ENTER] key; then move the cursor to a
different input channel and press the [ENTER] key.
•To cancel all connections, move the cursor to the SAFE but-
ton and press the [ENTER] key.
• If a recording-source input channel and the recording-destina-
tion track are both paired, two adjacent odd-numbered/even-
numbered channels will be assigned to two adjacent odd-
numbered/even-numbered tracks.
HINT


