


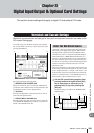


WAV File Transfer (USB Storage Mode)
231
AW2400 Owner’s Manual
USB
24
3
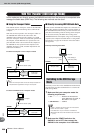
Turn on the AW2400.
No driver installation is necessary for WAV file trans-
fer. If it is the first time you have connected a USB
cable on a Windows machine, however, you may see a
message prompting you to install a USB MIDI driver.
Even if you will not send and receive MIDI messages
via the USB cable, install the USB MIDI driver as
described on page 266.
4
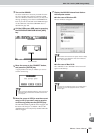
Call the USB screen USB page by pressing
the SCENE/AUTOMIX/USB section [USB]
key.
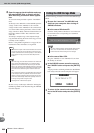
5
Move the cursor to the CONNECT button,
and press the [ENTER] key.
A popup window will ask you whether you want to
save the current song.
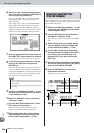
6
Move the cursor to YES (to save the current
song) or NO (if you don’t want to save the
current song) and press the [ENTER] key.
The AW2400 USB Storage Mode will be engaged, and
the button will change to “CANCEL”. Most of the
AW2400 functions are temporarily disabled while this
mode is engaged.
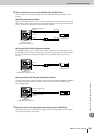
7
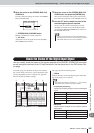
Display the AW2400 internal hard disk on
the computer screen.
● In the case of Windows XP:
The two windows will appear.
● In the case of Mac OS X:
The “AW2400-1” and “AW2400-2” drive icons will
appear on the desktop.
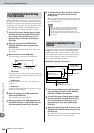
CONNECT button
• Before turning the USB Storage Mode on, make sure that no
MIDI data is being transferred via the USB connection with
your computer.
NOTE
• If the windows shown above do not appear, choose to display
the “AW2400-1” and “AW2400-2” drives from the Windows
Start
→
My Computer menu.
NOTE
• If the icons are not displayed properly, use the Disk Utility to
temporarily un-mount the appropriate volume, and then
mount it again.
NOTE