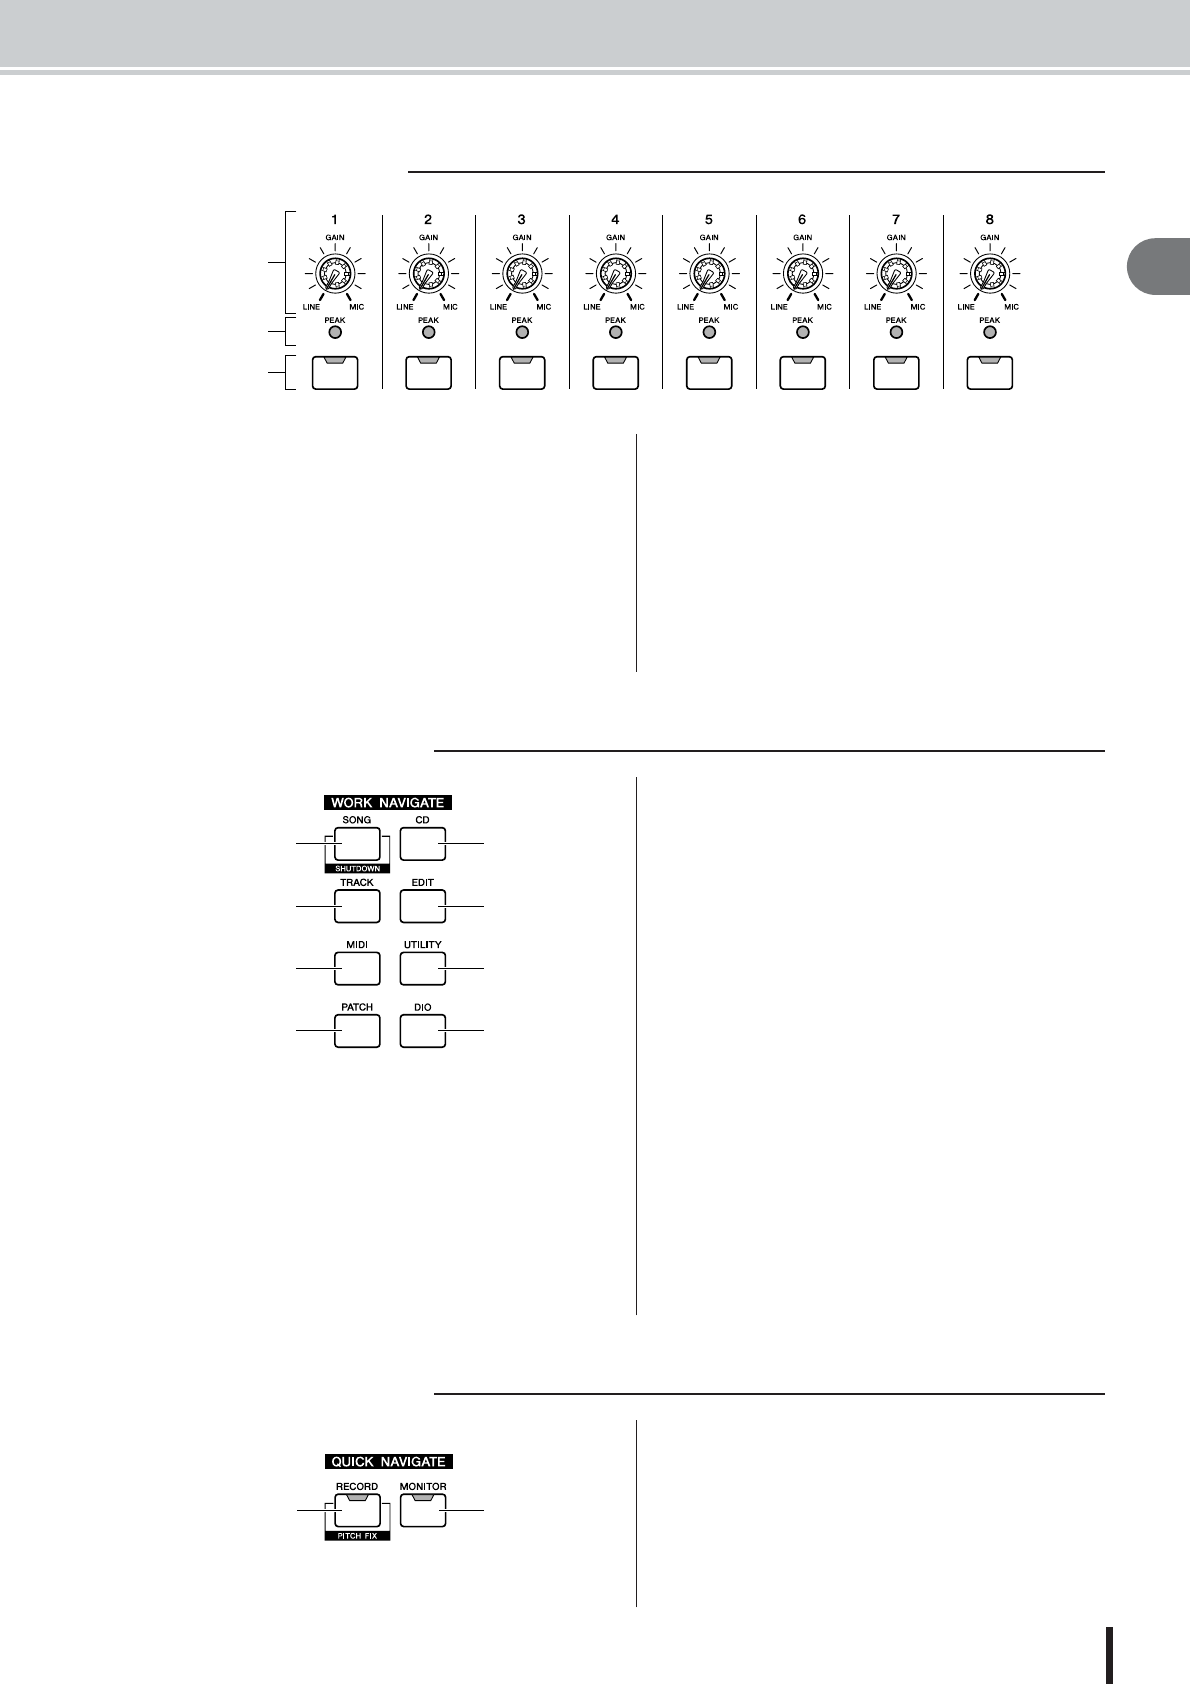
Parts of the AW2400 and what they do
21
AW2400 Owner’s Manual
Introducing the AW2400
2
1 [GAIN] knobs 1–8
These adjust the sensitivity of the rear panel MIC/LINE
INPUT jacks 1–8 to input signals.
B [PEAK] Indicators
These indicators will light red if the peak signal level after
the [GAIN] knob reaches or exceeds 3-dB below clipping.
To set the optimum record level, set the [GAIN] knob so
that the indicator flashes only briefly on the highest peaks
that will be encountered during the recording.
C [INPUT SEL] keys 1–8
These keys select the mixer input channel that you will
operate.
1 [SONG] key
This key accesses the SONG screen, where you can save
or load songs, and perform the shut-down procedure.
B [CD] key
This key accesses the CD screen, where you can write or
play an audio CD, and backup or restore data.
C [TRACK] key
This key accesses the TRACK screen, where you can
check whether each track contains data, and switch the
virtual tracks that will be used for recording and playback.
D [EDIT] key
This key accesses the EDIT screen, where you can copy or
erase tracks.
E [MIDI] key
Accesses the MIDI screen where you can set up MIDI
synchronization, scene change, and other settings.
F [UTILITY] key
Press this key to access the UTILITY screen with settings
for the unit’s test tone oscillator, digital inputs and out-
puts, and other utility parameters.
G [PATCH] key
Accesses the PATCH screen where you can patch output
signals as required.
H [DIO] key
The [DIO] key accesses the DIO screen which includes
the clock source and I/O card settings.
1 [RECORD] key
This key accesses the RECORD screen, where you can
quickly assign the signal to be recorded to the input of
each track, and make settings for recording.
B [MONITOR] key
The MONITOR screen, accessed by this key, includes set-
tings for fader grouping, the solo function, and more.
■ Analog Input section
1
C
2
■ Work Navigate section
2
4
6
1
3
5
H
G
■ Quick Navigate section
2
1


