


Importing audio data/WAV files
145
AW2400 Owner’s Manual
Track operations and editing
15
9
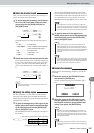
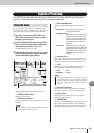
Move the cursor to the track list (file list),
and use the [DATA/JOG] dial or the [INC]/
[DEC] keys to select the track or WAV file
that you want to import.
If you’re using IMPORT CD WAV, and the is
located at the line enclosed by the dotted line, you can
press the [ENTER] key to move to the next lower
level.
To move to the next higher level, move the cursor to
the and press the [ENTER] key.
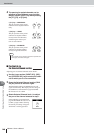
10
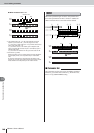
If you’re using IMPORT CD AUDIO, use
From Start/From End to specify the region
that will be imported.
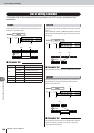
11
Use the To TR, To V.TR, and To Start fields to
specify the track number, virtual track num-
ber, and starting location into which the
data will be imported.
12
When you have finished making settings,
move the cursor to the EXECUTE button
and press the [ENTER] key.
A popup window will ask you to confirm the opera-
tion.
13
To execute the import operation, move the
cursor to the OK button and press the
[ENTER] key.
Importing will begin. If you move the cursor to the
CANCEL button and press the [ENTER] key, import-
ing will be cancelled.
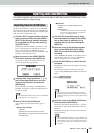
Here’s how you can import audio data from another song
saved on the AW2400’s hard disk.
1
Call the EDIT screen Edit page by either
pressing the Work Navigate section [EDIT]
key as many times as necessary, or by
pressing the [F1] key after pressing the
[EDIT] key.
2
Move the cursor to the edit command field,
and use the [DATA/JOG] dial or the [INC]/
[DEC] keys to select IMPORT TRACK.
3
Press the [ENTER] key to conform your
choice of edit command.
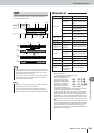
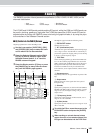
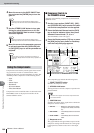
The screen will change as follows.
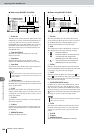
1 Song List
This area lists the songs that are saved on the
AW2400’s internal hard disk. In this list, select the
song that contains the track you want to import.
B Song name
C Song size
D Song Bit Depth/Sampling Frequency
E Song Protect Status
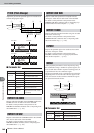
F SORT
Move the cursor to this box, and use the [DATA/JOG]
dial or the [INC]/[DEC] keys to choose the order in
which you want the songs in the list to appear.
• NAME...........Song names in alphabetical order.
• SIZE .............Song size, from largest to smallest.
• OLD..............The order in which the songs were
saved, from newest to oldest.
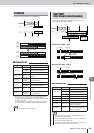
G From TR/From V.TR
Here you can select the desired track number (1–24,
ST) and virtual track number (1–8) of the import-
source song.
• In the case of a Mixed Mode CD, the edit command you use
will depend on the data you’re importing. Use IMPORT CD
AUDIO to import audio data (CD-DA), or use IMPORT CD
WAV to import a WAV file.
•You cannot import a WAV file whose bit depth or sample rate
differs from the current song.
• When the import source is an audio CD or CD Extra disc and
the song is 24-bit, the audio data will be automatically con-
verted to 24-bit format during the import operation.
• When you move the cursor to the LISTEN button and press
the [ENTER] key, there will be a slight time lag while the data
is read from the CD before you hear it.
NOTE
• If the import-destination contains data, it will be overwritten.
Be careful not to overwrite important data by accident.
NOTE
Importing audio data from
another song
H I
G
A
B C D E F