


112
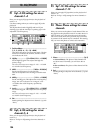
Adjust the volume levels.
The faders that adjust the recording level will differ
depending on whether you are recording an external
input or performing bounce recording.
• When recording an external input (when “Input” is
selected for the [RECORD] “RecMode” tab page
item “Select RecMode”), the channel faders will
adjust the recording level.
• When using bounce recording (when “Bounce” is
selected for “SelectRec Mode” in the [RECORD]
“RecMode” tab page), the master fader will adjust
the recording level.
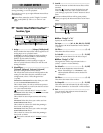
[CHANNEL] faders ..........................[1…6, 7–8…11–12]
These adjust the volume level of each channel.
• For a channel whose [TRACK STATUS] is PLAY, the
fader adjusts the playback volume.
• For a channel whose [TRACK STATUS] is REC, the
fader adjusts the recording level of the external input
or the rhythm.
• For a channel whose [TRACK STATUS] is INPUT,
the fader adjusts the recording level of the external
input.
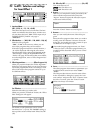
[MASTER] fader .............................................. [MASTER]
This adjusts the volume level of the master LR bus.
The signal from the [MASTER OUT L/R] jacks and [S/
P DIF OUT] jacks will be output at the specified vol-
ume.
• When recording an external input (when “Input” is
selected for the [RECORD] “RecMode” tab page
item “Select RecMode”), this fader adjusts the vol-
ume level of the master bus.
• When bounce-recording (when “Bounce” is
selected for “SelectRecMode” of the [RECORD]
“RecMode” tab page), this fader adjusts the record-
ing level on the track for which the [TRACK STA-
TUS] is set to REC.
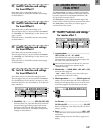
These keys are used to operate the recorder for opera-
tions such as recording and playback.
1. [FF] key
When stopped or playing, this key moves the time
backward (rewind).
If you hold down the [STOP] key and press the [FF]
key, you will move to the end of the current song. If
you are already at the end of the song, you will
move to the beginning of the next song.
When the Scrub function is on, you can press this
key to perform Slow Play (→p.101).
2. [REW] key
When stopped or playing, this key moves the time
forward (fast-forward).
If you hold down the [STOP] key and press the
[REW] key, you will move to the beginning of the
current song (if you are in the middle of the current
song), or to the beginning of the previous song (if
you are already at the beginning of the current
song).
3. [STOP] key
This key ends recording or playback, and stops the
recorder.
4. [PLAY] key
When you press this key, tracks whose [TRACK
STATUS] is PLAY will play back.
For tracks whose [TRACK STATUS] is REC, press-
ing the [REC] key and then pressing this key will
begin recording.
While the recorder is recording or playing, the LED
will light.
When the Scrub function is on, you can press this
key to use Play From, or hold down the [STOP] key
and press this key to use Play To. (→p.101)
5. [REC] key
When you press this key, the D12 will enter record-
ready mode (the LED will blink). In order to enter
record-ready mode, [TRACK STATUS] must be set
to REC for at least one track. When you press the
[PLAY] key, the LED will light and recording will
begin.
If the foot switch function (→p.75) has been set to
“PunchInOut,” the foot switch will act as a substi-
tute for the [REC] key.
6. [RHSL (REHEARSAL)] key
This key lets you rehearse a recording.
When you press this key, the Rehearsal function
will be turned on (the LED will light), and you will
be able to rehearse the recording (recording will not
actually occur). When you turn rehearsal on and
start recording, the monitor output will behave in
the same way as when actually recording, allowing
you to practice recording.
It is convenient to use this to rehearse before using
auto punch-in/out recording.
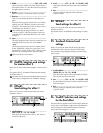
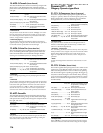
25. FADER
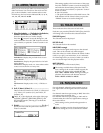
26. TRANSPORT KEYS
1234
65