


61
Step 12. Rhythm/tempo settings
The D12 contains numerous rhythm patterns for a vari-
ety of time signatures (→p.142 “Rhythm Pattern List”).
When you have a sudden idea for a song, you can
record your performance immediately, using the built-
in rhythms as a guide.
By joining various rhythm patterns, you can also create
drum patterns for an entire song.
1. Specifying and playing a rhythm
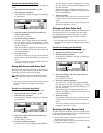
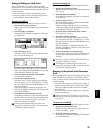
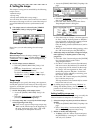
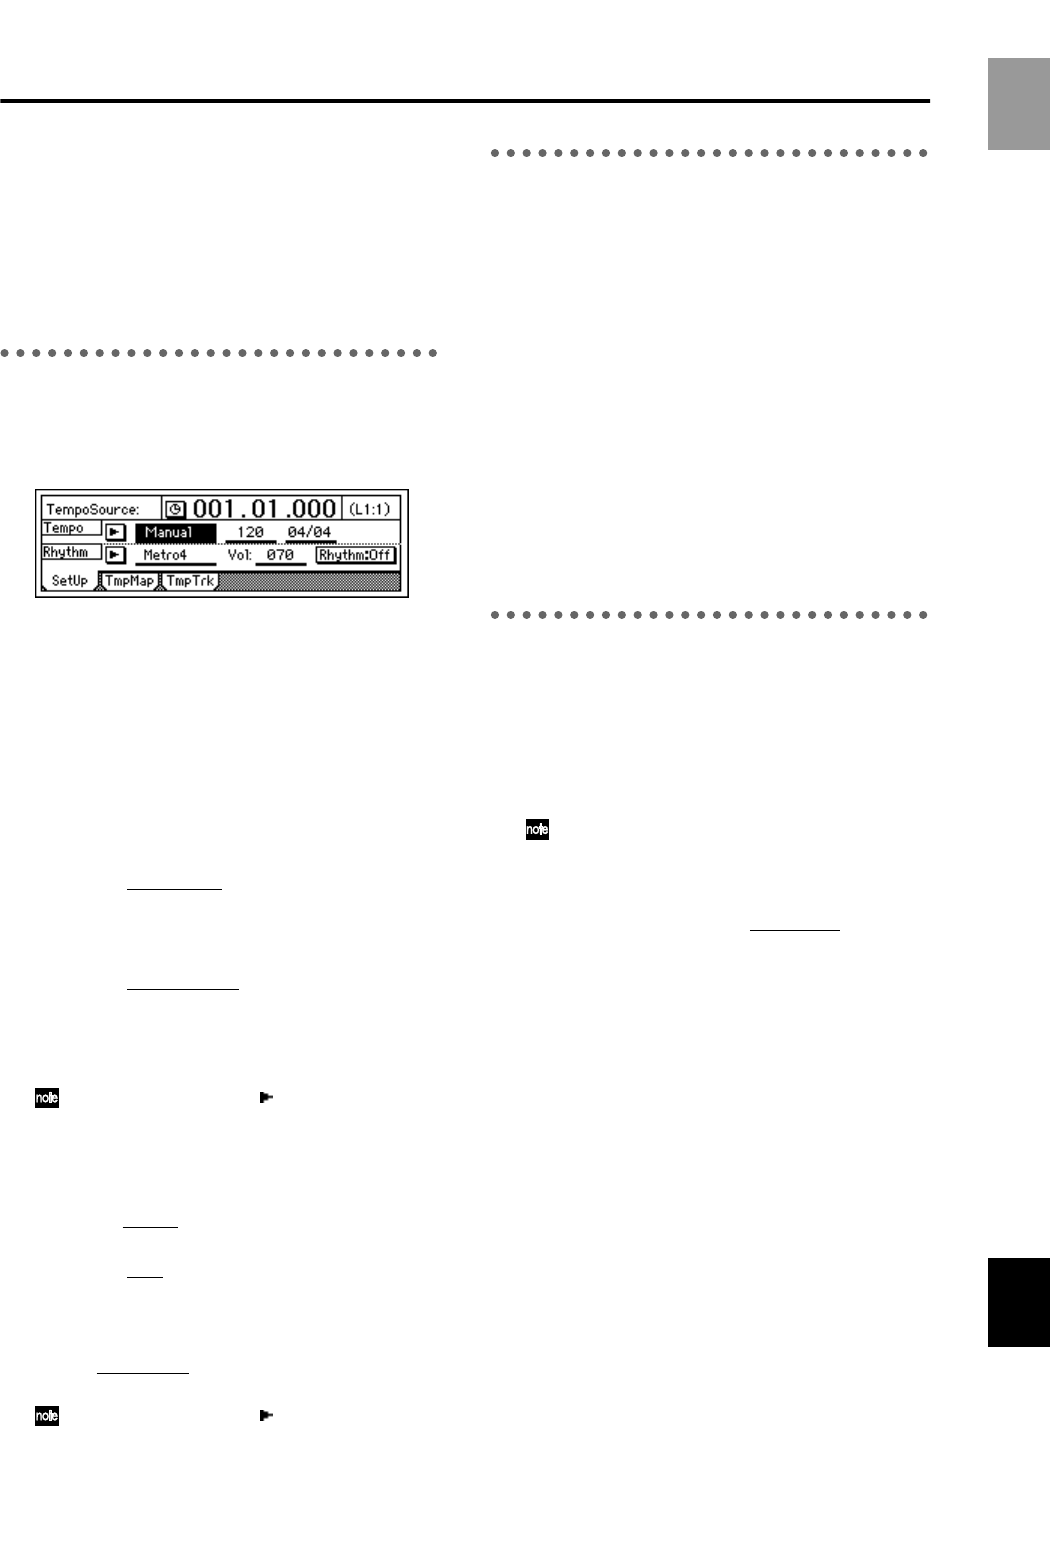
● Access the [TEMPO/RHYTHM] “SetUp” tab
page.
The settings described below are made in this page.
Turning the rhythm on/off
● Select the “Rhythm” button and press the
[ENTER] key to turn it “On” (highlighted).
The [TEMPO/RHYTHM] button will light, and the
rhythm will sound during playback or recording.
If you do not want to hear the rhythm during play-
back or recording, turn the “Rhythm” button
“Off.”
Adjusting the rhythm volume
● Select the “RhythmVol (Vol),” and rotate the
[VALUE] dial to adjust the volume.
Setting the tempo and time signature
1 Select the “TempoSource,” and select the tempo
source.
For this example, we will select “Manual” which
will use a single tempo, time signature, and rhythm
pattern.
You can also select the “ ” button, press the
[ENTER] key, and select from a list.
If you wish to change the tempo, time signature,
and rhythm pattern during the song, you must cre-
ate a Tempo Map. (→p.62)
2 Select the“T
empo,” and rotate the [VALUE] dial
to adjust the tempo.
3 Select the “Beat
,” and rotate the [VALUE] dial to
set the time signature.
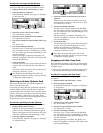
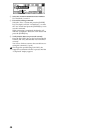
Selecting the rhythm pattern
● Select “SelRhythm,” and rotate the [VALUE] dial
to select the rhythm pattern that you wish to use.
You can also select the “ ” button, press the
[ENTER] key, and select from a list.
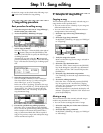
2. Recording your performance
while you listen to the rhythm
You can record your performance while listening to the
built-in rhythm as a guide.
1 Make settings as described in “1. Specifying and
playing a rhythm.”
• Turn “Rhythm” “On.”
• Make other settings as necessary.
2 Connect your input device, and begin recording.
Refer to “1. Analog inputs” and “1. Adjust the
recording level, and record” (→p.23, 27).
When you press the [REC] key to enter record-
ready mode, the rhythm will begin sounding.
Recording will begin when you press the [PLAY]
key. You will hear the selected rhythm pattern.
Begin performing, using the rhythm as a guide.
3. Recording the rhythm
Built-in rhythm patterns can be recorded on a track.
As an example, here’s how the rhythm pattern can be
recorded on mixer channels 1 and 2.
1 Make settings as described in “1. Specifying and
playing a rhythm.”
• Turn “Rhythm” “Off.”
If this is turned on, the sound will be output in
duplicate to the track and also to the master LR
bus.)
• To set the volume, use the mixer channel that
you are inputting. Since “RhythmV
ol (Vol)”
adjusts the send volume to the master LR bus,
you do not need to set it.
• Make other settings as necessary.
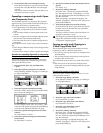
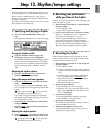
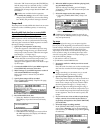
2 Specify the input channels.
• Select the [INPUT] “Ch1–6” tab page.
• Select the “Ch1” icon, and rotate the [VALUE]
dial to select “Rhythm L.” In the same way, set
“Ch2” to “Rhythm R.”
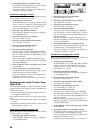
3 Check the record mode.
• Select the [RECORD] “RecMode” tab page.
• Select “Input” (= record the input).
4 Specify the recording tracks.
Press [TRACK STATUS] keys for tracks 1 and 2 to
set them to REC (LED lit red).
5 Adjust the recording level, and record.
Use the [CHANNEL] faders of tracks 1 and 2 to
adjust the level appropriately.
Basic operation
Rhythm/tempo settings