


49
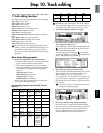
Step 9. Mixdown
You can use mixer settings such as EQ, faders, and
effects to adjust the audio from each recorded track,
and combine the result into two tracks to create your
own CD or record it on an external two-channel
recorder (DAT recorder, MD recorder, cassette recorder
etc.) to create a finished song. This process is called
mixdown.
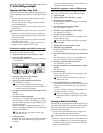
1. Creating an audio CD
Here’s how you can use a CD-R/RW drive to create an
original CD from a song you recorded on the D12.
In order to create an audio CD, you will need the
same amount of free space on your hard disk as
occupied by the song you created (i.e., the total of
the two tracks). For example if you wish to create
an audio CD of a five-minute song, you will need
sufficient free space for ten minutes of monaural
recording.
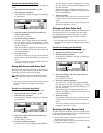
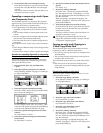
1 Listen to the completed song.
Use the faders and knobs to adjust the volume and
pan of each track, and listen to the playback.
If you wish to enable the scenes you registered,
set the [SCENE] “ReadDel” tab page “Sce-
neRead” parameter “On.”
2 Bounce your song to two tracks.
As described in “5. Combining multiple tracks into
two: Bounce” (→p.29), bounce the tracks of the
song to tracks 1 and 2.
If a song without a region of silence at the
beginning (at time zero) is written to CD, the
beginning of the sound may be omitted when
the CD is played back. In such cases, insert
approximately 0.5 seconds of silence into the
beginning of the audio data (time zero) when
you mix down to tracks 1/2. (→p.52, 82
“InsertTrack”)
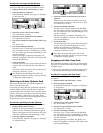
3 Insert a disc into the internal CD-R/RW drive.
If you are using an external drive, refer to “3. Con-
necting external drives” (→p.67).
Set the external CD-R/RW drive to SCSI ID 6.
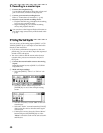
4 Access the [SONG] “CDR/RW” tab page.
Make sure that “CD-R/RW Information” indicates
either “BlankDisc” or “song number.”
5 Execute the write operation.
• Select the “WriteToCD” button and press the
[ENTER] key.
• Select the writing speed.
4X: Write at quadruple speed.
2X: Write at double speed.
If you use “4X” to write, you must use a drive
that supports 4X speed writing.
• A message of “Obey Copyright Rules” will
appear.
Carefully read the owner’s manual section “About
copyright” (→p.1). If you accept the terms, select
the “Yes” button for the “AreYouSure?” prompt,
and press the [ENTER] key.
Writing to the CD will begin.
While the data is being written, you can select
the “Abort” button and press the [ENTER] key
to halt the write operation. However, this will
result in an unfinished disc.
6 Complete the process.
When the data has been written, the display will
indicate “Completed.” Select the “OK” button and
press the [ENTER] key.
7 Verify the data that was written.
Select the button and press the
[ENTER] key to play back and check that the data
was written correctly.
In the case of a disc that has not yet been final-
ized, part of the very end of the song may not
be played.
Depending on the drive, it may not be possible
to play back the CD.
8 If you wish to write an additional song, repeat
steps 2 and 4–7. The song will be written fol-
lowing the last song on the CD-R/RW.
9 Finalize the disc.
If you wish to play back the newly created CD-R/
RW on an audio CD player, stop the D12, select the
“Final” button, and press the [ENTER] key to final-
ize the disc.
No more songs can be added to a disc that has
been finalized. This means that you should
execute the Finalize operation after you have
finished writing all the songs to that disc.
0 Play back the CD on your audio CD player to ver-
ify the disc.
In some cases, CD-R/RW media may not play back
on an audio CD player even if the recommended
media is used.
Since some audio CD players may not be able
to play back CD-RW media, we recommend
that you use CD-R media.
Basic operation
Mixdown