


Introduction–Parts and what they do
5
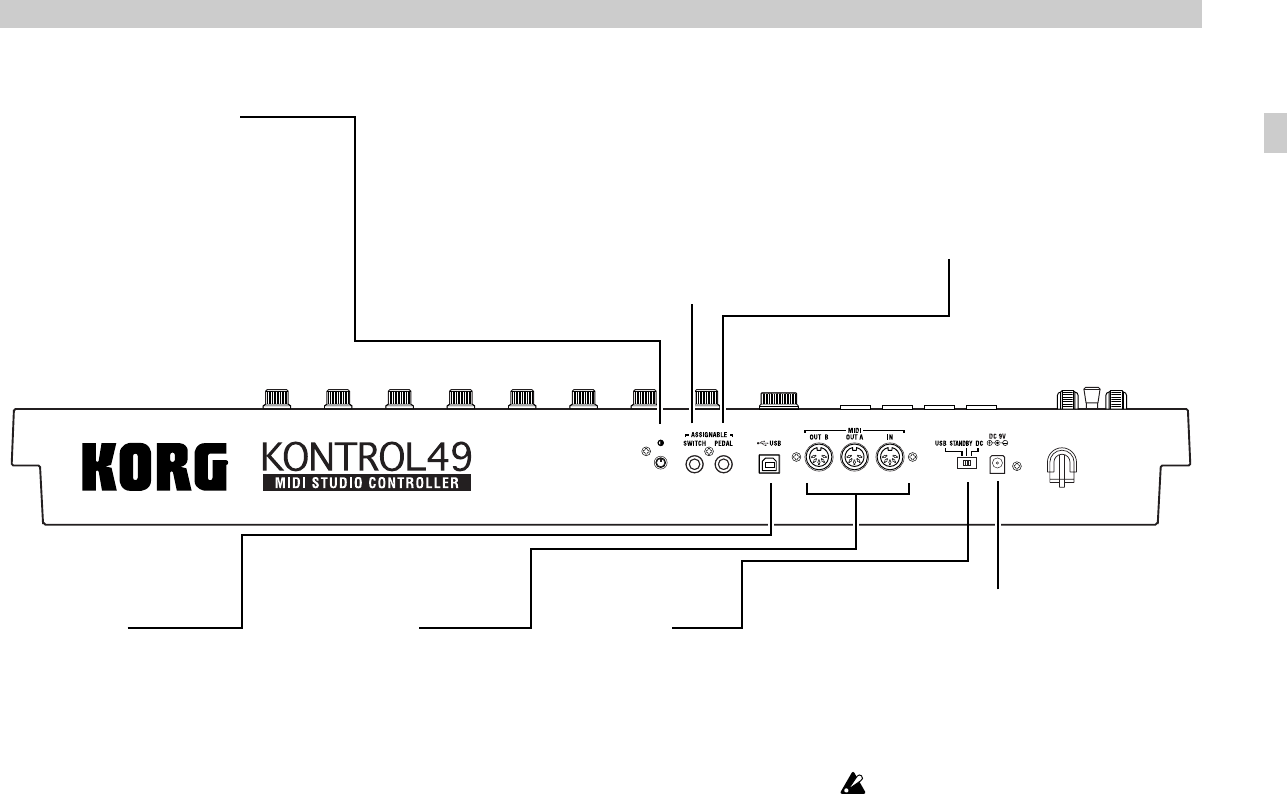
Rear panel
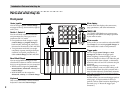
[Contrast adjustment] knob
This adjusts the display contrast. The visibility
of the display will vary depending on your
viewing angle. Adjust this knob as necessary.
SWITCH jack
You can connect a damper pedal or pedal switch
(such as the Korg DS-1H or PS-1 - both sold
separately)to this jack.
You can assign the foot switch to control
damper, sostenuto, soft pedal, portamento, or
another control change. You can also choose
how the value of the MIDI message will be
transmitted when the pedal is pressed.
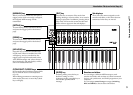
USB connector
Use a USB cable to connect the
KONTROL49 to your computer
for MIDI message transmission
and reception.
Power switch
This switch powers-on the
KONTROL49. Set the switch to
the appropriate position for the
type of power connection you
are using. (☞p.6 “Making
connections and turning the
power on”)
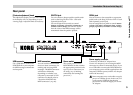
MIDI connectors
You can connect external MIDI
devices to these connectors, for
sending and receiving MIDI
messages. The MIDI connectors
will function differently
depending on whether your
computer is connected to USB
connector. For details, refer to
“About the KONTROL49’s
MIDI connectors” (☞p.46).
Power supply connector
Connect the included AC adapter here.
Use the AC adapter if you are using the MIDI
connectors to control a connected device. If you
use a USB cable to connect the KONTROL49 to
your computer, power will be supplied from the
computer (USB bus power) and the AC adapter
will not be necessary.
Some computers may not be able to supply
power via USB bus power. In this case, use
a self-powered USB hub (that obtains
power from an external supply) or use the
AC adapter.
PEDAL jack
You can connect a foot controller or expression
pedal (such as the Korg XVP-10 or EXP-2 - both
sold separately) to this jack.
You can assign the foot pedal to control master
volume, foot pedal, portamento time, volume,
panpot, expression, or another control change.
Parts and what the
y
do