


Operation–Setting mode
28
Assigning separate MIDI messages to the up/down
ranges
Here’s how to assign separate MIDI messages to the up and down ranges of
the Pitch Bend controller. You can assign aftertouch, velocity, or a control
change (CC#).
1
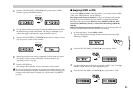
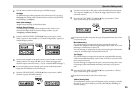
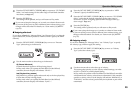
Hold down the [SETTING] key and press pad [5] to enter Pitch Bend
assignment, and choose UP/DOWN as the “Assignment Select”
setting.
2
Press the OCTAVE SHIFT/CURSOR [®] key to proceed to “UP/
DOWN Select” (select the range of movement for which you want to
make an assignment).
3
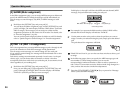
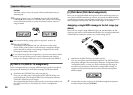
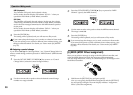
Use the main encoder to select whether you want to assign the up or
down range of movement.
UP
Make an assignment for the up range.
DOWN
Make an assignment for the down range.
4
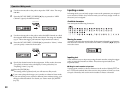
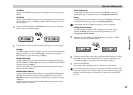
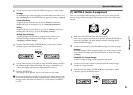
Press the OCTAVE SHIFT/CURSOR [®] key to proceed to “Message
Select” (select the MIDI message).
5
Use the main encoder to select the MIDI message you want to assign.
NoAssign
No MIDI message will be assigned to the range you are specifying. If
you choose NoAssign, continue by pressing the [ENTER] key to apply
the setting. (☞Step 8)
A.Touch (AfterTouch)
Assign keyboard aftertouch. If you choose A.Touch, continue by
selecting the type of aftertouch. (☞p.29 “Assigning aftertouch”)
Velocity
Assign keyboard or pad velocity. If you choose Velocity, continue by
selecting the velocity type. (☞p.29 “Assigning velocity”)
CtrlChg# (Control Change)
A control change message will be assigned to the switch. If you
selected CtrlChg#, select the control change number. (☞p.30
“Assigning a control change”)
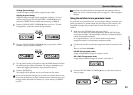
6
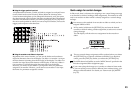
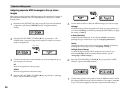
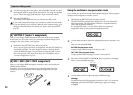
Press the OCTAVE SHIFT/CURSOR [®] key to proceed to “MIDI
Channel” (specify the MIDI channel).
7
Use the main encoder or the pads to select the MIDI channel on which
the assigned MIDI message will be transmitted. The range is 1–16 (ch).
(☞p.4 “About the trigger pad functions–Input numerical values”)
(Green)(Red)
(Green)(Green)
(Green)(Green)