


286
MOTIF Appendix
Installing Optional Hardware
Appendix
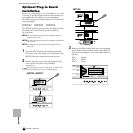
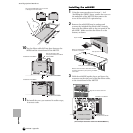
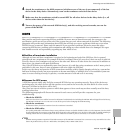
10 Let the ribbon cable fall into place between the
AIEB2 and the circuit board of the MOTIF.
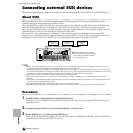
11Re-install the cover you removed in earlier steps,
in reverse order.
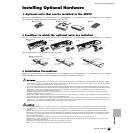
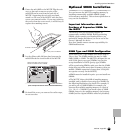
Installing the mLAN8E
1 Using the same procedure as in steps 1 - 4 of
“Installing the AIEB2” above, remove the cover on
the underside of the MOTIF, then remove the
cover of the mLAN/I/O expansion bay.
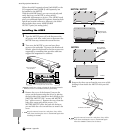
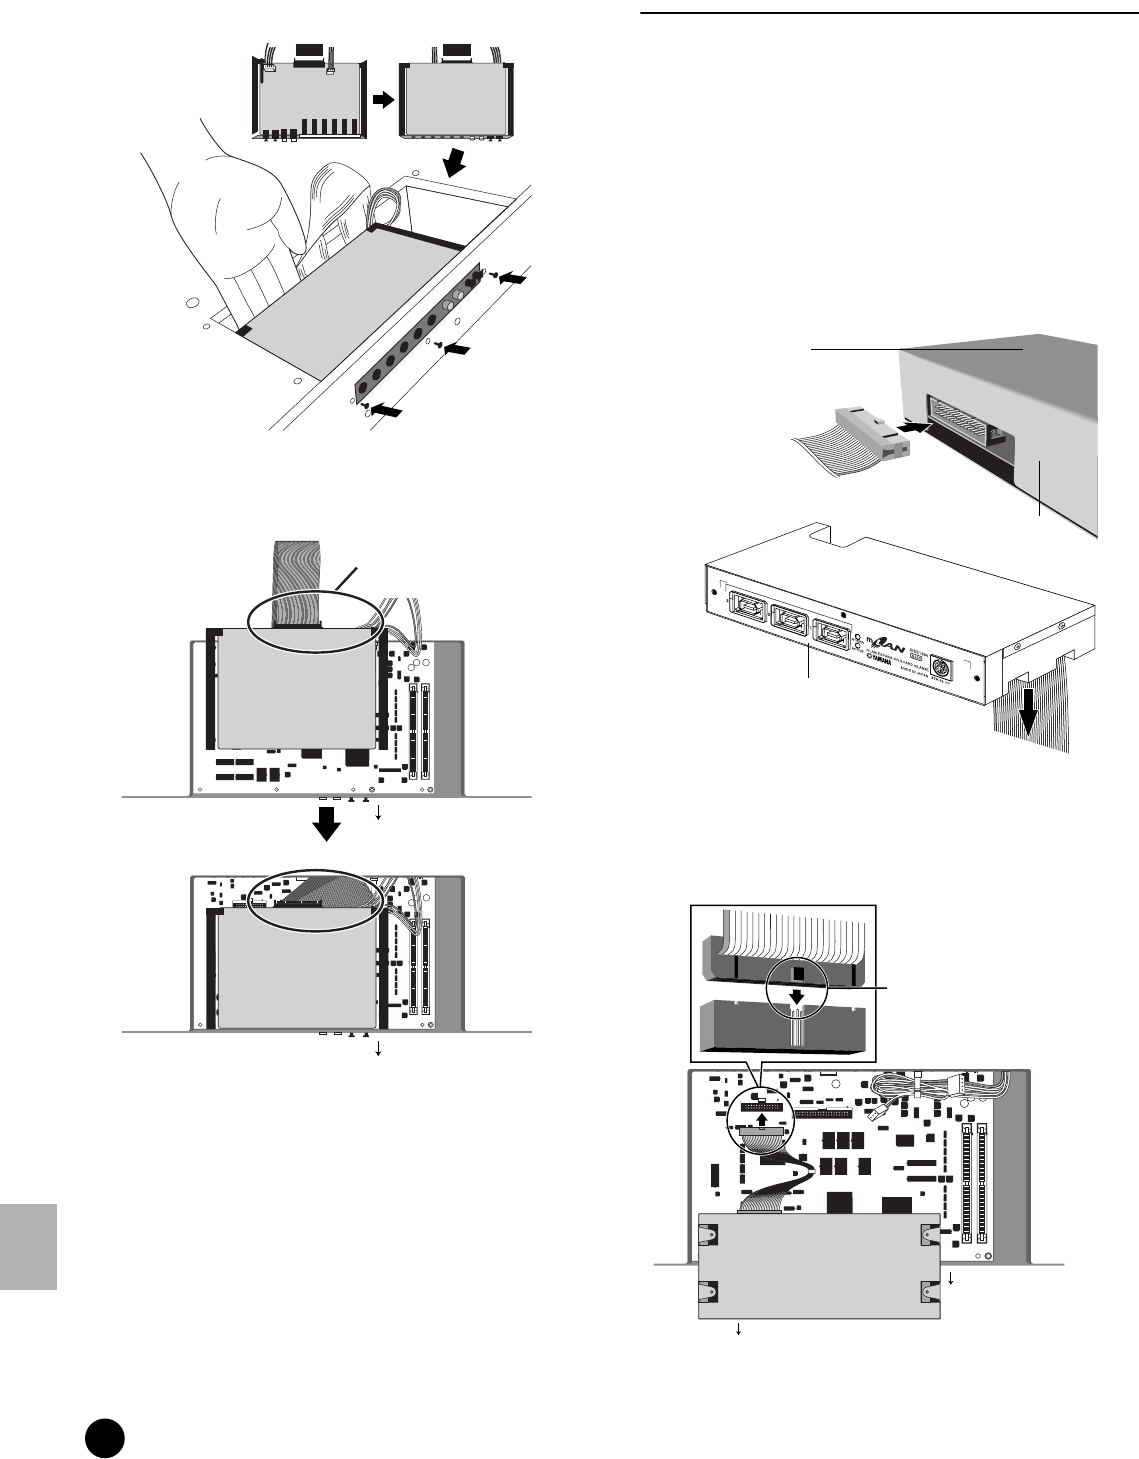
2 Remove the mLAN8E from its package and
connect the included flat ribbon cable. Securely
fasten the flat ribbon cable to the rear panel of the
mLAN8E. Make sure that the ribbon is at the
bottom, as shown.
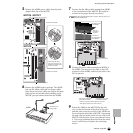
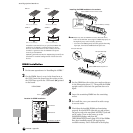
3 Hold the mLAN8E upside down, and insert the
connector on the other end of the flat ribbon cable,
to the circuit board of the MOTIF.
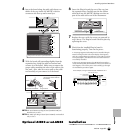
Flip over the AIEB2 taking care not to bend
or damage the flat ribbon cable.
AIEB2
CN5
m-LAN
Underside of the MOTIF
Underside of the MOTIF
CN5
m-LAN
AIEB2
Slide the flat ribbon cable
in the space between the MOTIF
and the AIEB2.
AIEB2
Rear panel of the MOTIF
Rear panel of the MOTIF
Make sure that flat ribbon cable is
at bottom of connector.
Rear panel of mLAN8E
Make sure the flat ribbon cable sticks out from
the bottom and that the panel printing "mLAN8E"
can be seen.
Front panel of mLAN8E
Top of mLAN8E
CN5
m-LAN
Underside of the MOTIF
Rear panel of the MOTIF
Front panel of mLAN8E
Align the connectors as shown.
Underside of mLAN8E
(This example illustration shows the MOTIF6/MOTIF7.)