


89
MOTIF Quick Start Guide
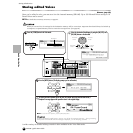
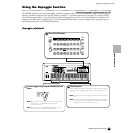
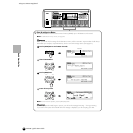
Editing Performances (Layer/Split)
Quick Start Guide
Editing Performances (Layer/Split)
Basic Structure (page 45) · Reference (page 170)
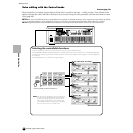
Performances can be made up of a maximum of four parts (voices), selected from the internal tone generator Parts 1 - 4
and Plug-in board Parts 1 - 3.
You can create a performance by layering several voices together, and by assigning different voices to separate ranges
of the keyboard. You can then store up to 128 of your original, edited performances to internal User memory.
PLG 2
A
B
C
D
E
F
G
H
15
CATEGORY
SEARCH
OCTAVE
DOWN
UP
KNOB
CONTROL
FUNCTION
PAN
REVERB
CHORUS
TEMPO
ATTACK RELEASECUTOFF
RESONANCE
ASSIGN A ASSIGN B ASSIGN 1ASSIGN 2
KN 1 KN 2 KN 3 KN 4
MEQ LOW
MEQ HI MIDMEQLOWMID MEQ HIGH
REMOTE
CONTROL
ON/OFF
EFFECT BYPASS
ARPEGGIO
INSERTION
SYSTEM
ON/OFF
MASTER
VOLUME
VOLUME 1VOLUME 2VOLUME 3VOLUME 4
CS 1 CS 2 CS 3 CS 4
ZONE 1 ZONE 2 ZONE 3 ZONE 4
SEQTRANSPORT
LOCATE
1
2
REC
MODE
VOICE PERFORMMASTER
SEQUENCER
SONG
PATTERN
FILE
INTEGRATED
SAMPLING
MIXING
UTILITY
EDIT
JOB
STORE
COMPARE
SCENE STORE
SET LOCATE
SONG SCENE
SF 1SF 2SF 3SF 4SF 5
F1 F2 F3 F4 F6F5
INFORMATION
DEC/NO INC/ YES
EXIT
ENTER
EXECUTE
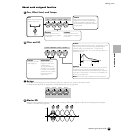
MUSIC
PRODUCTION
SYNTHESIZER
Integrated
Sampling
Sequencer
Real-timeExternal Control
Surface
Modular
Synthesis Plug-in
System
DRUM KITS
FAVORITES
SLOT 1 SLOT 2 SLOT 3
PRE 1
PRE 2
PRE 3
GM
USER PLG 1
PLG 3
A. PIANO
KEYBOARD
ORGAN
GUITAR/
PLUCKED
BASS
STRINGS
BRASS
REED/PIPE
SYN LEADSYN PAD/
CHOIR
SYN COMPCHROMATIC
PERCUSSION
DRUM/
PERCUSSION
SE
MUSICAL FX COMBI
1
2
3
4
5
6
7
8
9
10
11
12
13
14
16
SECTION
TRACK
SELECT
MUTE
SOLO
BANK
GROUP
NUMBER
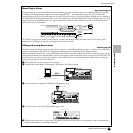
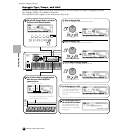
COMMON
ELEMENT/PERF.PART /ZONE
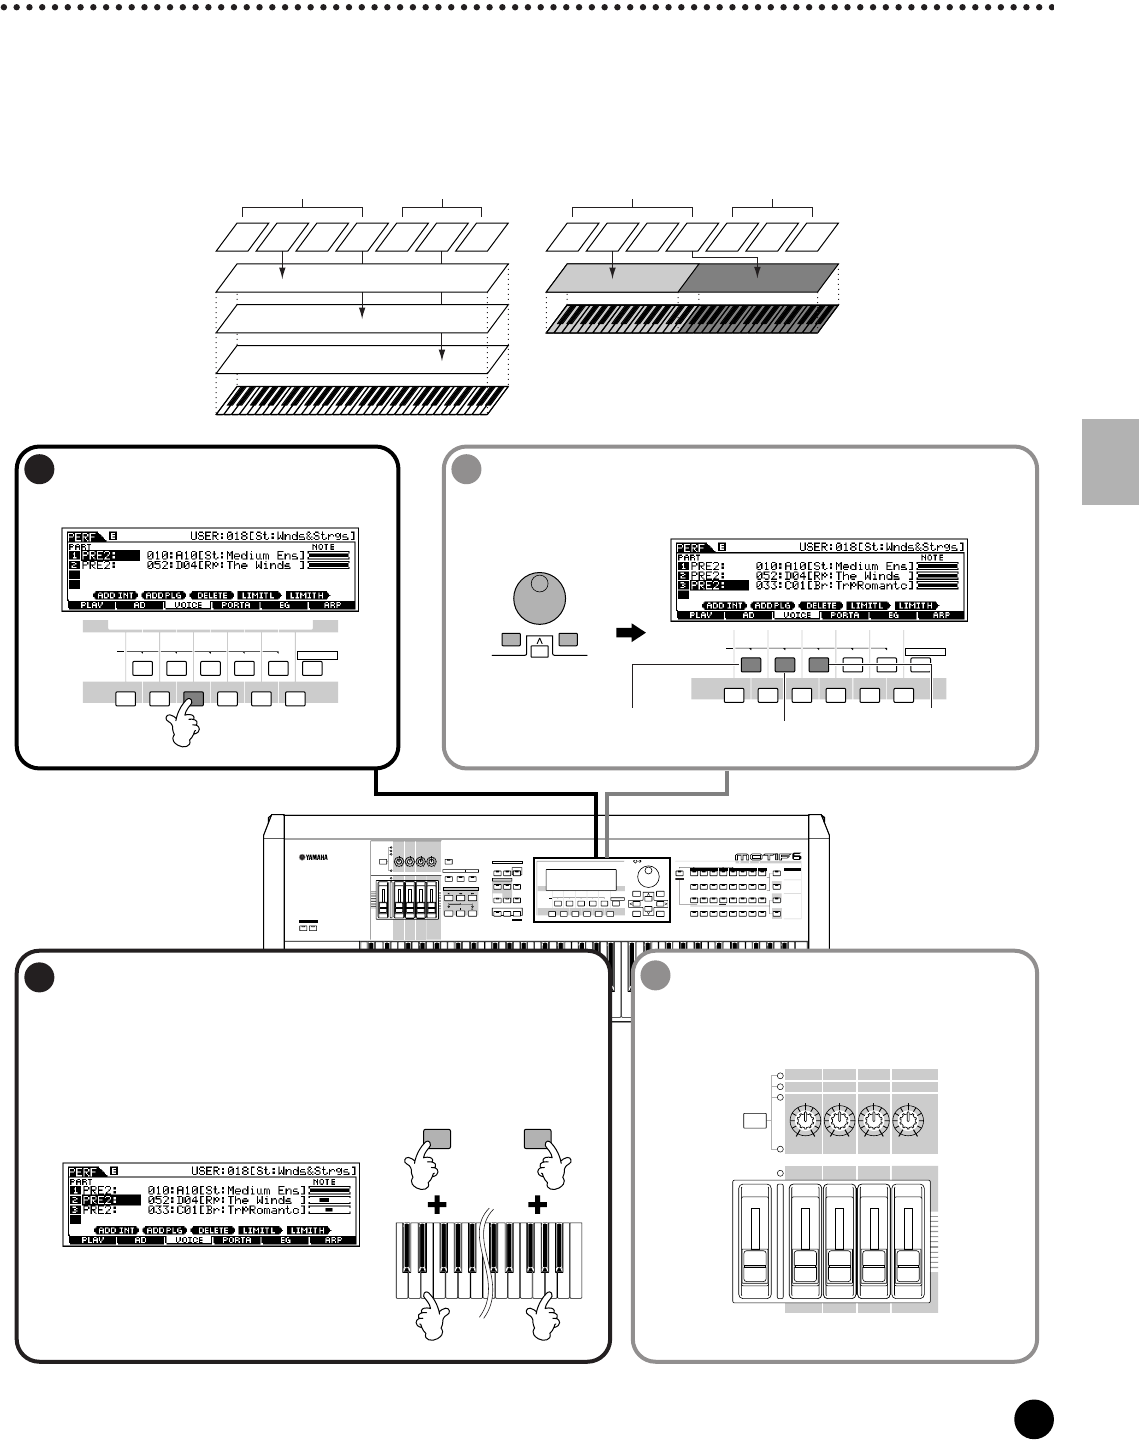
PRE1 PRE2 PRE3 USER PL1
Built-in tone generator parts Plug-in parts
PL2 PL3
Layer Split
PRE1 PRE2 PRE3 USER PL1
Built-in tone generator parts Plug-in parts
PL2 PL3
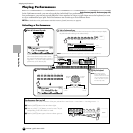
SONG SCENE
SF 1 SF 2 SF 3 SF 4 SF 5
F1 F2 F3 F4 F6F5
INFORMATION
SONG SCENE
SF 1 SF 2 SF 3 SF 4 SF 5
F1 F2 F3 F4 F6F5
INFORMATION
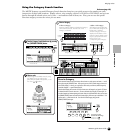
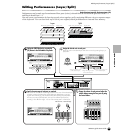
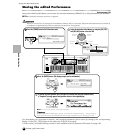
Assign the built-in voice
to the selected part.
Delete the voice assignment
of the selected part.
Assign the Plug-in voice
to the selected part.
DEC/NO INC/YES
1
Call up the VOICE display by pressing the
[F3] button in the Performance Play mode.
2
Assign the desired voice to each part.
Move the cursor to the desired part and select a voice by pressing the [F1] or
[F2] button.
3
4
Specify the note range of each part, as required.
You can set the lowest note of the range over which the voice of the selected part
sounds by pressing the desired key while holding the [SF4] button. To set the
highest note of the range, press the desired key while holding the [SF5] button.
This lets you create a split keyboard, with up to four different parts (voices)
sounding in four different ranges. You can also overlap parts to create layers.
Change the volume of each part and adjust the
relative balance among the four parts by using
the Control sliders.
MASTER
VOLUME
VOLUME 1 VOLUME 2 VOLUME 3 VOLUME 4
CS 1 CS 2 CS 3 CS 4
KNOB
CONTROL
FUNCTION
PAN
REVERB
CHORUS
TEMPO
ATTA CK RELEASECUTOFF
RESONANCE
ASSIGN A ASSIGN B ASSIGN 1 ASSIGN 2
KN 1 KN 2 KN 3 KN 4
MEQ LOW
MEQ HI MIDMEQLOWMID MEQ HIGH
Note Limit Low Note Limit High
SF 4 SF 5