Inserting an external device into a channel
M7CL Owner’s Manual
Input/output patching
9
111
D INSERT ON/OFF button
This button switches the insert on/off. If this button is
off, the insert-out/in signal path is bypassed.
E INSERT IN popup button
This indicates the input port that is selected as the
insert-in for this channel. Press this button to open a
popup window where you can select the input port.
4
Access either the one-channel or the eight-
channel INSERT/DIRECT OUT popup win-
dow, and press the INSERT OUT popup but-
ton.
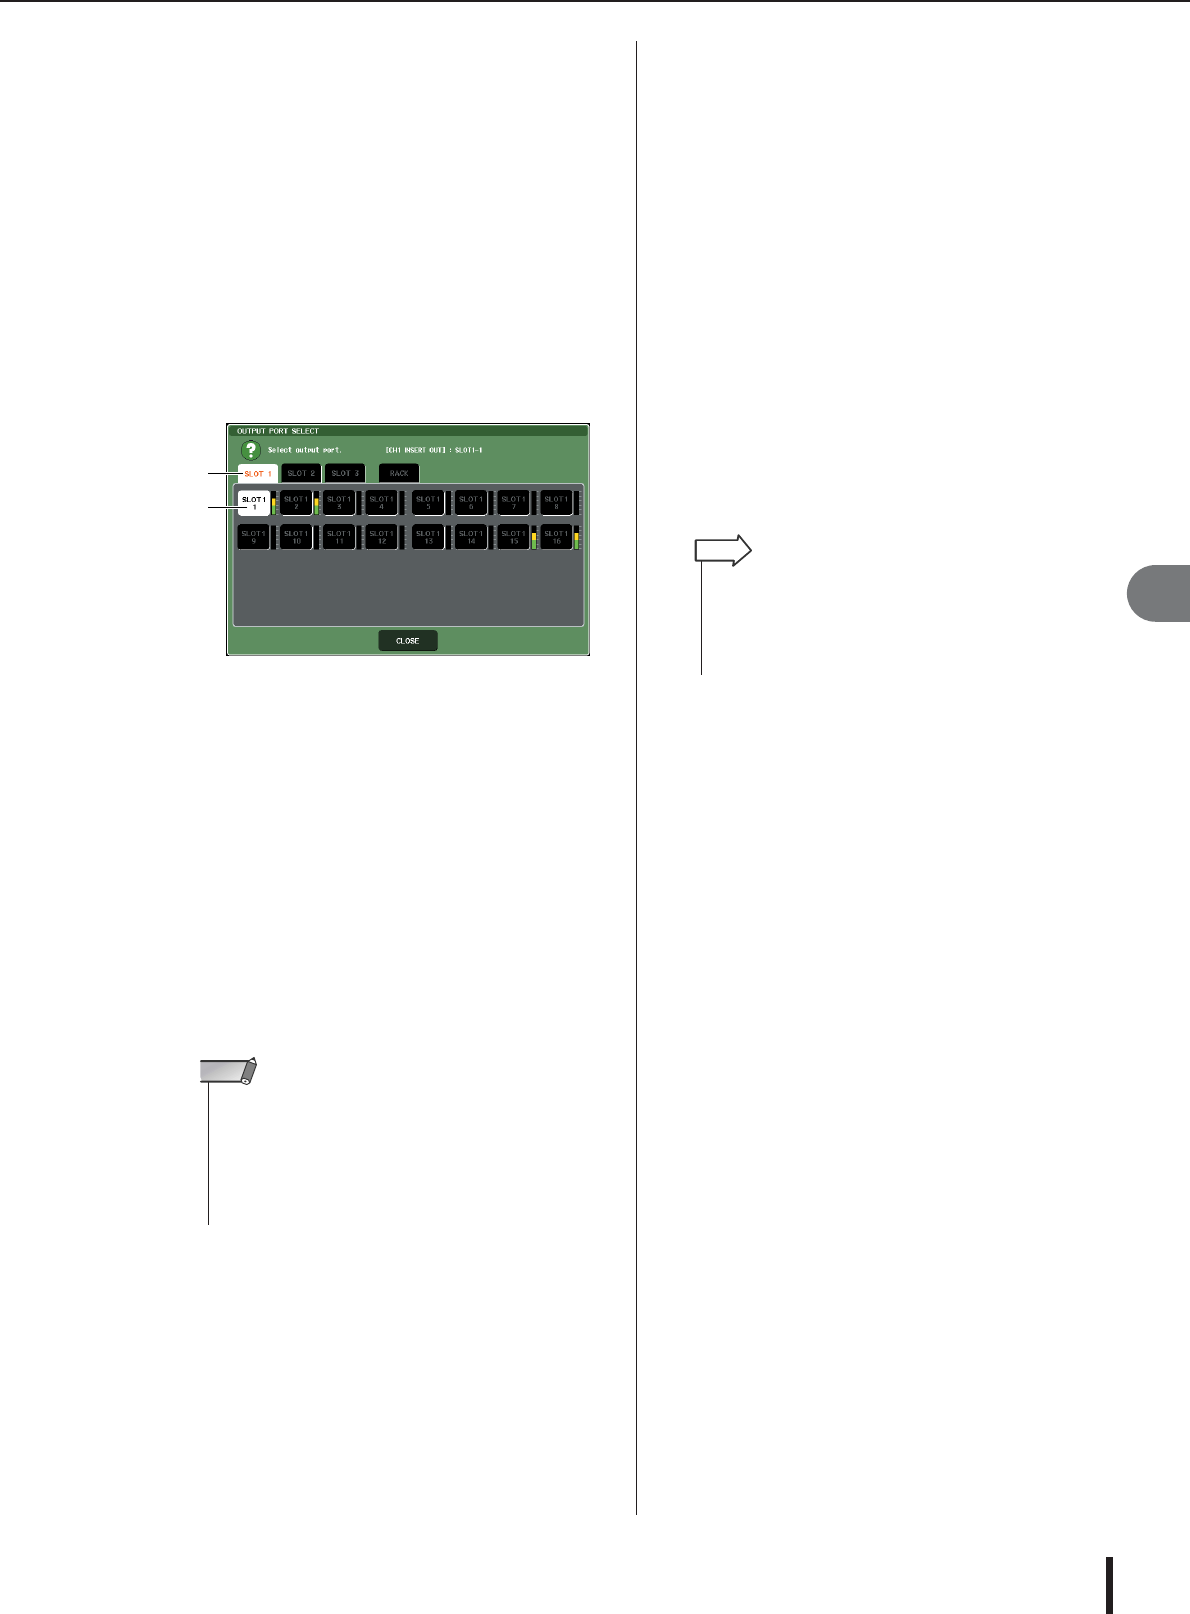
The OUTPUT PORT SELECT popup window will
appear, allowing you to select the output port used for
insert-out. The window includes the following items.
1 Output port select tabs
These tabs select the output ports shown in the win-
dow. Each tab corresponds to the following output
ports.
• OMNI (M7CL-48ES only)
...........OMNI OUT jacks 1–8 will be dis-
played.
• SLOT 1–SLOT 3
...........Output channels 1–16 from slots 1–
3 will be displayed.
•RACK ...........Input ports to rack 1–8 will be dis-
played.
B Output port select buttons
These buttons assign the output port that will be used
as insert-out for the currently selected channel.
5
Use the output port select tabs and the out-
put port select buttons to specify the out-
put port that will be used as insert-out, and
press the CLOSE button.
You will return to the INSERT/DIRECT OUT popup
window.
6
Press the INSERT IN popup button.
The INPUT PORT SELECT popup window will
appear, allowing you to select the input port used for
insert-in. Each tab corresponds to the following input
ports.
• OMNI (M7CL-48ES only)
........... OMNI IN jacks 1–8 will be displayed.
• SLOT 1–SLOT 3
........... Input channels 1–16 of slots 1–3 will
be displayed.
•RACK ........... Output ports to rack 1–8 will be dis-
played.
7
Specify the input port you will use for
insert-in, and press the CLOSE button.
8
Press the INSERT ON/OFF button to turn it
ON.
In this state, insert-out/in is enabled. Adjust the input/
output levels of your external device as necessary.
9
If you want to change the insert-out/in posi-
tion, access the one-channel INSERT/
DIRECT OUT popup button, and press one
of the three INSERT fields.
The INSERT field you pressed will be enabled.
10
When you have finished making all set-
tings, click the “×” symbol located in the
upper right to close the window.
You will return to the OVERVIEW screen.
11
As desired, make insert settings for other
channels as well.
1
2
• If a rack in which a GEQ is mounted is specified as the insert-
out or insert-in, the other patch point will automatically be
assigned to the same rack. Also, insert mode will automati-
cally be switched on. Additionally, if you defeat the insert-out
or insert-in of a rack in which a GEQ is mounted, the other
patch point will automatically be defeated and at the same
time insert mode will automatically be switched off.
NOTE
• If you have selected the OMNI IN jack on the M7CL-48ES as
the input port for insert-in, make the HA settings in the
INSERT IN HA field.
•Even if the INSERT ON/OFF button is OFF, the signal
selected for insert-out will continue to be sent.
HINT
