


Using the oscillator
Talkback / Oscillator
M7CL Owner’s Manual
14
165
4
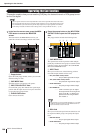
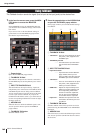
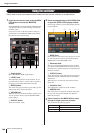
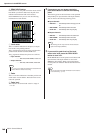
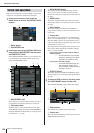
Use the knobs and buttons in the parameter
field to adjust the oscillator parameters.
The displayed parameters will differ depending on the
oscillator selected in the MODE field. The knobs
shown in the parameter field can be operated using the
corresponding multifunction encoders.
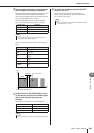
The following table shows the available oscillator
types and the parameters displayed for each type.
Details of each parameter are shown in the following
table.
5
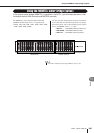
Press a button in the ASSIGN field to spec-
ify the bus(es) to which the oscillator signal
will be sent (multiple selections are
allowed).
These buttons correspond to the following buses.
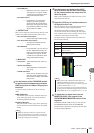
6
To enable the oscillator, press the OUTPUT
button to turn it on.
The oscillator signal will be sent to the bus you
selected in step 5. When you press the button again,
the oscillator will turn off.
Oscillator type
Parameters
SINE WAVE 1CH
LEVEL, FREQ
PINK NOISE
LEVEL, HPF, LPF
BURST NOISE
LEVEL, HPF, LPF, WIDTH, INTERVAL
Parameters
Details
LEVEL
Oscillator output level
FREQ
Frequency of the sine wave output from
the oscillator
HPF
High-pass filter (on/off switch, cutoff fre-
quency)
LPF
Low-pass filter (on/off switch, cutoff fre-
quency)
WIDTH
Length of noise
INTERVAL
Length of silence between intervals of
noise
MIX 1–16 buttons
MIX buses 1–16
MTRX 1–8 buttons
MATRIX buses 1–8
ST L, ST R buttons
STEREO bus L/R
MONO (C) button MONO bus
• The “LEVEL” parameter can also be adjusted using the
LEVEL knob in the MONITOR screen.
HINT
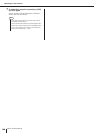
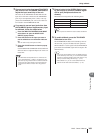
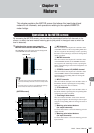
INTERVAL
WIDTH
Level
Time
Pink noise output
The BURST NOISE button is on
•You can press the CLEAR ALL button to defeat all selections.
HINT
•You can also assign oscillator on/off or an ASSIGN change to
a user-defined key (
→
p. 216).
HINT