


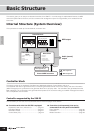

Using the Plug-in Boards
103
Quick GuideUsing the Plug-in Board
Owner’s Manual
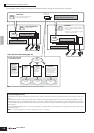
Using an Effect Plug-in Board
In the example explanation below, the PLG100-VH Vocal Harmony Plug-in Board is used to apply harmony effects to the
microphone sound in the Performance mode.
n For Multi, the Effect Plug-in Board related parameters can be edited in the Multi Play mode or Multi Edit mode.
n Please note that the Effect Plug-in Board cannot be used in the Voice mode.
See page 184 for details.
n A standard dynamic microphone is recommended. (The S90 ES
does not support phantom-powered condenser microphones.)
For details, refer to steps 4 - 9 on page 38.
For details, refer to the Owner’s Manual of the PLG100-VH.
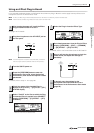
1
After turning the power off, install the Effect
Plug-in Board PLG100-VH to slot 1.
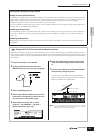
2
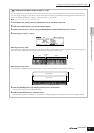
Plug the microphone to the A/D INPUT jack on
the rear panel.
3
Turn the S90 ES power on.
4
Press the [PERFORM] button to enter the
Performance Play mode, select the desired
Performance, then set the microphone related
parameters.
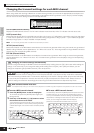
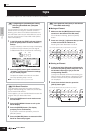
5
Check the status of the installed Plug-in
Boards in the [UTILITY] → [F6] PLUG → [SF1]
STATUS display.
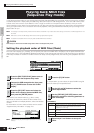
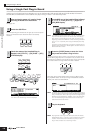
6
Select “PartAD” as the Part to which the Plug-
in Insertion Effect is applied in the CONNECT
display ([PERFORM] → [F3] EFFECT → [SF1]
CONNECT).
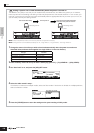
A/D INPUT
L
R
GAIN
Move the cursor here, then select the Part.
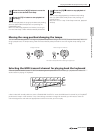
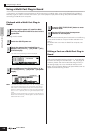
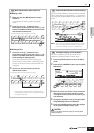
7
Select the Plug-in Insertion Effect Type.
8
Set related parameters from the Plug-in Effect
display ([PERFORM] → [EDIT] → [COMMON]
→ [F6] EFFECT → [SF3] PLG-EF).
9
Sing or talk into the microphone to check the
effect sound, and adjust the settings as
necessary.
10
If desired, store the settings for the
microphone sound and PLG100-VH as a
Performance in the Performance Store mode
(page 56).
Move the cursor here, then select the Part.
A/D INPUT
L
R
GAIN