


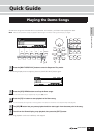

Performance Play mode
37
Owner’s Manual
Quick Guide Playing the S90 ES
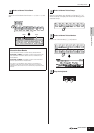
6-3 Select the Voice you’ve assigned to Part 2 as you
did in steps 2 - 4 in the section “Selecting a
Normal Voice” or “Selecting a Drum Voice” (page
30).
You can select the desired Bank and Number directly by
using the [DEC/NO], [INC/YES] buttons and data dial. You
can also use the Category Search function (page 32). Here,
we’ll assign a flute Voice (PRE3: C Flute) to Part 2.
n Voices of the Multi part Plug-in Board PLG100-XG cannot be
assigned to Performance Parts; they are specifically meant to be
used in the Multi mode for playback of XG song data.
The Part 1 (piano Voice) and Part 2 (flute Voice) can be
played in unison.
Next, we'll divide the keyboard into two sections for each
Voice.
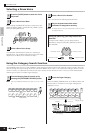
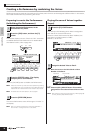
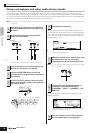
Dividing the keyboard into separate
sections— Split
8-1 Move the cursor to Part 1.
8-2 Press a note on the keyboard while holding down
the [SF5] LIMIT H button to set the highest note
for Part 1.
n Note that the dark bar (at “NOTE”) for Part 1 changes as the note
range is changed.
9-1 Move the cursor to Part 2.
9-2 Press a note on the keyboard while holding the
[SF4] LIMIT L button down to set the lowest note
of Part 2.
n Note that the dark bar (at “NOTE”) for Part 2 changes as the note
range is changed.
Use your left hand to play piano sounds and your right
hand to play flute sounds.
Adjusting the Part levels and storing
the Performance
For details, see page 42.
For details about the Store operation, see page 56.
n If you are editing a program and you select a different program
without storing your edited one, all the edits you’ve made will be
erased.
In the section above, you learned how to assign two Voices
to two different Parts. Use same procedure to assign
Voices to Parts 3 and 4, and create a full orchestral sound
or the sound of a 3- or 4-piece band—just by using a single
S90 ES. You can also use the preset Performances as
starting points in building your own custom Voice
combinations.
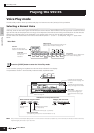
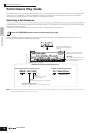
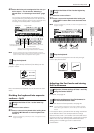
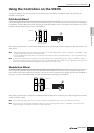
7
Play the keyboard.
8
Assign the Voice of Part 1 to the lower key
range.
SF1
F1
SF2
F2 F3 F4 F5 F6
SF3 SF4 SF5
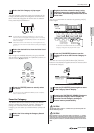
INFORMATION
Voice Bank
Voice Number
Assigns an internal Voice
to the selected Part. Part.
Deletes the Voice assignment of
the selected Part.
Assigns a Plug-in Voice to the selected Part.
(Available when a Plug-in Board has been installed.)
Part 1: Piano
Part 2: Flute
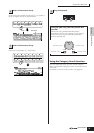
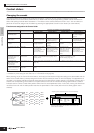
9
Assign the Voice of Part 2 to the higher key
range.
10
Play the keyboard.
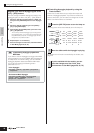
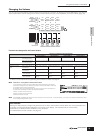
11
Adjust the Volume settings of Parts 1 and 2 by
using the Control sliders.
12
Store the settings as a User Performance in
the Performance Store mode.
SF 4 SF 5
Note Limit Low Note Limit High
Part 1: Piano Part 2: Flute