


Quick GuideCreating Your Original Program Set (Master mode)
Creating Your Original Program Set (Master mode)
95
Owner’s Manual
Setting up the Master Zones to Split or Layer
This operation lets you easily determine whether the Zones of the selected Master are to be used in a Split or a Layer.
The note range settings for each Zone can be determined by setting the NoteLimitH and NoteLimitL parameters from
the NOTE display ([MASTER] → [EDIT] → Zone selection → [F2] NOTE).
n Zones 1 and 2 are used in the explanations here.
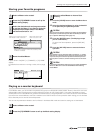
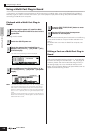
1 In the Master Play mode, press the [JOB] button to enter the Master Job mode.
2 Press the [F1] INIT button to call up the Initialize display.
3 Uncheckmark the box of “All” by using the [DEC/NO] button and checkmark the box of “Zone.”
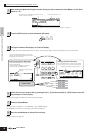
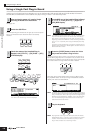
4 Set the Type to “Split” or “Layer.”
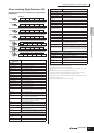
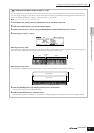
When Type is set to “Split”
Set the UpperCh (MIDI transmit channel of the upper range), LowerCh (MIDI transmit channel of the lower range), and
Split Point (which separates the keyboard into the upper range and lower range).
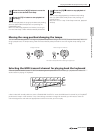
When Type is set to “Layer”
Set the UpperCh (MIDI transmit channel of Zone 1) and LowerCh (MIDI transmit channel of Zone 2).
5 Press the [ENTER] button. (The display prompts you for confirmation.)
To cancel the Job, press the [DEC/NO] button.
6 Press the [INC/YES] button to execute the Job.
After the Job has been completed, a “Completed” message appears and operation returns to the original display.
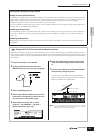
TIP
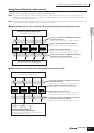
Lower Upper
Split Point
(C3)
Layer (Upper)
Layer (Lower)