


Voice mode
Performance
mode
Multi modeUtility modeFile modeMaster mode
Multi Voice
mode
Sequence Play
mode
Reference
Utility mode
163
Owner’s Manual
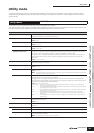
Utility mode
The Utility mode features a variety of important settings related to overall operation of the S90 ES. These settings can also be stored —
simply press the [STORE] button from any mode (with the exception of the Utility Job mode), and store the data to internal memory as
system settings.
In this mode, you can set parameters that apply to the entire system of the S90 ES.
This mode is actually a sub-mode of the Voice/Performance/Multi/Sequence Play mode. Press the [UTILITY] button in each mode to enter
the Utility mode and press the [EXIT] button after making settings to go back to the previous mode.
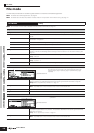
Utility mode
[UTILITY]
[F1] GENERAL
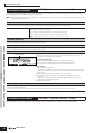
[SF1] TG (Tone Generator)
From this display you can make overall settings for the internal tone generator. Settings here do not affect MIDI
messages transmitted to the external MIDI instrument.
Volume Determines the overall volume of the instrument.
Settings: 0~127
NoteShift Determines the amount (in semitones) by which the pitch of all notes is shifted.
Settings: -24~0~+24
Tune Determines the fine tuning (in 0.1 cent steps) of the internal tone generator’s overall sound.
Settings: -102.4~+102.3
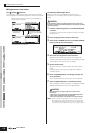
BCCurve
(Breath Controller Curve)
These four curves determine how the sound of the internal tone generator responds to use of a Breath
Controller. The setting here affects the Destination parameters when the Source is set to “BC,” both of which
can be set in the CTL SET displays ([VOICE] → [EDIT] → [COMMON] → [F4] CTL SET).
The graph shown in the display indicates the controller response curve. (The horizontal line represents the
received breath control values, while the vertical line represents the actual response of the internal tone
generator.)
Settings: thru, soft, hard, wide
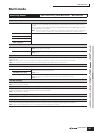
[SF2] KBD (Keyboard)
From this display you can set the keyboard-related parameters. The settings here affect the MIDI messages
generated by playing the keyboard.
Octave Determines the amount in octaves by which the range of the keyboard is shifted up or down.
Settings: -3~0~+3
Transpose Determines the amount in semitones by which the range of the keyboard is shifted up or down.
Settings: -11~ 0 ~+11
n If you transpose beyond the note range limits (C-2 and G8), notes in the adjacent octaves will be used. For example, a
transposed note of F9 will be changed to F8.
VelCurve (Velocity Curve) These five curves determine how the actual velocity will be generated and transmitted according to the velocity
(strength) with which you play notes on the keyboard.
The graph shown in the display indicates the velocity response curve. (The horizontal line represents the
received velocity values (strength of your playing), while the vertical line represents the actual velocity values
transmitted to the internal/external tone generators.)
Settings: norm, soft, hard, wide, fixed
norm (normal).......This linear “curve” produces one-to-one correspondence between the strength of your keyboard playing
(velocity) and the actual sound change.
soft........................This curve provides increased response, especially for lower velocities. In other words, playing softly results in
higher response than the “norm” curve.
hard...................... This curve provides increased response, especially for higher velocities. In other words, playing hard results in
higher response than the “norm” curve.
wide......................This setting provides opposite response curves for lower and higher velocities. It widens the apparent
dynamic range of the controller, producing less sound change in the softer range and more change in the
higher range.
fixed......................This setting produces the same amount of sound change (set in Fixed Velocity below), no matter what your
playing strength.
FixedVelocity This parameter is only available if you select the “fixed” Velocity Curve above. The velocity of the note you play
is fixed at the value set here.
Settings: 1 ~ 127
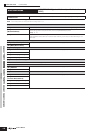
[SF3] EF BYPS (Effect Bypass)
From this display you can select the specific effect(s) to be bypassed when the [EFFECT BYPASS] button is
turned on.
Insertion
FInternal When this is set to on and the [EFFECT BYPASS] button is turned on, the internal Insertion Effect is bypassed.
FPLG-EF (Plug-in Effect) When this is set to on and the [EFFECT BYPASS] button is turned on, the Insertion Effect or Variation Effect of
the Plug-in Boards is bypassed.
n This parameter does not affect certain Plug-in Boards.