


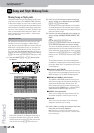

Editing User Program Finder information
G-70 Music Workstation
r
119
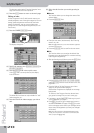
■Music Assistant Mark
Note: This function is not available for User Programs that
reside on floppy disk.
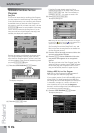
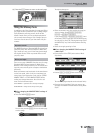
This option allows you to add an “MA” label to the
selected User Program, which means that its registra-
tion settings appear in the Music Assistant list (see
p. 36).
• Press the [MUSIC¥ASSIST¥MARK] field.
Use the familiar Finder functions to locate the User
Programs you want to appear in the Music Assistant
list, then press their fields to add (and again to
remove) the “MA” label.
As you will learn later on, Music Assistant registra-
tions are, in fact, a virtual concept, because they only
exist if there is a User Program file they can refer to.
That explains why deleting a User Program file (see
above) also discards the associated Music Assistant
entry.
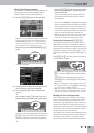
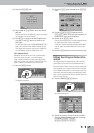
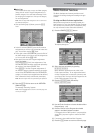
■Copy
This function allows you to copy the selected User
Program to another memory area. Be sure to select a
User Program before pressing the [OPTIONS] field on
the USER PROGRAM LIST page. Also bear in mind that
the COPY page only lists User Programs that match
the last search criteria you used for the USER PRO-
GRAM FINDER.
On the other hand, if you only need to copy certain
User Programs on memory card or in the internal
memory, using the FINDER is actually a good idea: it
helps you to avoid too many presses of the PAGE [ø]
or [˚] field.
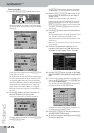
• On the USER PROGRAM OPTIONS page, press the
[COPY] field.
• Start by specifying the source that contains the User
Program(s) you wish to copy: Press the [FROM] but-
ton icon to select the memory area.
• Now specify the target you wish to copy the selected
song(s) to: Press the [TO] button icon to select the
memory area.
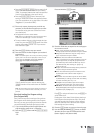
• If the name of the User Program you want to copy is
already displayed, press its line.
You can also select several User Programs.
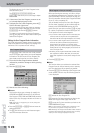
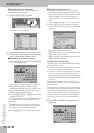
To display the next 5 files, press the [˚] field in the
lower right corner. You also use the [DATA÷ENTRY]
dial and the [DEC]/[INC] buttons.
You can press this field as many times as necessary
(or until it is no longer displayed). To return to a pre-
vious group of 5 songs, press [ø].
If you need to copy all User Programs that are cur-
rently displayed (on all available pages), press the
[ALL¥FILES] field.
Note: If the memory card or floppy disk is not formatted, a
message will be displayed that allows you to format it before
the User Programs are copied.
(4) If you chose “EXT MEMORY” or “FLOPPY DISK” for
“TO”, enable the card’s/disk’s write protection and
insert it into the PCMCIA slot or disk drive.
This is also true of a floppy disk you want to work
with. See the owner’s manual of the memory card for
how to disable its write protection.
Note: Not all cards have a write protection function.
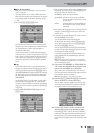
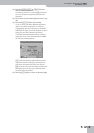
(5) Press the [EXECUTE] field. (Press [Back] if you do not
want to proceed, or to select other files.)
You are asked whether it is OK to overwrite all files
on the destination media (“TO”) that have the same
file names as the files you are about to copy.
(6) Press the [YES] field if it is OK to overwrite files
with the same names on the destination media.
Press the [NO] field if files on the source (“FROM”)
media that have the same name as existing files on
the destination (“TO”) media should not be copied
(only files with “original” names will be copied in that
case).
INT MEMORY: The G-70’s internal memory.
EXT MEMORY: The memory card in the G-70’s PCMCIA
slot. Do not forget to insert it before select-
ing this option.
FLOPPY The floppy disk in the G-70’s PCMCIA slot.
Do not forget to insert it before selecting
this option.