


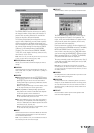


Editing individual Style events (Style Micro Edit)
G-70 Music Workstation
r
201
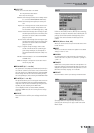
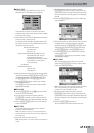
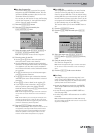
■CREATE EVENT
Press this button icon to add a new event to the
selected track. The following pop-up appears:
If the position for which you create a new event
already contains other events, the new event is added
at the end of that group.
• Press the button icon that corresponds to the kind of
event you want to add to the list.
The meaning of the available message types should
be clear by now. Here are the default values that are
assigned to events you create:
• Specify the position where your new event should be
inserted by pressing the [BAR], [BEAT] and [CPT] fields
and entering the desired value for each unit using
the [DATA÷ENTRY] dial or the [DEC]/[INC] buttons.
• Press the [EXECUTE] field to confirm your settings
and add the new event.
Press [CLOSE] to close the pop-up window without
applying your changes.
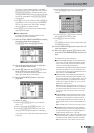
■ERASE EVENT
• Use the [DATA÷ENTRY] dial or [ß][†] buttons to select
the event you want to delete.
• To select several consecutive events, press the
[DATA÷ENTRY] dial while turning it towards the left
(upward direction) or the right (downward direction).
• Press the [ERASE¥EVENT] button icon to remove the
event you selected.
■MOVE EVENT
This function allows you to move one or several
events to a different position.
Note: If the position to which you move the selected event
already contains other events, the moved event is added at the
end of that group.
• Select the event you want to move.
Note: Events located at “1-01-00” cannot be moved further to
the left.
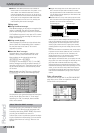
• To select several consecutive events, press the
[DATA÷ENTRY] dial while turning it towards the left
(upward direction) or the right (downward direction).
All events selected in this way appear on a blue back-
ground.
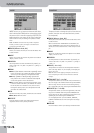
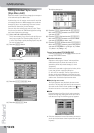
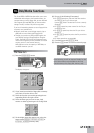
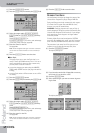
• Press the [MOVE¥EVENT] button icon. The following
pop-up appears:
• Specify the position to which the first event (in chro-
nological order) of the selected group should be
shifted by pressing the [BAR], [BEAT] and [CPT] fields
and entering the desired value for each unit using
the [DATA÷ENTRY] dial or the [DEC]/[INC] buttons.
• Press the [EXECUTE] field to confirm your settings
and move the event.
Press [CLOSE] to close the pop-up window without
applying your changes.
■COPY EVENT
This function allows you to copy one or several
events. Use [PLACE¥EVENT] to insert a copy of those
events at the desired position.
Note: For this function, you could take advantage of the VIEW
filter to avoid selecting event types that should not be
included in the copy. See “VIEW” on p. 198.
• To select several consecutive events, press the
[DATA÷ENTRY] dial while turning it towards the left
(upward direction) or the right (downward direction).
All events selected in this way appear on a blue back-
ground.
• Press the [COPY¥EVENT] button icon.
The new selection will replace the previous one.
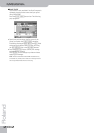
Note: Note Number: 60 C4
On Velocity: 100
Gate Time: 60
Program Change: CC00 Bank Select MSB, value “0”
CC32 Bank Select LSB, value “4”
Program Change Number “1”
(The Bank Select messages are added
automatically: you don’t have to
worry about that.)
Pitch Bend: “0”
Alteration Mode: Nearest
Limit Low: Std
Limit High: Std