Using the 16-track sequencer
174
r
G-70 Music Workstation
■ERASE EVENT
• Use the [DATA÷ENTRY] dial to select the event you
want to delete.
• Press the [ERASE¥EVENT] field to erase the selected
event.
Note: Tempo and time signature events located at “1-01-00”
cannot be erased.
■MOVE EVENT
This function allows you to move one or several
events.
• Select the event you want to move. If you want to
move several events, it would be a good idea to select
the first or last event of the series.
Note: For this function, you could take advantage of the VIEW
filter to avoid selecting event types that should remain where
they are. See “VIEW” on p. 173.
Note: Tempo and time signature events located at “1-01-00”
cannot be moved.
• To select several consecutive events, press the
[DATA÷ENTRY] dial while turning it towards the left
(upward direction) or the right (downward direction).
All events selected in this way appear on a blue back-
ground.
• Press the [MOVE¥EVENT] button icon. The following
pop-up appears:
• Specify the position to which the first event (in chro-
nological order) of the selected group should be
shifted by pressing the [BAR], [BEAT] and [CPT] fields
and entering the desired value for each unit using
the [DATA÷ENTRY] dial or the [DEC]/[INC] buttons.
• Press the [EXECUTE] field to confirm your settings
and move the event.
Press [CLOSE] to close the pop-up window without
applying your changes.
■COPY EVENT
This function allows you to copy one or several
events. Use [PLACE¥EVENT] to insert a copy of those
events at the desired position.
Note: For this function, you could take advantage of the VIEW
filter to avoid selecting event types that should not be
included in the copy. See “VIEW” on p. 173.
• To select several consecutive events, press the
[DATA÷ENTRY] dial while turning it towards the left
(upward direction) or the right (downward direction).
All events selected in this way appear on a blue back-
ground.
• Press the [COPY¥EVENT] button icon.
The new selection will replace the previous one.
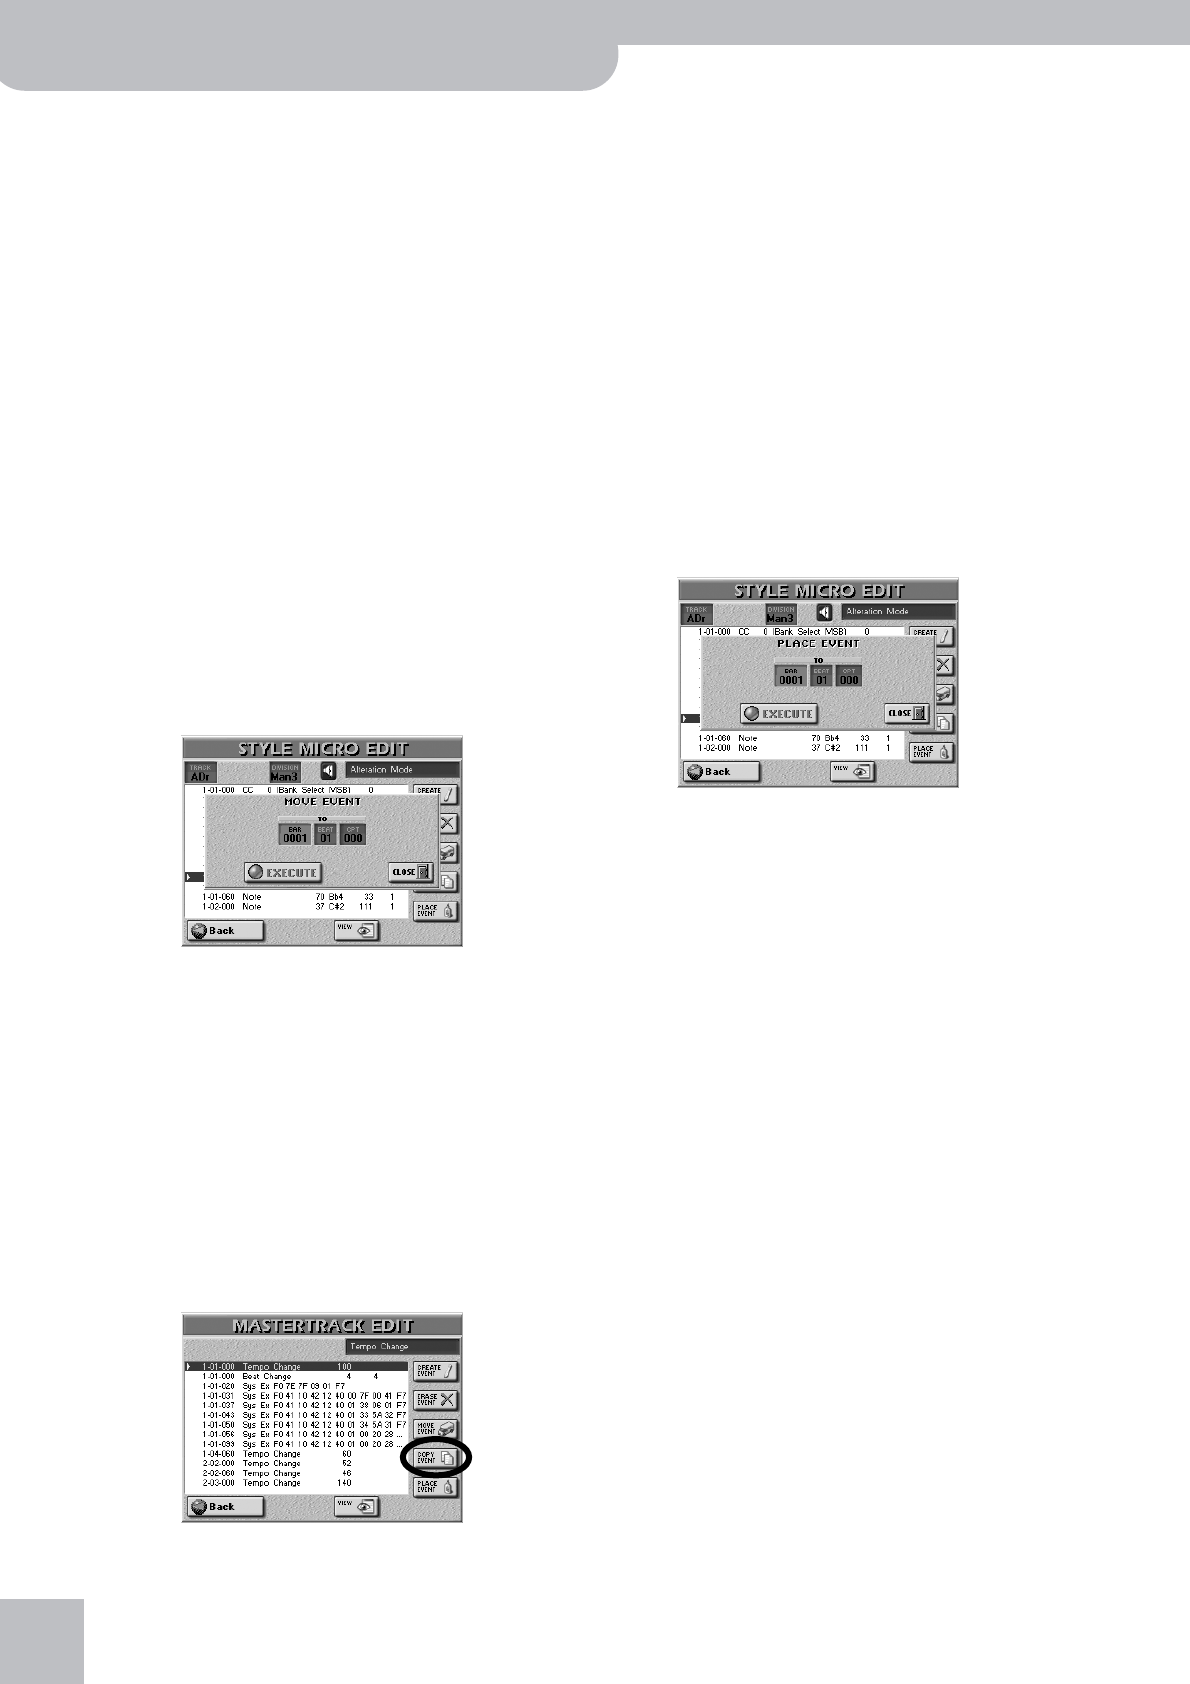
■PLACE EVENT
This function is only available if the sequencer’s clip-
board already contains events that you copied using
COPY EVENT. For safety reasons, it would be a good
idea to use this function immediately after copying
events.
Press the [PLACE¥EVENT] button icon. The following
pop-up appears:
• Specify the position where the first event of the
group you copied with [COPY¥EVENT] should be
inserted by pressing the [BAR], [BEAT] and [CPT] fields
and entering the desired value for each unit using
the [DATA÷ENTRY] dial or the [DEC]/[INC] buttons.
• Press the [EXECUTE] field to confirm your settings
and add the new event(s).
Press [CLOSE] to close the pop-up window without
applying your changes.
Note: Events inserted with PLACE EVENT are added to any
events that may already exist in that area. Existing events are
thus not pushed towards the end of the song.


