


Quick Start
34
r
G-70 Music Workstation
This information is confirmed by the TONE ASSIGN
[UP1] button (it lights).
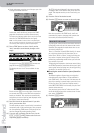
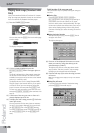
(4) Play a few notes with your right hand and move
the sliders below the display to change the organ
registration.
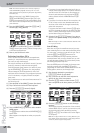
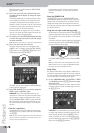
The numbers appearing on the harmonic bars allow
you to rapidly set the bars to the desired setting. If
you push a (virtual) harmonic bar inward until no
number is visible, its volume will be “0,” and no sound
will be heard. If you pull a harmonic bar all the way
out, the volume will be at the maximum.
Each harmonic bar is assigned to a sine wave (pure
tone) of a set pitch. By mixing these sine waves, you
can create a variety of organ sounds.
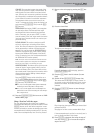
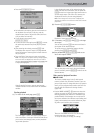
(5) If necessary, press the PERCUSSION fields (left side)
to switch the organ percussion on/off and change
its speed and timbre.
Note: When percussion is on, the 1’ pitch will not be produced.
(6) Play a few notes with your left hand.
The organ sound you hear now is assigned to the
LOWER 1 part. To change it, press the TONE ASSIGN
[LW1] button (or the [HARMONIC¥BAR] button next
to the sliders) and move the sliders.
Of course, you can also change the PERCUSSION set-
tings of the LW1 organ part.
(7) Press TONE ASSIGN [UP1] if you need to change the
UPPER 1 part’s registration again.
WARNING: The G-70’s assignable sliders are not
motorized. It is therefore very likely that their physi-
cal positions no longer correspond to what you see
on the HARMONIC BARS “UPPER 1” page (and hear).
We recommend quickly moving a slider all the way
up or down before actually setting it to the desired
position.
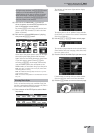
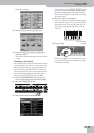
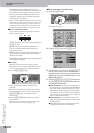
If you like a registration…
You can save it to one of the eight memories: press
the [WRITE] field (it “lights”), then one of the numeric
fields [1]~[8].
Note: This only saves the registration of the currently selected
part. You will have to repeat this for the other sections if you
want to save their registrations too.
Press another numeric field to recall the settings
stored in that memory, in which case the sound
changes.
About the MANUAL field
The [MANUAL] field on the HARMONIC BARS page
allows you to change the organ sound so as to corre-
spond to the current positions of the sliders. This will
change the sound. (After selecting another memory,
their physical positions usually no longer correspond to
the sound you hear.)
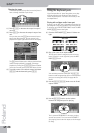
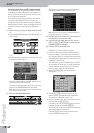
Using just one organ sound and bass pedals
As stated earlier, pressing the EASY SETTING [ORGAN]
button creates a split that involves two organ sounds
(UP1 and LW1). This actually simulates a two-manual
instrument.
If you only need one organ sound that is assigned to
the entire keyboard, press the KBD MODE [WHOLE]
button (its indicator must light).
Press PART ON/OFF [LW1] to switch off the LOWER 1
part.
Note: You could connect a PK-5A MIDI pedal to the G-70’s
MIDI IN socket and use it to trigger the MBS (M. BASS) part.
See page 214 for the G-70’s MIDI functions.
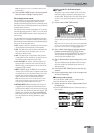
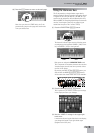
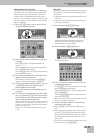
Using effects
An organ sound without rotary speaker modulation is
only half an organ sound, right? So let’s have a look at
this and the other effects, because the G-70 provides a
lot more than just a convincing rotary effect.
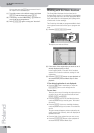
(1) On the “HARMONIC BARS” page (UPPER 1, LOWER
1, or M.BASS), press the [EFFECTS] field in the upper
left-hand corner.
These effects are shared by all three “organ” sections.
It therefore doesn’t matter on what page you press
the [EFFECTS] field.
OVERDRIVE: This effect distorts the sound, giving it
an “edge” and making it suitable for hard rock and
similar musical genres. Press the [ON÷OFF] field to
switch this effect on or off. To change the setting,
press the display icon and rotate the [DATA÷ENTRY]
dial (or use the [DEC]/[INC] buttons).
LW 1
WHOLE