


Editing the Keyboard effects processors
G-70 Music Workstation
r
97
Editing the Keyboard effects pro-
cessors
After setting the above parameters, you may find that
even sensible Reverb/Chorus Send values for the Key-
board parts do not yield the expected result.
In that case, you should edit the Reverb and Chorus
settings by pressing the [EFFECTS] button.
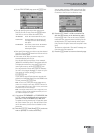
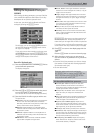
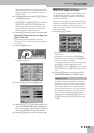
On this page, you can switch the REVERB processor
on and off by pressing the [OFF/ON] button icon to
the right of its “display”.
If you only want to select another reverb type, press
the REVERB display and use the [DATA÷ENTRY] dial or
the [DEC]/[INC] buttons to select it. If you also need to
change certain aspects of that effect…
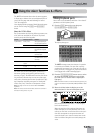
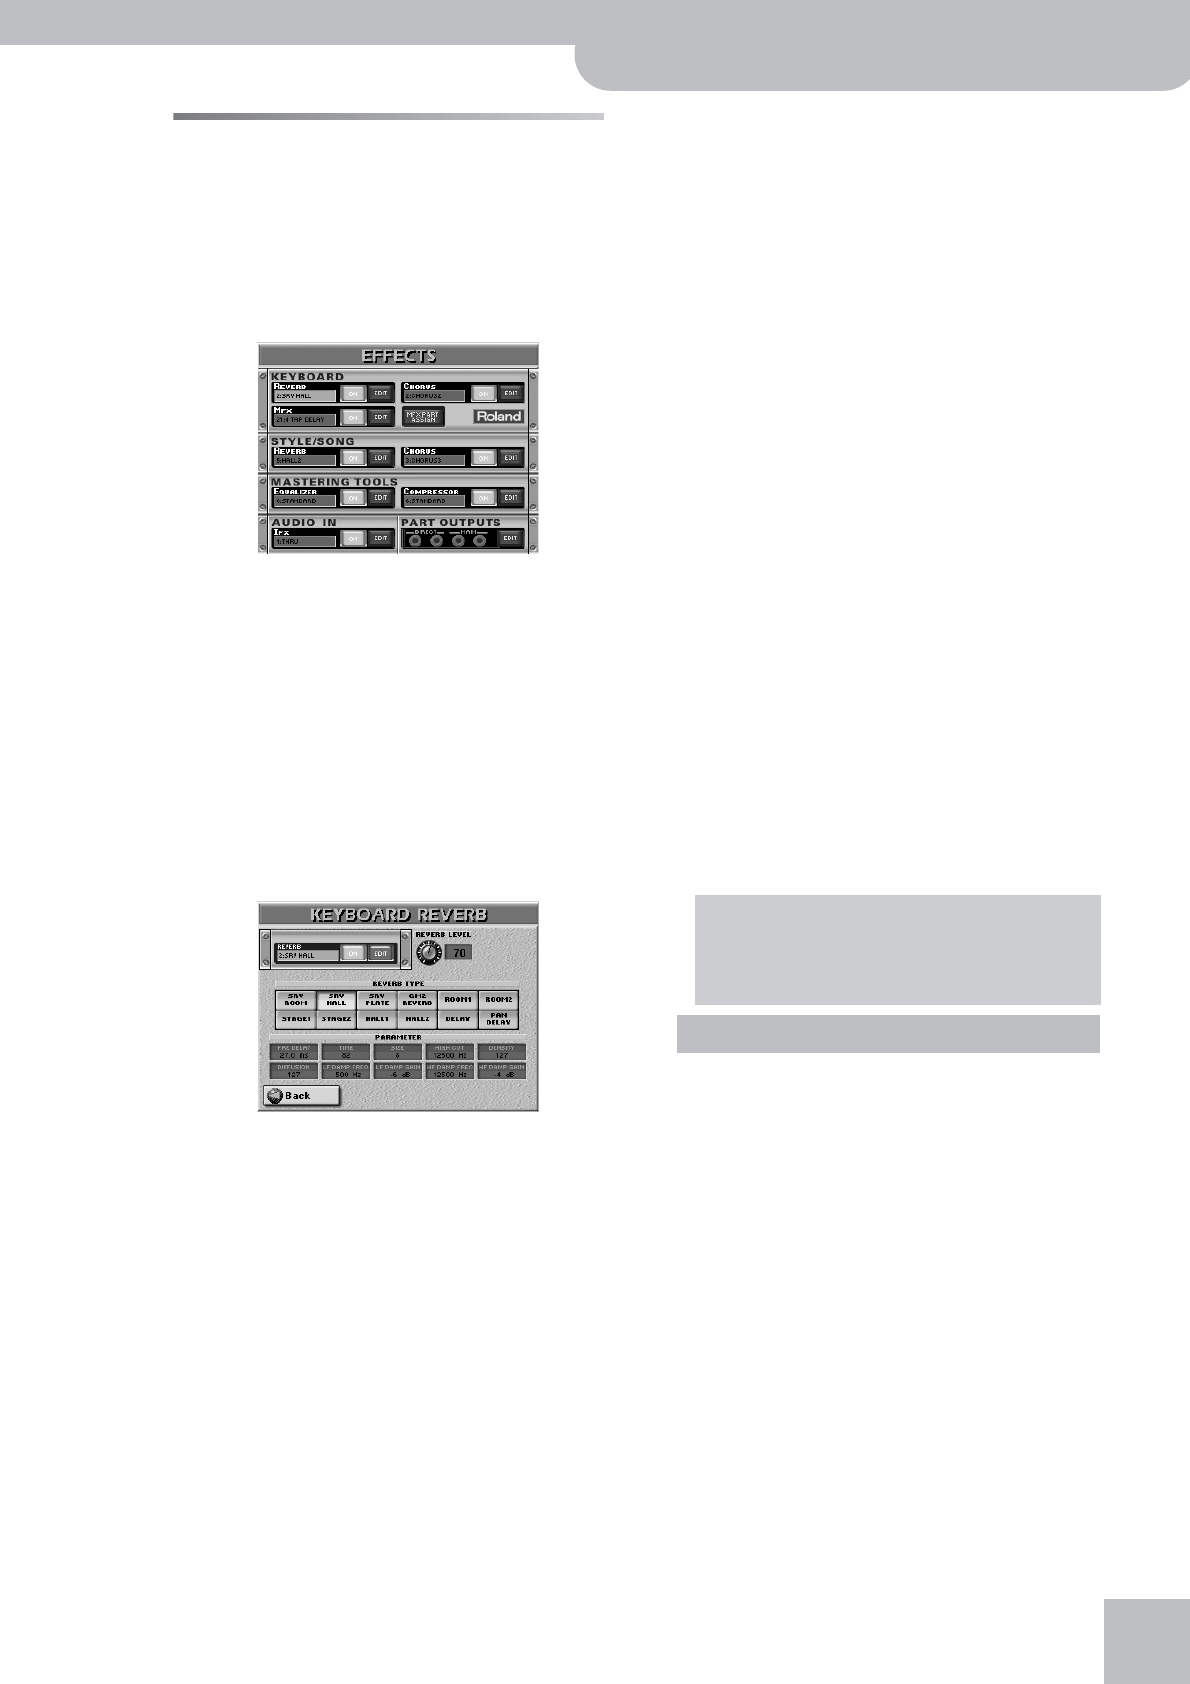
Reverb for Keyboard parts
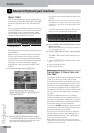
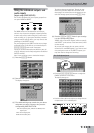
(1) Press the KEYBOARD EFFECTS REVERB [EDIT] field to
access the Reverb parameters.
The display changes to:
(2) Press the [ON] (or [OFF]) field to switch the proces-
sor on (icon lights) or off (icon goes dark).
You can also do so on the EFFECTS page (see above).
(3) Press the field of the effect type you wish to use.
The options are:
● SRV Room—This effect simulates the reverb characteris-
tics of a room. The name (“SRV”) refers to Roland’s
SRV-3030, a stand-alone reverb processor, which is also
used by certain Fantom-series synthesizers.
● SRV Hall—Digital simulation of a metal plate that is
sometimes used for creating Reverb effects. Works well
for percussive sounds.
● SRV Plate—Digital simulation of a metal plate that is
sometimes used for creating reverb effects. Works well
for percussive sounds.
● GM2 Reverb—This reverb effect is Roland’s standard
type for GM2-compatible tone generators.
● Room1, Room2—These types simulate the reverb char-
acteristics of a room. The higher the number (1 or 2), the
“bigger” the room becomes.
● Stage1, Stage2—These types simulate the reverb char-
acteristics you get when you perform on a concert stage.
The higher the number (1 or 2), the “bigger” the stage
becomes.
● Hall1, Hall2—These types simulate the reverb of a small
(1) or large (2) concert hall and thus sound much “big-
ger” than the Room types above.
● Delay—A Delay effect (no reverb). Works a lot like an
echo effect and thus repeats the sounds.
● Pan Delay—This is a stereo version of the above Delay
effect. It creates repetitions that alternate between the
left and right channels.
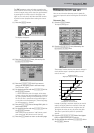
[REVERB LEVEL] allows you to set the output level of
the Reverb processor. Setting this parameter to “0”
means that you no longer hear the effect in question.
If you don’t want to edit the effects parameters, con-
tinue with the next step, otherwise jump to step (5).
(4) Press [Back] to return to the display page with the
“modules”.
–OR–
Press the [EXIT] button to return to the main page.
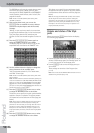
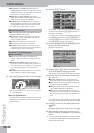
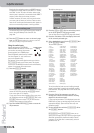
(5) After selecting a reverb type, you may want to
fine-tune some of its parameters. If so, proceed as
follows:
• Press the field of the parameter you wish to change
(the number of fields and their meaning depend on
the selected reverb type).
• Set the desired value.
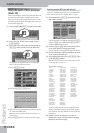
● Pre Delay (0.0~100.0 ms)—Adjusts the delay time
between the direct sound until the reverb sound is
heard. This is used to simulate the distance between the
original signal and the reflective surfaces.
● Time (0~127)—The duration of the reverb signal. The
higher the value, the “longer” the simulated room
becomes.
● Size (1~8)—Determines how the later reverberations are
propagated, which gives the listener important clues
about the height of the simulated room.
● High Cut (160~12500Hz, Bypass)—Adjusts the fre-
quency above which the high-frequency content of the
reverb will be reduced. If you do not want to reduce the
high frequencies, set this parameter to BYPASS.
● Density (0~127)—Density (number) of the reflections.
● Diffusion (0~127)—Adjusts the change in the density of
the reverb over time. The higher the value, the more the
density increases with time. (The effect of this setting is
most pronounced with long reverb times.)
● LF Damp Freq. (50~4000Hz)—Adjusts the frequency
below which the low-frequency content of the reverb
sound will be reduced, or “damped.”
Parameter values can be set by turning the
[DATA÷ENTRY] dial, by pressing the [DEC]/[INC] but-
tons, or by pressing the [DATA÷ENTRY] dial and
using the on-screen numeric pad.
SRV Room/SRV Hall/SRV Plate parameters