


x Table of Contents
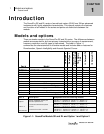
Models SE and DL
Figure 4-2: Setting Date parameters for Auto-Run #1 .................................................................. 39
Figure 4-3: Example of setting up Auto-Run (QSP-II) ................................................................... 40
Figure 4-4: Day of the Week (DOW) setup ..................................................................................... 41
Figure 4-5: Auto-Run Shutdown screen ........................................................................................ 42
Figure 4-6: Timed Run setup screen .............................................................................................. 43
Figure 4-7: Level-Triggered screen ................................................................................................ 44
Figure 4-8: Secure/Lock option ...................................................................................................... 47
Figure 4-9: Secure/Lock screen ...................................................................................................... 47
Figure 4-10: Adding code for secure/lock screen ........................................................................... 48
Figure 4-11: Secure/lock run prompt ............................................................................................... 48
Figure 4-12: Secure/lock setup prompt............................................................................................ 49
Figure 4-13: Digital-Out screen ......................................................................................................... 50
Figure 4-14: QSP/Serial ..................................................................................................................... 52
Figure 4-15: Mass Storage ................................................................................................................ 52
Figure 4-16: Log to Port .................................................................................................................... 53
Figure 4-17: Comm-Set screen for GPS data .................................................................................. 54
Figure 4-18: Viewing GPS coordinates in COMM-Set screen ........................................................ 55
Figure 5-1: Bar chart screen (A) and Filtered Bar Chart (B) ......................................................... 60
Figure 5-2: Attaching calibrator to SoundPro ............................................................................... 62
Figure 5-3: Setting pre-cal screen .................................................................................................. 63
Figure 5-4: Calibration history screen ........................................................................................... 63
Figure 5-5: Post-Calibrate history screen ...................................................................................... 64
Figure 5-6: Bar Chart screen in run mode ..................................................................................... 64
Figure 5-7: Selecting measurements with Lookup softkey .......................................................... 66
Figure 5-8: Example measurement icons & descriptors .............................................................. 67
Figure 5-9: Bar Chart screen and Filtered Bar Chart screen ........................................................ 68
Figure 5-10: Community Noise screen............................................................................................. 69
Figure 5-11: Dosimetry screen ......................................................................................................... 70
Figure 5-12: Tabulation screen for octave filtering ......................................................................... 71
Figure 5-13: Back-erasing ................................................................................................................. 72
Figure 5-14: Time Log screen ........................................................................................................... 74
Figure 5-15: Stopping and pausing .................................................................................................. 75
Figure 6-1: Reverb Time .................................................................................................................. 78
Figure 6-2: Interrupted noise example ........................................................................................... 79
Figure 6-3: Reverb Time Setup screen........................................................................................... 81
Figure 6-4: Reverb Time Setup screen........................................................................................... 83
Figure 6-5: RT60 bar chart screen .................................................................................................. 84
Figure 6-6: Decay curve screen ...................................................................................................... 85
Figure 6-7: Tabular octave filtering RT screen .............................................................................. 86
Figure 6-8: Selecting measurement type for curves ..................................................................... 88
Figure 6-9: Captured Curves and Survey mode ............................................................................ 89
Figure 6-10: Selecting 1/1 or 1/3 for measurement type ................................................................. 90
Figure 6-11: Capturing a curve (CAP-1) ........................................................................................... 91
Figure 6-12: Selecting measurement type for curves ..................................................................... 92
Figure 6-13: Curves setup screen example ..................................................................................... 93
Figure 6-14: 1/1 or 1/3 octave measurement type for audiometric testing ................................... 94
Figure 6-15: Selecting measurement type for curves ..................................................................... 95
Figure 6-16: Audiometric booth setup in the curves screen .......................................................... 95