105
Basic functions
Saving dataLoading dataProgram
settings
Combination
settings
Producing
songs
Sampling
settings
Creating a
CD
SMF
playback
System
settings
Drum kit
settings
Arpeggiator
settings
Effects
settings
Other
functions
by one after you sample, so that the next sample you
record will be assigned to the next higher note.
Press the OK button to finalize the settings.
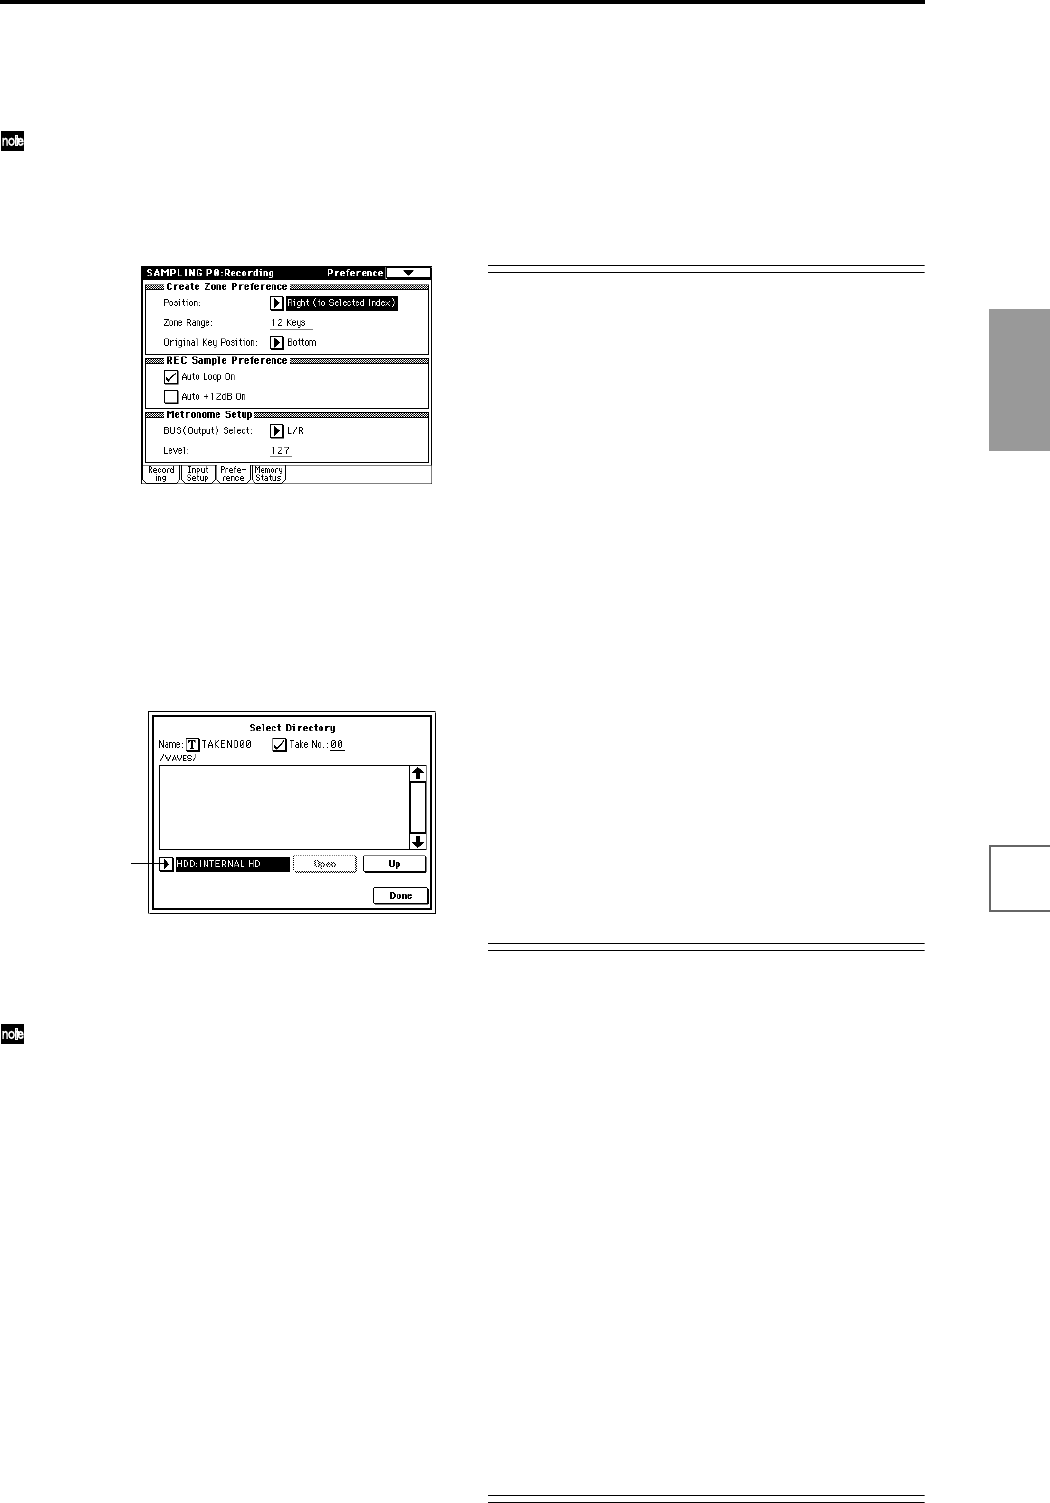
Set the “Auto +12 dB On” parameter. If you check
“Auto +12 dB On,” the sample playback level will
automatically be increased by +12 dB after sampling.
(☞“The recording level and “Auto +12 dB On””)
In Sampling mode, you can set this parameter in the
P0: Recording, Preference page.
In Program, Combination, and Sequencer modes, you
can set this parameter using the Sampling page menu
command “Select Bank & Smpl. No.” (☞p.104).
DISK: The sample will be written to the internal hard
drive or a SCSI-connected hard disk drive etc.
If you select DISK, you can also select the writing-des-
tination drive.
In all modes, this is specified by the page menu com-
mand “Select Directory.”
In the drive select field, select the drive. Use the Open
and Up buttons to move between levels of the direc-
tory hierarchy to select the desired directory. Press the
Done button to finalize the settings.
If you sampled to the internal hard disk etc. as a
WAVE file, the “Auto +12 dB On” setting will be
ignored. The playback level of the WAVE file is set by
“WAVE File Play Level” (☞PG p.138).
2 In “Sample Time,” specify the length of time that you
want to sample.
This can be set in units of minutes and seconds.
If you are sampling to RAM (sample memory), you
can sample a maximum of approximately 2 minutes 54
seconds in mono, or approximately 1 minute 27 sec-
onds in stereo. If you have installed additional SIMM
boards to expand the sample memory to 96 Mbytes,
you will be able to sample up to six samples of 2 min-
utes 54 seconds each in mono (or approximately 1
minute 27 seconds in stereo), for a total of 17 minutes
28 seconds (or approximately 8 minutes 44 seconds in
stereo).
If you are sampling to DISK, you can sample a maxi-
mum of 80 minutes in either mono or stereo (mono:
approximately 440 Mbytes, stereo: approximately 879
Mbytes).
3 Set “Sample Mode” to specify whether a mono or a
stereo file will be created.
L-Mono: The sound of the internal L channel will be
sampled in mono.
R-Mono: The sound of the internal R channel will be
sampled in mono.
Stereo: The sound of the internal L and R channels will
be sampled in stereo.
The recording level and “Auto +12 dB On”
When you resample the playback of a song, or your key-
board performance using a program, combination, or
sample, or if you mix your performance with an external
audio source and sample the result, you should normally
set “Recording Level” to –12.0 (dB). If you resample at
–12.0 (dB), the sample data will be recorded at the opti-
mum level, but the playback level will be lower than the
level during sampling (if “+12 dB” is off). In such cases,
you can check “Auto +12 dB On” when you resample, so
that “+12 dB” (Sampling mode Loop Edit page) will auto-
matically be turned on, and the recorded sample will play
back at the same level at during resampling.
When you sample an external audio source, you should
normally set “Recording Level” to +0.0 (dB). The sample
data will be recorded at the optimum level. If you sample
with “Auto +12 dB On” turned off at this time, “+12 dB”
(Sampling mode Loop Edit page) will be off, and the sample
will play back at the same level at which it was sampled.
When the power is turned on, “Recording Level” and
“Auto +12 dB On” will default to the following settings.
Program, Combination, Sequencer modes
“Recording Level”: –12.0 (dB), “Auto +12 dB On”: on
Sampling mode
“Recording Level”: +0.0 (dB), “Auto +12 dB On”: off
These settings assume that you will mainly be resampling
in Program, Combination, and Sequencer modes (listed
above), and performing conventional sampling in Sam-
pling mode (listed below).
Optimizing the sample memory (RAM)
If RAM has been specified as the destination to which
data will be written during sampling, you can specify that
sample memory (RAM) be automatically optimized after
the data is written. When optimization is performed,
unused areas that are occupying memory space will be
reorganized to increase the available free space. In the
Global mode P0: Basic Setup, Input/Sampling page, you
can check “Auto Optimize RAM” so that RAM will auto-
matically be optimized when sampling ends. In this case,
you will always be able to sample without any wasted
RAM area, but the sound will stop for a time when sam-
pling ends. If a song is being played back in Sequencer
mode, the playback will stop.
If you are playing back a song, or if you are repeatedly
recording multiple samples in various locations while lis-
tening to audio input from a CD etc., you can sample with
“Auto Optimize RAM” unchecked, and then execute the
page menu command “Optimize RAM” (found in the
Sampling page of Program, Combination, or Sequencer
modes, and in P0–P4 of Sampling mode) to optimize the
RAM when the remaining amount of memory begins to
decrease. The remaining amount of sample memory
(RAM) can be checked in Sampling mode P0: Memory
Status.
Drive select


