119
Basic functions
Saving dataLoading dataProgram
settings
Combination
settings
Producing
songs
Sampling
settings
Creating a
CD
SMF
playback
System
settings
Drum kit
settings
Arpeggiator
settings
Effects
settings
Other
functions
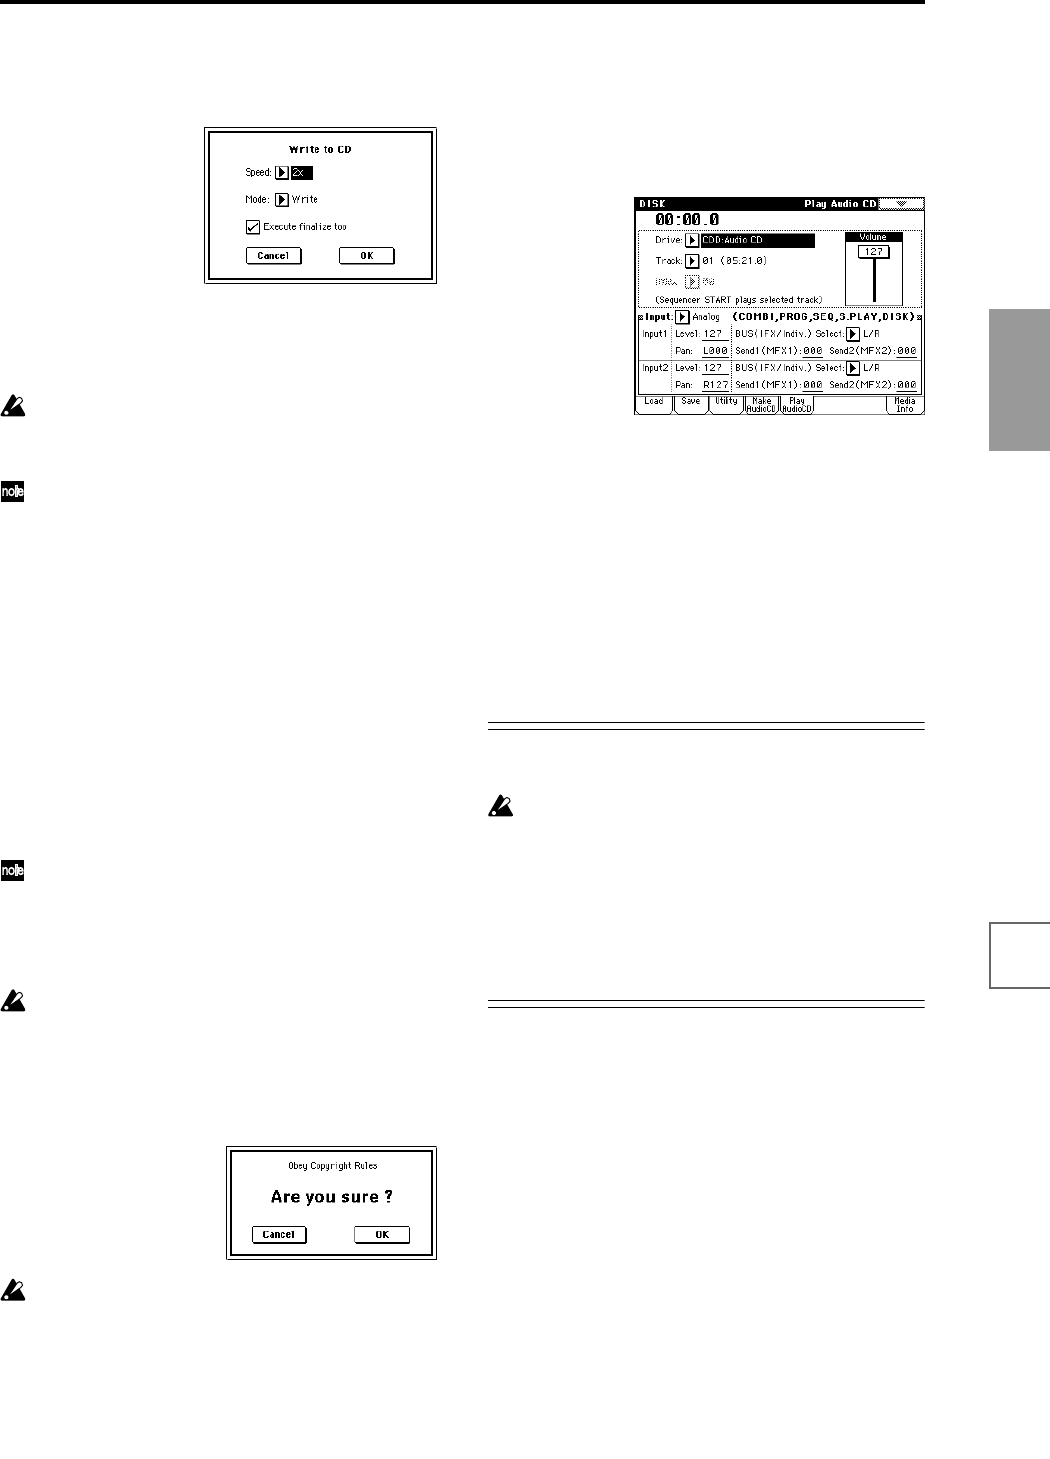
4 Select the page menu command “Write to CD” to
access the dialog box, and specify how the CD will be
written.
Use “Speed” to set the writing speed. This will indicate
the speeds supported by the CD-R/RW drive you are
using.
In this example, set “Speed” to 2x.
Be aware that if you use a faster writing speed in a
slower system, writing errors will occur.
Use “Mode” to specify the writing method.
Depending on the drive you are using, it may not be
possible to write at the specified speed. We recom-
mend that the first time you write, you select Test to
perform a writing test in order to determine the
speed capabilities of your drive. Test will not write
data to the CD-R/RW media, but will perform all
other processing just as when data is actually written.
If an error occurs, the display will indicate “Error in
writing to medium.”
Press the OK button to execute the writing test.
After verifying that data can be written correctly at
the specified speed, select Write.
“Execute finalize too” specifies whether Finalization
will be executed after the audio tracks have been writ-
ten to the CD-R/RW media. If finalization has been
executed, the disc can be played back on a CD player,
but it will no longer be possible to add more tracks.
If you only want to execute finalization, execute
“Finalize Audio CD.”
5 When you are ready to write to the CD-R/RW media,
or to execute a writing test, press the OK button. To
cancel without executing, press the Cancel button.
When you press the OK button, the “Obey Copyright
Rules” dialog box will appear.
Carefully read “About copyright” (☞p.iii). If you
accept the terms, press the OK button to write to the
CD or to perform the test. If you do not accept the
terms, press the Cancel button to cancel the opera-
tion.
In order to avoid causing errors, do not subject the
drive to physical shock or vibration while CD-R/RW
media is being written.
6 An audio CD to which audio tracks have been writ-
ten and which has been finalized can be played in the
Play Audio CD page, allowing you to hear the CD
you created.
Press the Play Audio CD tab to access the Play Audio
CD page.
In “Drive,” select your CD-R/RW drive. “Drive” will
indicate Audio CD (☞PG p.156).
Make the following settings to allow monitoring.
Use “Track” to select the track, and press the
SEQUENCER [START/STOP] key to begin playback.
Saving a track list that you have completed or par-
tially edited
The track list will be lost when the power is turned
off. If you want to keep this data, you must save it.
1 In the Save page, select the directory in which you
want to save the track list.
2 Select the page menu command “Save Audio CD
Track List” to access the dialog box.
3 Press the OK button to save the data, or press the
Cancel button to cancel without saving.
“Input”: Analog
Input1 “BUS(IFX/Indiv.)” L/R, “Level” 127, “Pan”
L000
Input2 “BUS(IFX/Indiv.)” L/R, “Level ”127, “Pan”
R127
“Volume” 127


