


118
Creating an audio CD from WAVE files
sampled to hard disk
This section explains how you can create an audio CD by
specifying the desired order of WAVE files on the hard
disk.
As described in “Resampling the song playback to create a
WAVE file on the hard drive” (☞p.116), a song you cre-
ated in Sequencer mode can be sampled to the hard disk
to create a WAVE file.
To do this, the CDRW-1 option (☞PG p.286) must be
installed or an external CD-R/RW drive must be con-
nected to the SCSI connector (☞PG p.298).
In order to write data to CD-R/RW media, the drive
containing the WAVE files must have at least as much
free space as the WAVE files. Before you execute this
procedure, make sure that the drive containing the
WAVE files has sufficient free space.
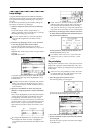
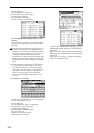
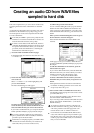
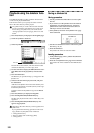
1 Access the Disk mode Make Audio CD page.
In the default state, the WAVE File area will show only
“====End====.”
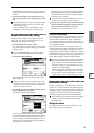
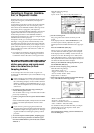
2 To the track list, add the WAVE files that you want to
write to the CD.
Select “====End====” (it will be highlighted), and
press the Insert button.
The Insert Track dialog box will appear.
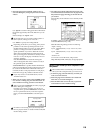
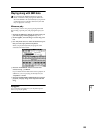
Use drive select and the Open and Up buttons to
access the directory that contains the WAVE file, and
select the WAVE file that you want to add to the list.
If you want to audition the file, you can press the SAM-
PLING [START/STOP] key to play back the sample.
If you have selected a WAVE file of a sampling fre-
quency other than 44.1 kHz or 48 kHz, it will not be
possible to press the Insert button.
WAVE files at a sampling frequency of 48 kHz will be
converted to 44.1 kHz when they are written to an
audio CD (when you execute “Write to CD”).
To add the file, press the Insert button.
You can continue adding files until you press the Exit
button. The files will be added to the track list in the
order in which you selected them. If you want to add
all the WAVE files in the directory, press the Insert All
button.
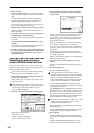
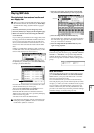
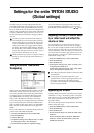
When you have finished adding files to the list, press
the Exit button to close the dialog box.
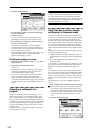
Notice that the WAVE files have been added to the
track list.
In this page as well, you can select a WAVE file and
press the SAMPLING [START/STOP] key to play back
the sample.
To add other WAVE files to the track list, press the
Insert button once again.
If you want to add another track, select the WAVE file
that follows the track you want to add. If you want to
add the track to the end of the track list, select
“====End====.” Then press the Insert button.
To delete a WAVE file from the track list, select the
WAVE file that you want to delete, and press the Cut
button.
Subsequent tracks will be moved forward in the list.
For details on editing operations such as Clear and
Swap Track, refer to PG p.173.
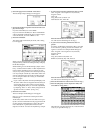
3 Insert a blank CD-R or CD-RW disk into the drive.
Use the Make Audio CD page drive select area to select
your CD-R/RW drive.
If you are using the CDRW-1 option, the drive select
area will indicate “CDD: Blank Disc.”
If you are using a SCSI-connected CD-R/RW drive, the
display will indicate “ID*:Blank Disc.” (* will be the
SCSI ID number.)
An audio CD cannot be created on a disc that con-
tains data other than audio (e.g., files). In this case, it
will not be possible to select the page menu com-
mands “Write to CD” or “Finalize Audio CD.”
Even when the recommended CD-R/RW media is
used, some audio CD players may be unable to play
back the disc. Also, since some audio CD players are
unable to play back CD-RW media, we recommend
that you use CD-R media.