


51
Quick Start
Power on/offDemo songPlaying
programs
Playing
combinations
Using
controllers
ArpeggiatorRPPRProgram
editing
Combination
editing
SamplingSong
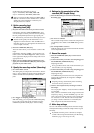
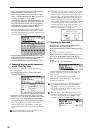
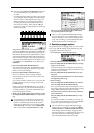
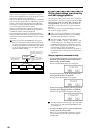
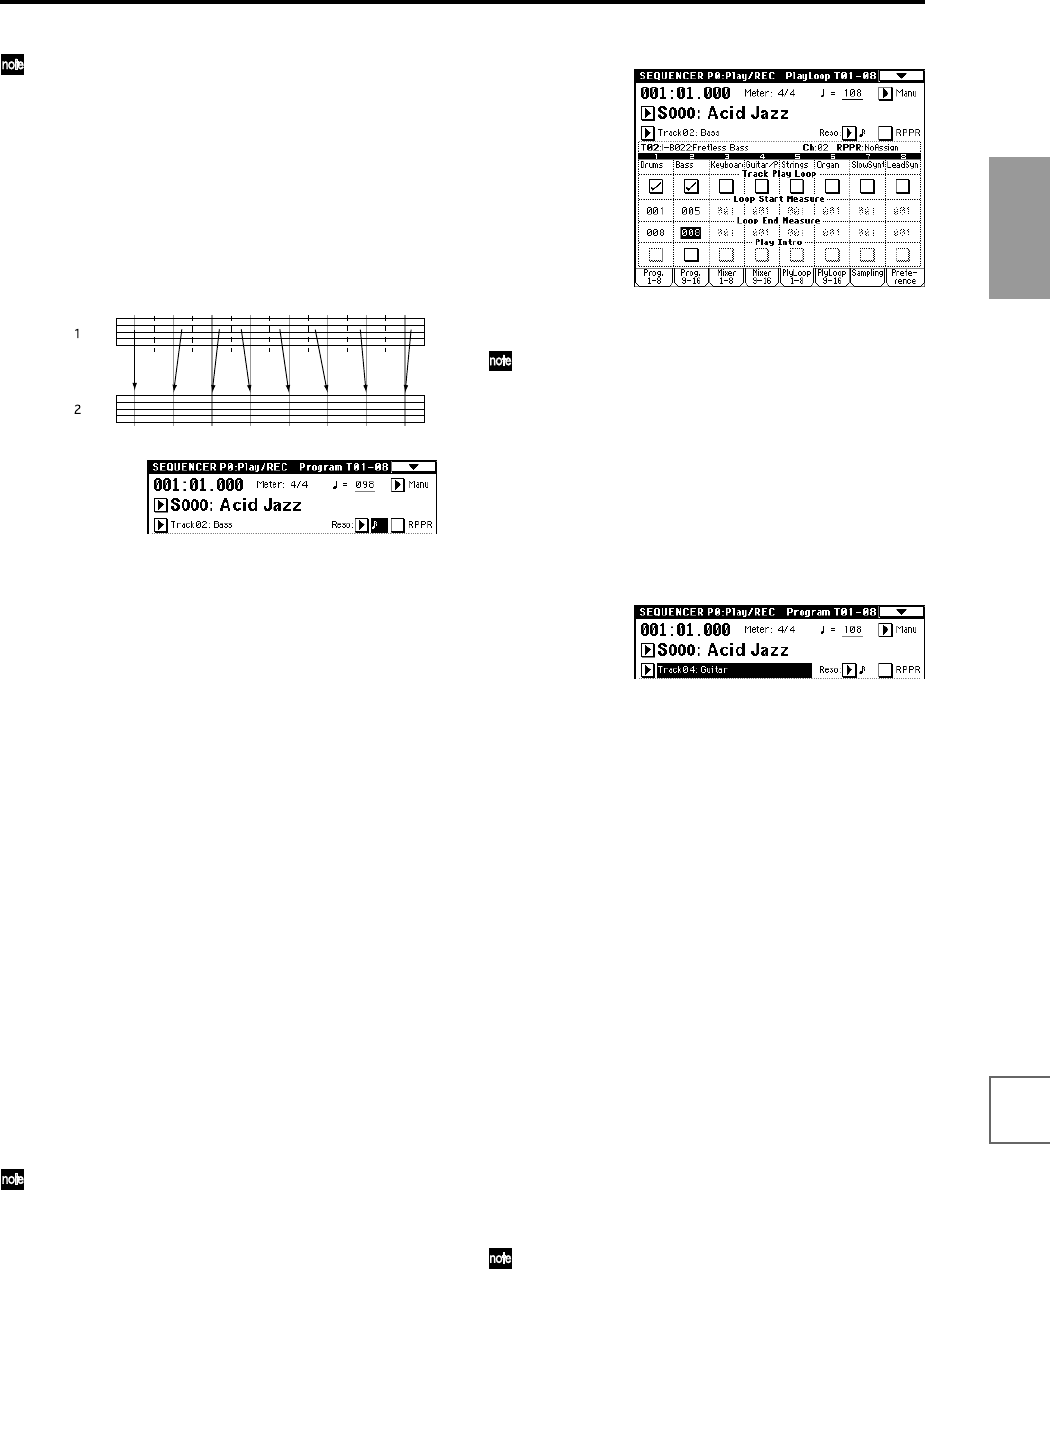
You can use the Quantize and Resolution functions
to correct the timing of your performance as it is
recorded.
For example during realtime recording, suppose that
you input eighth notes at slightly inaccurate timing,
as shown in line 1 of the diagram below. If you set
“Reso” (Resolution) to and performed realtime
recording, the timing would automatically be cor-
rected as shown in line 2. With a setting of Hi, the
performance will be recorded with the exact timing at
which it was played.
Independent of this function, there is also a page menu
command “Quantize” (P5: Track Edit, Track Edit page)
that can be used to correct the timing of performance
data that has already been recorded. If data (recorded
without using Realtime Quantize) falls at the timings
shown in the above figure 1, then when played back, it
will be corrected to the timings shown in figure 2 if you
set “Quantize” to a “Resolution” of and press the
OK button.
4 Press the SEQUENCER [REC/WRITE] key.
You will hear the metronome. The TRITON STUDIO
will be in record-ready mode. (☞Refer to PG p.58 for
details on metronome settings.)
5 Press the SEQUENCER [START/STOP] key.
After a two-measure count, recording will begin.
Play the keyboard for about 16 measures, and record
your performance.
If you make a mistake or decide to re-record, press the
[START/STOP] key to stop recording, and press the
[COMPARE] key.
When you press the [COMPARE] key to execute the
Compare function, you will return to the state prior to
recording. (☞Refer to p.97 for the content that can be
compared in Sequencer mode.)
6 When you are satisfied with your performance, press
the SEQUENCER [START/STOP] key to stop record-
ing.
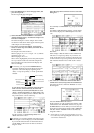
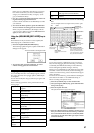
For example if your performance in measures 5–8
was the best take, you can use the Track Play Loop
function to repeatedly play back just this portion.
In the P0: Play/REC, PlayLoop T01–08 page, check
“Track Play Loop” for track 2, set “Loop Start Mea-
sure” to 005, and set “Loop End Measure” to 008.
When you press the SEQUENCER [START/STOP]
key, repeated playback will begin.
After you press the SEQUENCER [START/STOP]
key to stop playback, we recommend that you press
the [LOCATE] key to return to the beginning of the
song. After recording, you will automatically return
to the measure at which recording began.
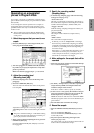
4. Recording arpeggio patterns
The performance of an arpeggio pattern can be recorded
into a song. With the settings of this template song, the
arpeggiator will function on track 4.
1 In “Track Select,” choose Track04: Guitar.
2 Press the ARPEGGIATOR [ON/OFF] key.
3 Press the SEQUENCER [START/STOP] key and play
single notes or chords.
Verify that arpeggios are sounded in synchronization
with the tempo of the drum and bass performance, and
rehearse your performance.
4 Press the SEQUENCER [START/STOP] key to stop
playback.
Then press the [LOCATE] key to move the location to
the beginning of the song.
5 Start recording.
Press the SEQUENCER [REC/WRITE] key, and then
press the SEQUENCER [START/STOP] key.
If you play notes on the keyboard during the count-in,
the arpeggio will begin at the same time that recording
begins, and then that pattern will be recorded.
Play the keyboard for about 16 measures and record
your performance.
Press the SEQUENCER [START/STOP] key to stop
recording.
If you made a mistake or would like to re-record, you
can use the Compare function (press the [COMPARE]
key) to re-record as many times as you wish.
The note data that was generated by the arpeggio
pattern will be recorded. If you change the ARPEG-
GIATOR [GATE] or ARPEGGIATOR [VELOCITY]
knob settings while recording an arpeggio pattern,
this data will also be recorded, but it will not be possi-
ble to add changes by overdubbing [GATE] or
[VELOCITY] data afterward for those notes.