


86
9 When the song ends, stop the external sequencer.
TRITON STUDIO’s sequencer will receive the MIDI
Stop message transmitted by the external sequencer,
and will automatically stop recording. You can also
press the SEQUENCER [START/STOP] key on TRI-
TON STUDIO itself to stop recording.
0 Playback.
In the Global P1: MIDI page, set “MIDI Clock” to
Internal.
Set “Tempo Mode” to Auto.
When you press the SEQUENCER [START/STOP]
key, playback will begin.
If the correct sounds do not play immediately after
playback is started, you may be able to solve the
problem by using the page menu command “Event
Edit” (Sequencer P5: Track Edit) to edit the Program
Change data.
Step recording
This is a method of recording where you specify the note
timing, note length, and velocity etc. in the LCD screen,
and use the keyboard to input the pitches. (☞p.52)
Only note-on/off data can be recorded with this method.
Event Edit and Create Control Data
Note data is the only type of data that can be recorded in
step recording. However there are ways to record other
types of data, aside from the realtime mode. You can use
the Event Edit and Create Control Data functions.
Event Edit is intended as a way to edit previously-
recorded data, but you can also use it to modify program
numbers or insert control changes.
Create Control Data is a function that lets you create and
insert controller data that changes smoothly between two
specified values over the specified length of time. This is
used to input bend, after touch, and control change data
etc.
Realtime-recording to a pattern
Here’s how you can use realtime recording to create a pat-
tern. User patterns can be accessed by the RPPR function
in the same way as preset patterns, and can be copied to
or placed in a song. Playback data from a track can also be
copied to a pattern.
Before you begin recording a pattern, turn off the
memory protect setting in Global mode (☞p.57).
When realtime-recording a pattern, a pattern of the speci-
fied number of measures will playback repeatedly, allow-
ing you to continue adding musical data to it.
1 Create a new song, and as described in “Preparations
for recording,” set the track to the program that will
be used by the pattern. (☞p.82)
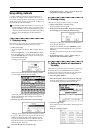
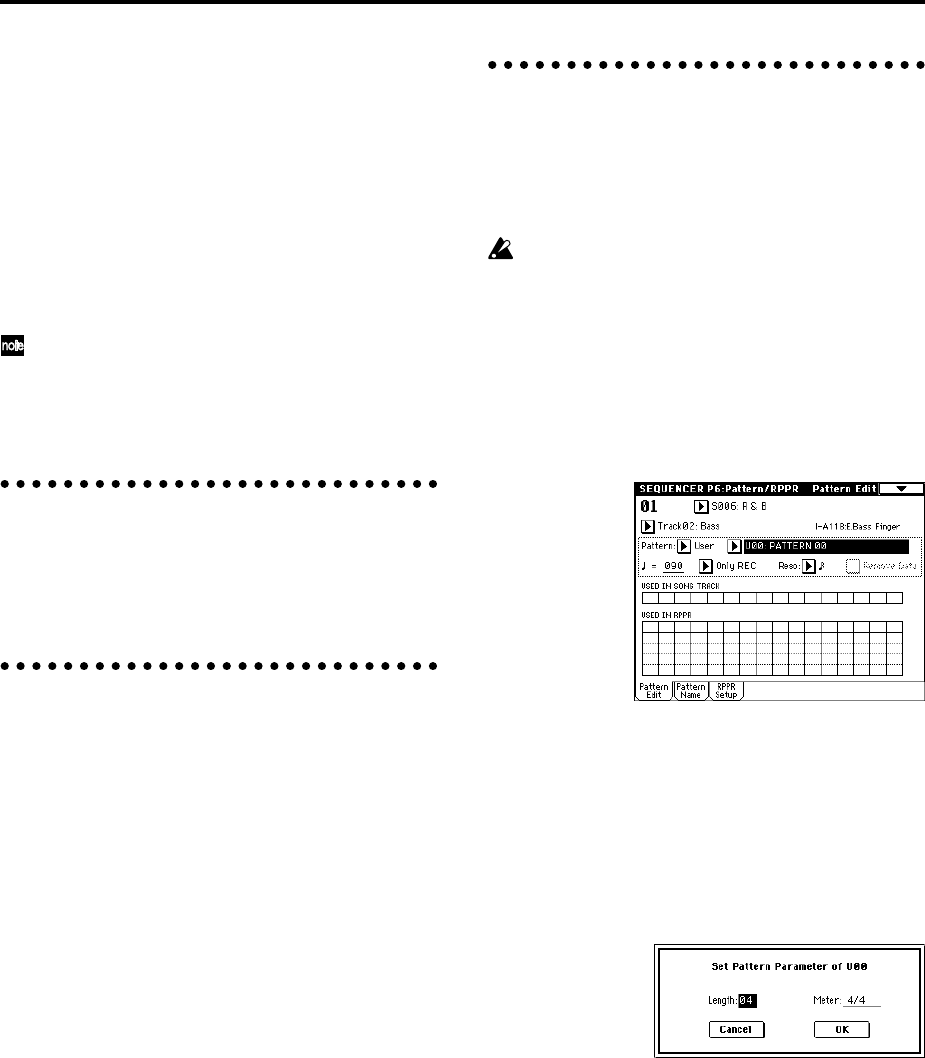
2 Access the Sequencer P6: Pattern/RPPR, Pattern Edit
page.
3 Use “Track Select” to select the track that you will use
to record the pattern.
The pattern will sound with the program and other set-
tings of the selected track.
4 Set “Pattern (Pattern Bank)” to User, and set “Pattern
Select” to U00.
User patterns U00–U99 can be created for each song.
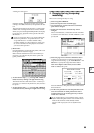
5 Select the page menu command “Pattern Parameter”.
A dialog box will appear.
6 Set the number of measures in the pattern to a
“Length” of 04 (four measures), and set “Meter” to a
time signature of 4/4. Press the OK button.
7 As necessary, set “Resolution” to apply realtime
quantization.
8 Begin realtime recording.
You can record in the same way as you did when
recording tracks with Loop All Tracks. (☞p.85)
Press the SEQUENCER [REC/WRITE] key, and then
press the SEQUENCER [START/STOP] key.
After the pre-count, pattern recording will begin. Play
the keyboard and operate the joystick and other con-
trollers to record your performance.
When you reach the end of the pattern, the sequncer
will return to the beginning of the pattern and continue
recording. If you continue recording, the newly
recorded data will be added to the previously-recorded
data.