


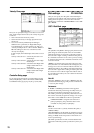

78
Adjusting the BPM of multisamples or samples cre-
ated in Sampling mode
If a timbre’s program uses multisamples or samples that
you created in Sampling mode (or loaded in Disk mode)
at a specific BPM value, you can use the page menu com-
mand “Detune BPM Adjust” to call up a new BPM value.
This changes the BPM by adjusting the playback pitch.
(☞PG p.39)
Other page
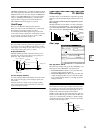
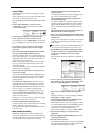
Delay [ms]
Specifies the amount of time before the program assigned
to each timbre will sound. Specifies the time from when
you play the keyboard until the program will sound.
If you select KeyOff for this parameter, the timbre will
sound when the note is released.
Use Program’s Scale, Scale
Specifies the scale for each timbre. If you check “Use Pro-
gram’s Scale,” the scale specified by the program will be
used. Timbres for which this is not checked will use the
Scale setting.
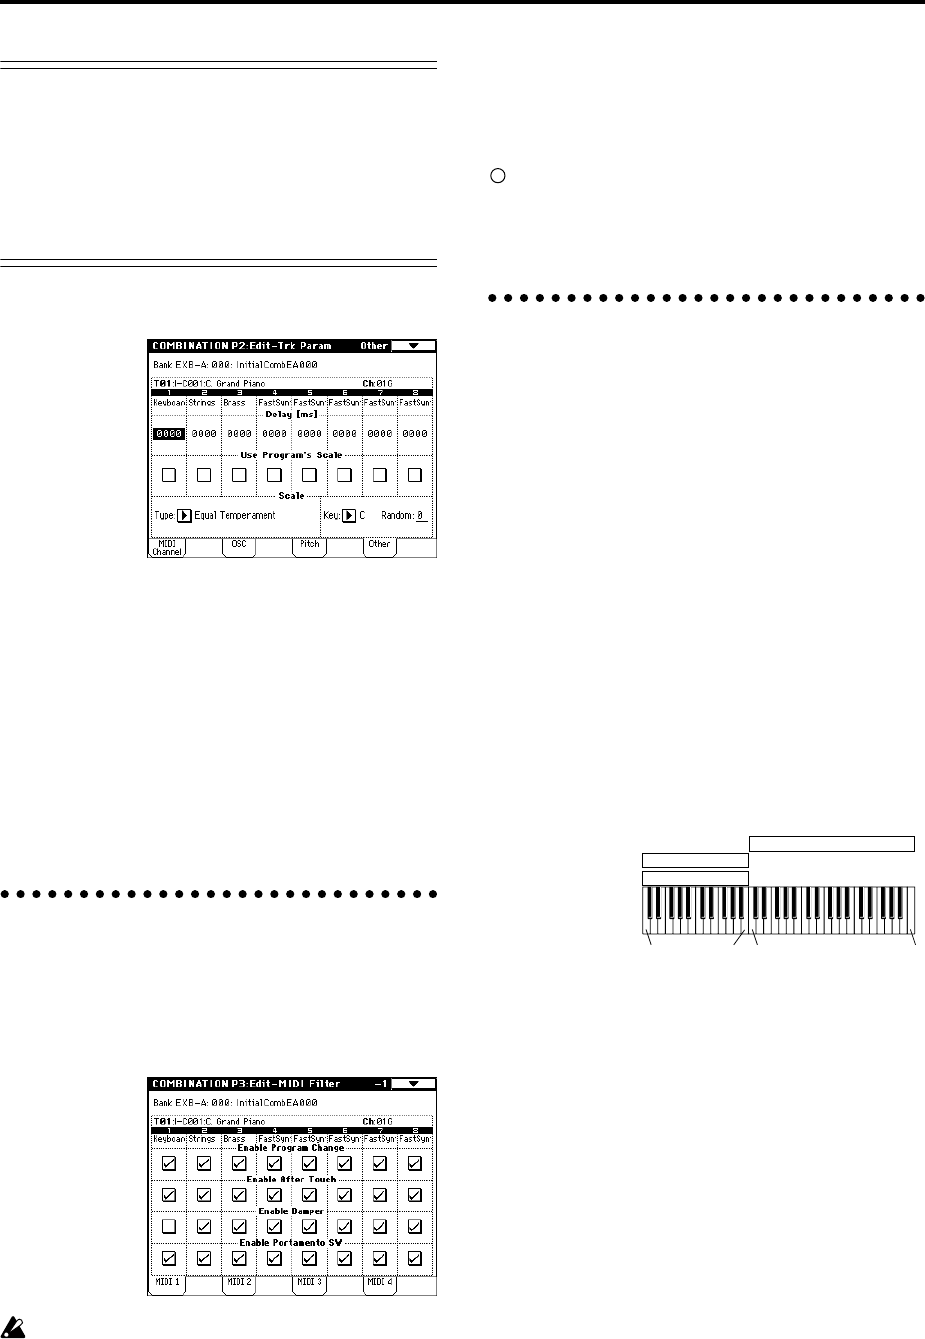
MIDI filter settings
P3: Edit-MIDI Filter
For each MIDI Filter item, you can specify whether or not
the corresponding MIDI message will be transmitted and
received. The checked items will be transmitted and
received.
MIDI filter does not turn the function itself on/off,
but specifies whether or not that MIDI message will
be transmitted and received. For example if porta-
mento is on, portamento will be applied to the sound
of TRITON STUDIO even if “Portamento SW CC#65”
is unchecked.
For example if you selected a bass program for timbre 1
and a piano program for timbre 2 to create a split-type
combination, you could make the following settings so
that pressing the connected damper pedal would apply
the damper effect only to the piano program of timbre 2.
Set the P3: Edit-MIDI Filter-1 “Enable Damper”
parameter
Timbre 1 “Enable Damper”: unchecked
Timbre 2 “Enable Damper”: checked
Layer, split, and velocity switch
settings/Controller settings
P4: Edit-Zone/Ctrl
Key Zone page (Key zone settings)
Indicates settings such as layer, split, and keyboard cross-
fade.
Specifies the range of notes that will be sounded by each
timbre. Each area that sounds a timbre is referred to as a
Key Zone. By setting key zones, you can create a combi-
nation in which different programs sound in different
areas of the keyboard.
By combining key zones specified for each timbre, you
can create layered or split combinations.
The upper and lower limits for the key zone of each tim-
bre are set by the “Top Key” and “Bottom Key” respec-
tively.
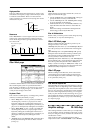
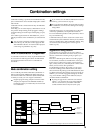
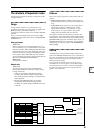
For example in the following diagram, timbres 1–3 are set
to create a layered and split combination. This is specified
by the key zone settings.
Timbres 2 and 3 create a layer. Timbre 1 and timbres 2/3
are split between the B3 and C4 note numbers.
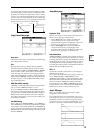
As an example here, we will explain how to create a com-
bination like the one shown above.
1 In the P0: Play, Program Select page or the P1: Edit-
Program/Mixer page, use the “Program Select” area to
select the program that will be used for each timbre
1–3.
Select a piano program for timbre 1.
Select a brass program for timbre 2.
Select a strings program for timbre 3.
2 In the MIDI Ch page of P2: Edit-Trk Param, set “Sta-
tus” to INT for all the timbres that you wish to use,
and set “MIDI Channel” to either Gch or to match the
global MIDI channel (a “G” will be displayed after
the channel number).
3 In the Key Zone page of P4: Edit-Zone/Ctrl, set “Top
Key” and “Bottom Key.”
Set timbre 1 to a “Top Key” of G9 and a “Bottom Key”
of C4.
Set timbres 2 and 3 to a “Top Key” of B3 and a “Bottom
Key” of C–1.
PianoTimbre 1
Brass
Timbre 2
Strings
Timbre 3
C–1 C4 G9B3