


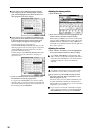
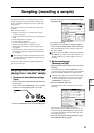
44
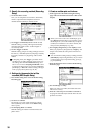
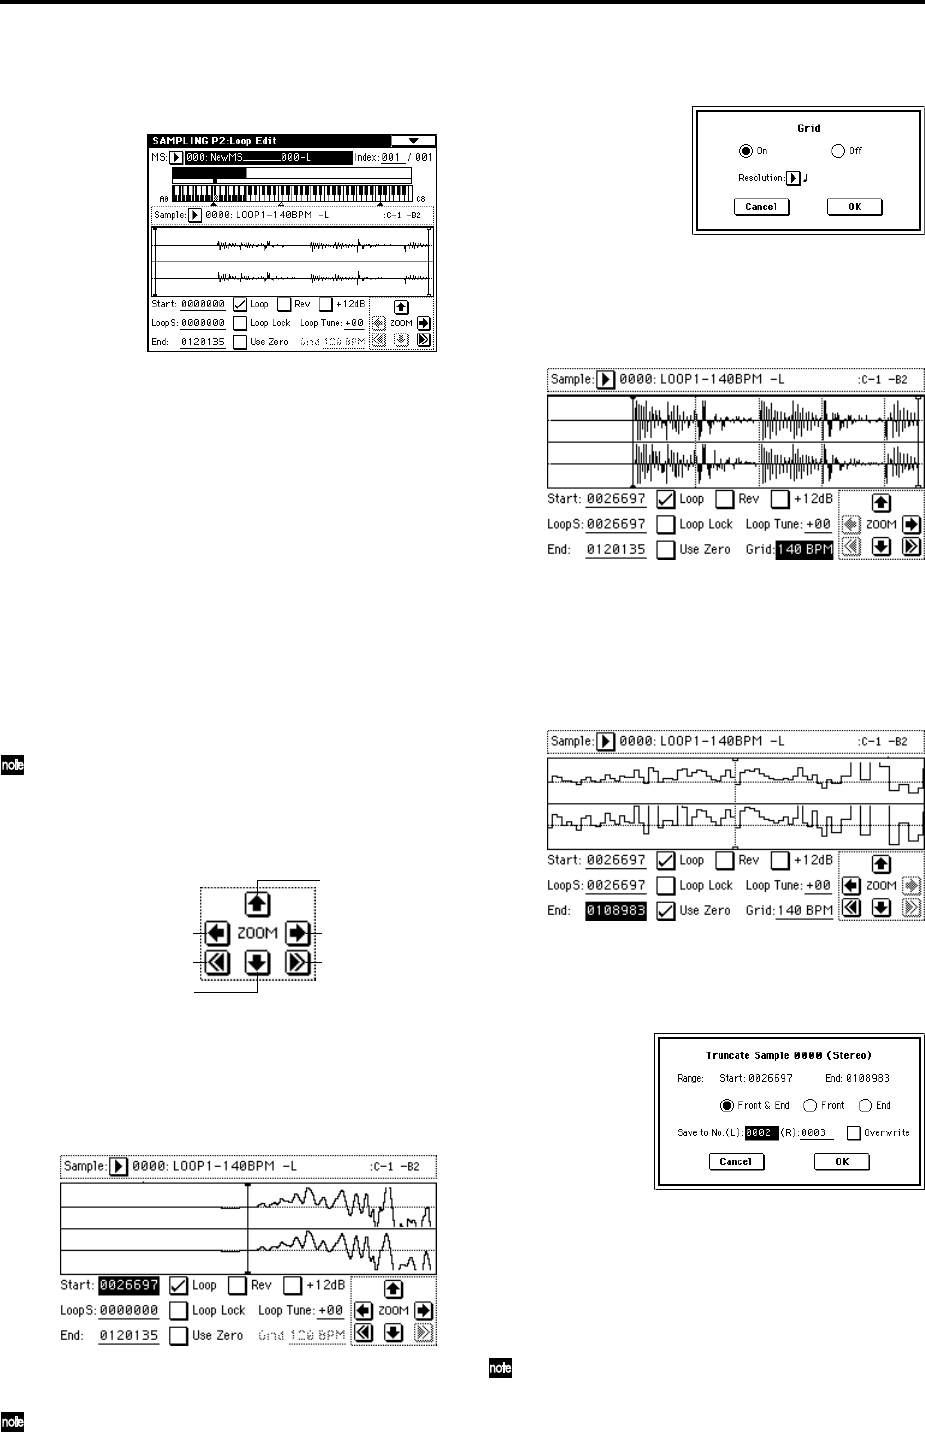
1 Press the [MENU] key to access the page menu, and
press P2: Loop Edit.
The P2: Loop Edit page will appear.
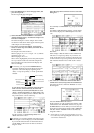
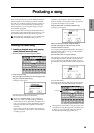
2 Notice that 0000: LOOP1-140BPM-L is selected for
“Sample (Sample Select),” and that the sample wave-
form data is displayed.
The selected sample is a stereo sample. The L and R
waveforms will be shown in the upper and lower parts
of the sample waveform display.
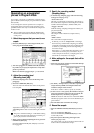
3 Use “Start” to set the start address, “LoopS (Loop
Start)” to set the loop start address, and “End” to set
the end address.
The sample will sound as follows.
When looping is on: S → E → LoopS → E → (continue
repeating LoopS → E)
When looping is off: S → E
Select “Start” (highlighted), and use the [VALUE] dial
etc. to specify the location at which the sample will
begin sounding. The vertical line in the display will
move accordingly.
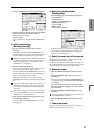
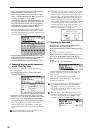
If necessary, you can press the ZOOM buttons to
expand or shrink the waveform display. Zoom will
expand or contract the display beginning at the
“Start,” “LoopS (Loop Start),” or “End” point that is
selected.
If you check “Use Zero,” locations where the wave-
form is at zero will automatically be found and
selected when you use the [VALUE] dial etc. to set
“Start,” “LoopS (Loop Start),” or “End” points. This
makes it easy to set these points to addresses that will
not produce clicks or noise in the loop.
For this example, set “LoopS (Loop Start)” and
“Start” to the same value.
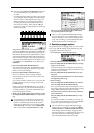
If desired, you can make a dotted vertical line appear
in the sample waveform display to indicate the BPM.
If you use this function with waveforms that have a
specific BPM, it will be easier to make accurate set-
tings for “End.”
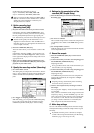
Select the page menu command “Grid” to access the
dialog box.
Check “Grid,” set “Resolution” to , and press the OK
button.
Set “Grid” to 140. With these settings, vertical dotted
lines will be displayed at 140 BPM quarter note inter-
vals.
Set “End.”
When “Loop” is On, the dotted vertical “Grid” lines
will start at “LoopS (Loop Start).” If you want to set
“End” at the end of one 4/4 measure, the fourth verti-
cal line from the “LoopS (Loop Start)” line will be the
end of the first measure. Place “End” at this vertical
line.
4 Use “Truncate” to delete the unwanted data that is
outside of the start (or loop start) and end addresses.
Select the page menu command “Truncate” to access
the dialog box.
Select the Front & End radio button.
In this example, we will not change the settings of the
“Save to No.” and “Overwrite” check boxes, so press
the OK button to execute. When you execute the oper-
ation, the truncated samples 0002: LOOP1-140B0002-L
and 0003: LOOP1-140B0002-R will be automatically
assigned to Index 1.
Please refer to “A note on saving samples” (☞p.111)
for a cautionary note regarding the “Save to No.” and
“Overwrite” check boxes.
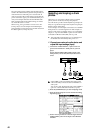
Zoom-in vertically
Zoom-out vertically
Zoom-out horizontally
Zoom-in horizontally
Maximum
horizontal zoom-out
1x horizontal zoom-in