


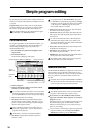
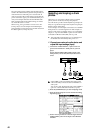
38
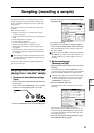
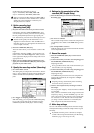
3. Specify the recording method (Recording
Setup)
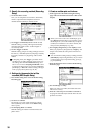
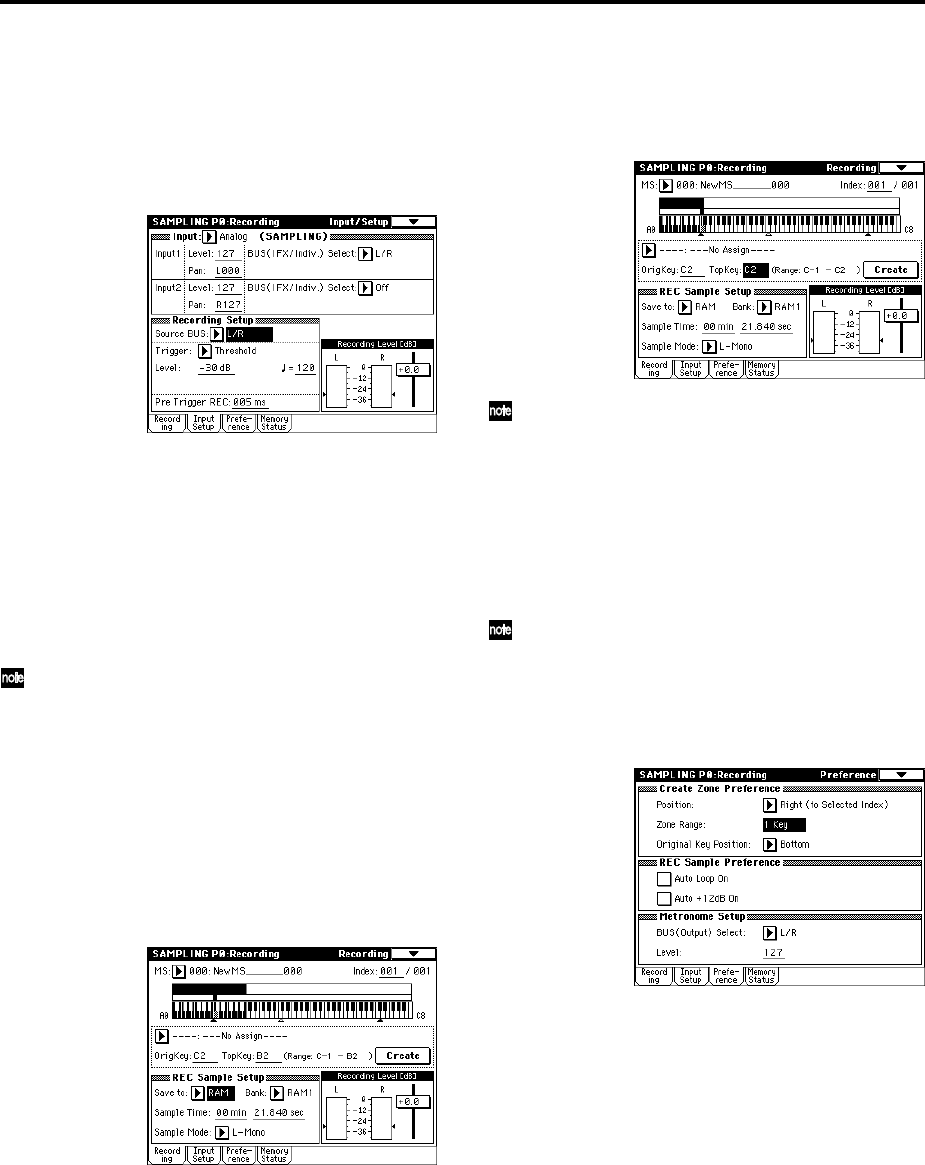
1 Set “Source BUS” to L/R.
Now you can sample the sound of the L/R channels,
which is output from the headphones and from
AUDIO OUTPUT (MAIN) L/MONO and R.
2 Set “Trigger” to Threshold, and set “Level” to –30.
With this setting, recording will begin automatically
when the audio input reaches –30 dB or higher in
record-ready mode.
3 Set “Pre Trigger” to 005 ms.
With this setting, sample recording will begin 5 ms ear-
lier than (i.e., immediately before) sampling is actually
triggered, so that the very beginning of the sound is
not lost.
In Sampling mode, the “Trigger” parameter which
specifies how recording will begin can be set to vari-
ous settings other than the Threshold setting used
above. You can choose Sampling START SW so that
recording will begin when you press the SAMPLING
[START] key, or Note On so that recording will begin
when you play the keyboard. (☞p.43, 45)
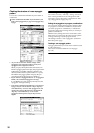
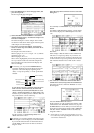
4. Settings for the sample that will be
recorded (REC Sample Setup)
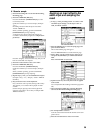
1 Press the Recording tab to access the P0: Recording,
Recording page.
2 Set “Save to” to RAM.
The sample you record will be written into sample
memory (RAM). (☞For details on the DISK setting,
refer to p.105)
3 Set “Sampling Mode” to L-Mono.
With this setting, the internal L channel will be sam-
pled in mono.
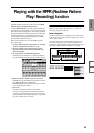
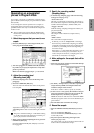
5. Create a multisample and indexes
1 In the upper left of the P0: Recording, Recording
page, make sure that 000 is selected for “MS” (multi-
sample).
When you want to create a new multisample, press
the “MS (Multisample Select)” popup button, press a
Multisample No. (or use the numeric keys to input a
number) for which there is no name in the list, and
then press the [ENTER] key. (☞p.106)
2 Set “OrigKey (Original Key)” and “TopKey” to C2.
When you play the key designated by “OrigKey,” the
sample will sound at the same pitch at which it was
sampled.
You can make this setting easily by holding down the
[ENTER] key and pressing the C2 key. If you want to
use the numeric keys to input this setting, press [3],
[6], and [ENTER].
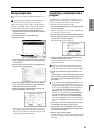
3 Press the Preference tab to access the P0: Recording,
Preference page.
4 Set “Zone Range” to 1 Key.
When you create a new index, the width of the zone
will be set to one key.
5 Press the “Auto Loop On” check box to uncheck it.
Looping will automatically be turned off for the sam-
ple that is recorded.