


Storing and Recalling Scenes 69
01V96i—Reference Manual
Scene Memories
Storing and Recalling
Scenes
You can store and recall Scenes by pressing the buttons on the
top panel or using the dedicated Scene memory page on the
display.
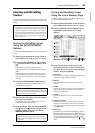
Storing and Recalling Scenes
Using the SCENE MEMORY
Buttons
You can use the SCENE MEMORY buttons to store and recall
Scenes.
1. Adjust the mix parameters on the 01V96i to
the conditions you wish to store as a Scene.
2. Press the SCENE MEMORY Up [ ] or Down
[ ] buttons to select a Scene memory num-
ber.
If you select a Scene memory other than the cur-
rently-recalled Scene, its number flashes at the to of the
display.
Scene memories #U (“Ud”) and #0 (“00”) are special
read-only memories, to which you cannot store Scenes.
Also, you cannot store Scenes to write-protected Scene
memories.
3. Press the SCENE MEMORY [STORE] button.
The Title Edit window appears, which enables you to
name the Scene to be stored.
4. Enter the title, move the cursor to the OK but-
ton, then press [ENTER].
The Title Edit window closes and the current Scene is
stored to the selected Scene memory.
5. To recall a Scene, press the SCENE MEMORY
Up [ ] or Down [ ] buttons to select a Scene
memory number, then press the SCENE
MEMORY [RECALL] button.
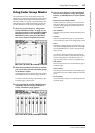
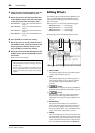
Storing and Recalling Scenes
Using the Scene Memory Page
On the Scene Memory page, you can store, recall, write-pro-
tect, delete, and edit the titles of Scenes.
1. Adjust the mix parameters on the 01V96i to
the conditions you wish to store as a Scene.
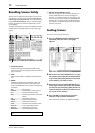
2. Press the DISPLAY ACCESS [SCENE] button
repeatedly until the Scene | Scene page
appears.
3. Rotate the Parameter wheel or press the
[INC]/[DEC] buttons to select a Scene mem-
ory, move the cursor to one of the following
buttons, then press [ENTER].
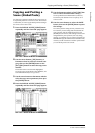
1 TITLE EDIT
Select this button to display the Title Edit window, which
enables you to edit a selected Scene title.
2 RECALL
This button recalls the contents of the selected Scene
memory.
3 STORE
This button stores the current Scene to the selected Scene
memory. By default, a confirmation window appears
before you store the Scene.
4 CLEAR
This button deletes the contents of the selected Scene
memory.
5 PROTECT ON/OFF
This button switches on and off the write-protection of
the contents of the selected Scene memory. A padlock
icon ( ) appears next to the title of a Scene memory that
is write-protected.
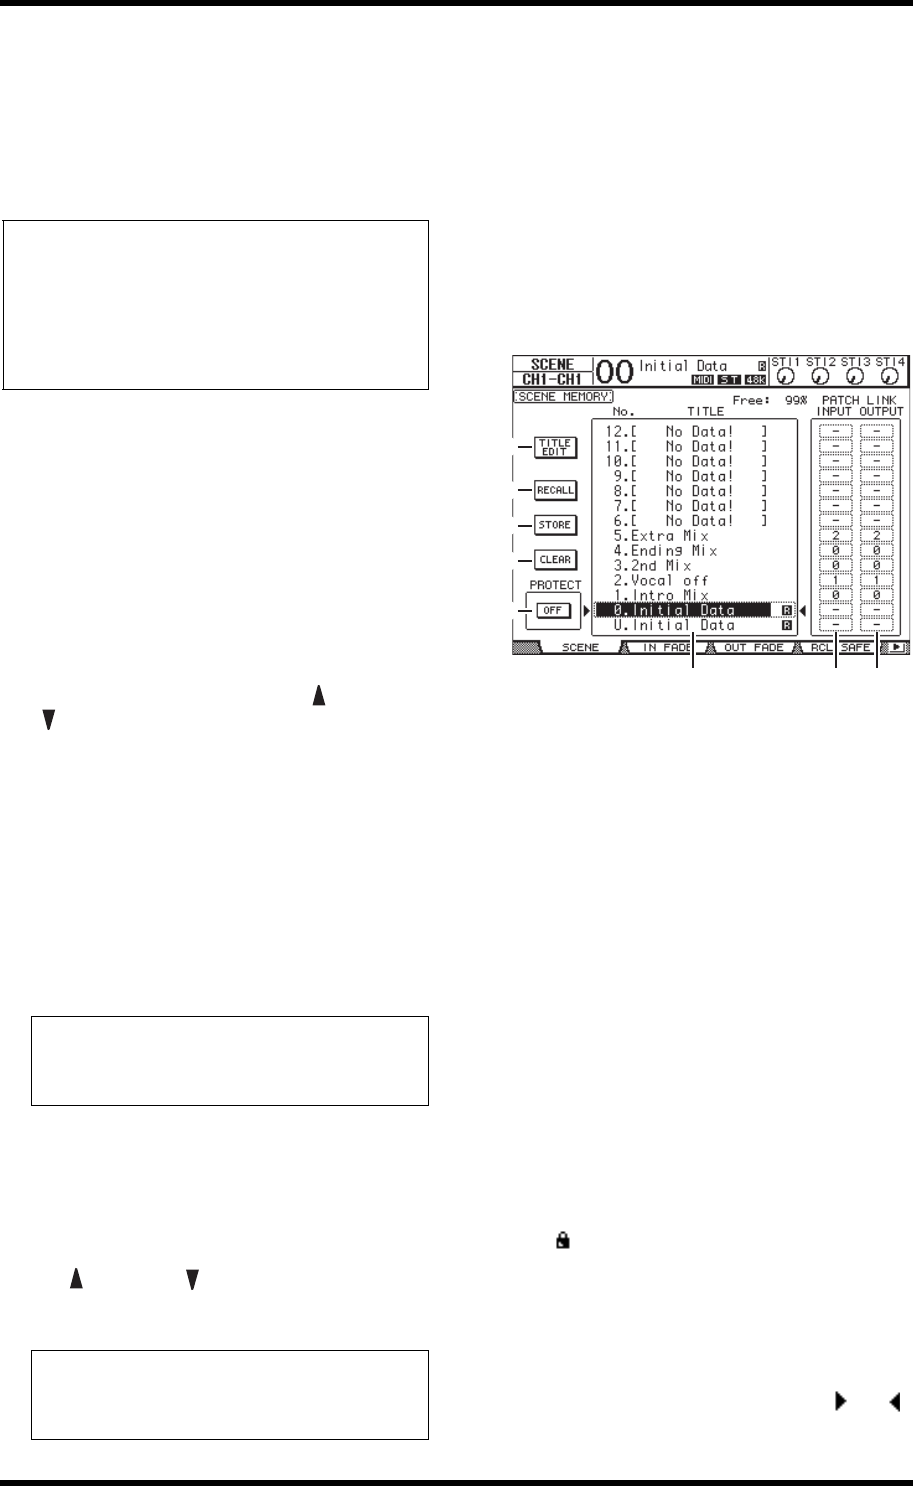
6 Library list
Scene memories 01–99 are listed in the library memory
title list. The titles of stored Scenes are indicated in the
title column. The message “No Data!” appears in the title
column of empty library memories. The selected mem-
ory appears inside the dotted box between the and
marks.
Note:
•
When you store Scenes, make sure that there are no settings in
the Edit Buffer that you do not want to store. Make sure that no
settings, especially faders, have been adjusted unintentionally.
• If you are not sure of the Edit Buffer’s contents, recall the last
Scene, make the adjustments you want, then store the Scene.
You may wish to store the current Scene to an unused Scene
memory, just in case.
Tip: You can disable this window by turning the Store Con-
firmation parameter to Off on the DIO/Setup | Prefer1 page
(see page 109). In this case, the stored Scene will hve the same
name as the one recalled most-recently.
Tip: If you turn the Recall Confirmation parameter to On on
the DIO/Setup | Prefer1 page, a Scene recall confirmation
window for Scene recalls appears before the Scene is recalled
(see page 109).
1
2
3
4
5
7
6 8