


39
Step 11. Rhythm/tempo settings
The D16 contains numerous rhythm patterns for a vari-
ety of time signatures (→p.114 “Rhythm Pattern List”).
When you have a sudden idea for a song, you can
record your performance immediately, using the built-
in rhythms as a guide.
By joining various rhythm patterns, you can also create
drum patterns for an entire song.
Specifying and playing a rhythm
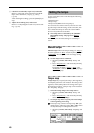
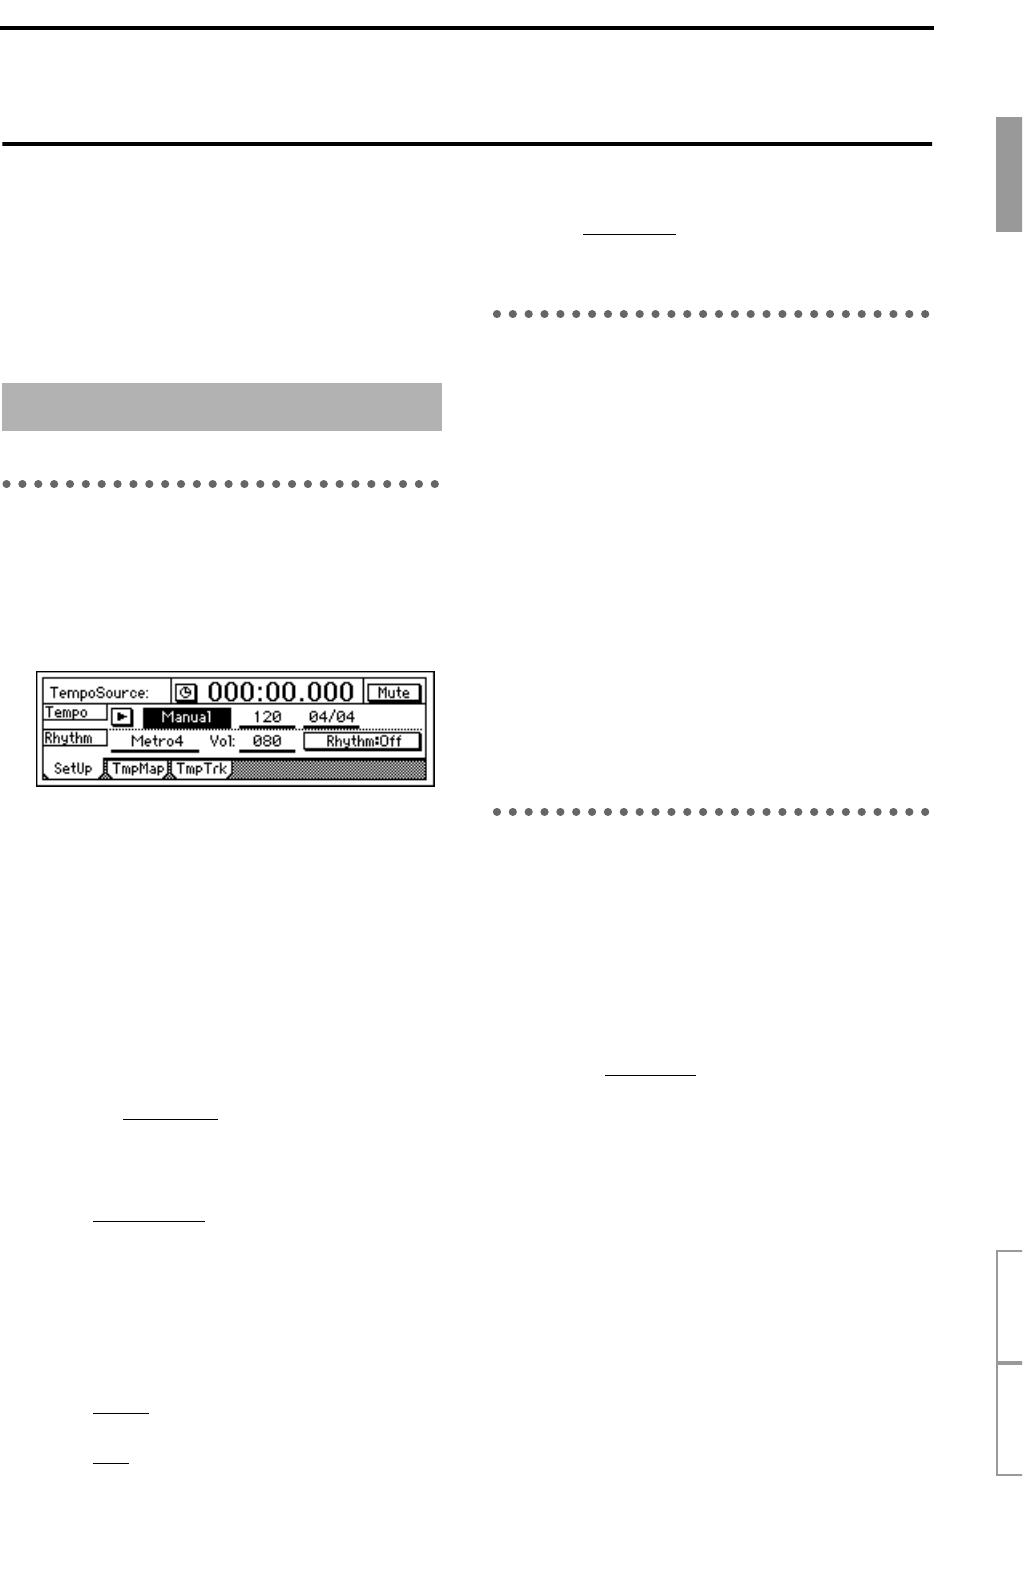
● Select the [TEMPO/RHYTHM] “SetUp” tab page.
The settings described below are made in this
page.
When you enter this page, a rhythm will sound. To
silence it, press the “Mute” button.
Turning the rhythm on/off
● Press the “Rhythm” button to turn it “On” (high-
lighted).
The [TEMPO/RHYTHM] the key will light, and
the rhythm will sound during playback or record-
ing.
If you do not want the rhythm to be heard during
playback or recording, press the “Rhythm” button
once again to turn it “Off.”
Adjusting the rhythm volume
● Press the “RhythmVol (Vol),” and rotate the
[VALUE] dial to adjust the volume.
Setting the tempo and time signature
1 Press “TempoSource,” and select the tempo
source.
For this example, we will select “Manual” which
will use a single tempo, time signature, and
rhythm pattern.
If you wish to change the tempo, time signature,
and rhythm pattern during the song, you must cre-
ate a Tempo Map. (→p.40)
2 Press “T
empo,” and rotate the [VALUE] dial to
adjust the tempo.
3 Press “Beat
,” and rotate the [VALUE] dial to set
the time signature.
Selecting the rhythm pattern
● Press “SelRhythm,” and rotate the [VALUE] dial
to select the desired rhythm pattern.
Recording your performance while
you listen to the rhythm
You can record your performance while listening to the
built-in rhythm as a guide.
1 Make settings as described in “Specifying and
playing a rhythm.”
• Turn “Rhythm” “On.”
• Make other settings as necessary.
2 Connect your input device, and begin recording.
Refer to “1. Selecting the input/record track” and
“2. Adjusting the record level, and recording”
(→p.16, 18).
When you press the [REC] key to enter record-
ready mode, a count will sound. Recording will
begin when you press the [PLAY] key. You will
hear the selected rhythm pattern. Begin perform-
ing, using the rhythm as a guide.
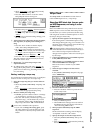
Recording the rhythm
Built-in rhythm patterns can be recorded on a track.
As an example, here’s how the rhythm pattern can be
recorded on mixer channels 1 and 2.
1 Make settings as described in “Specifying and
playing a rhythm.”
• Turn “Rhythm” “Off.” (If this is turned “On,”
the sound will be doubled; on the tracks and
also on the master LR bus.)
• Since “RhythmV
ol (Vol)” adjusts the send vol-
ume to the master LR bus, you do not need to
set it in this example. You will use each mixer
channel to set the volume.
• Make other settings as necessary.
2 Specify the input channels.
• Select the [INPUT] “Ch1–8” tab page.
• Press the “Ch1” icon, and rotate the [VALUE]
dial to select “Rhythm L.” In the same way, set
“Ch2” to “Rhythm R.”
3 Specify the recording tracks.
Press [TRACK STATUS] keys for tracks 1 and 2 to
set them to REC (LED lit red).
4 Check the record mode.
• Select the [RECORD] “RecMode” tab page.
• Select “Input” (= record the input).
Playing rhythms
Basic operation
Song editing
Rh
y
thm
/
tem
p
o