3
Introduction
Panel overview of
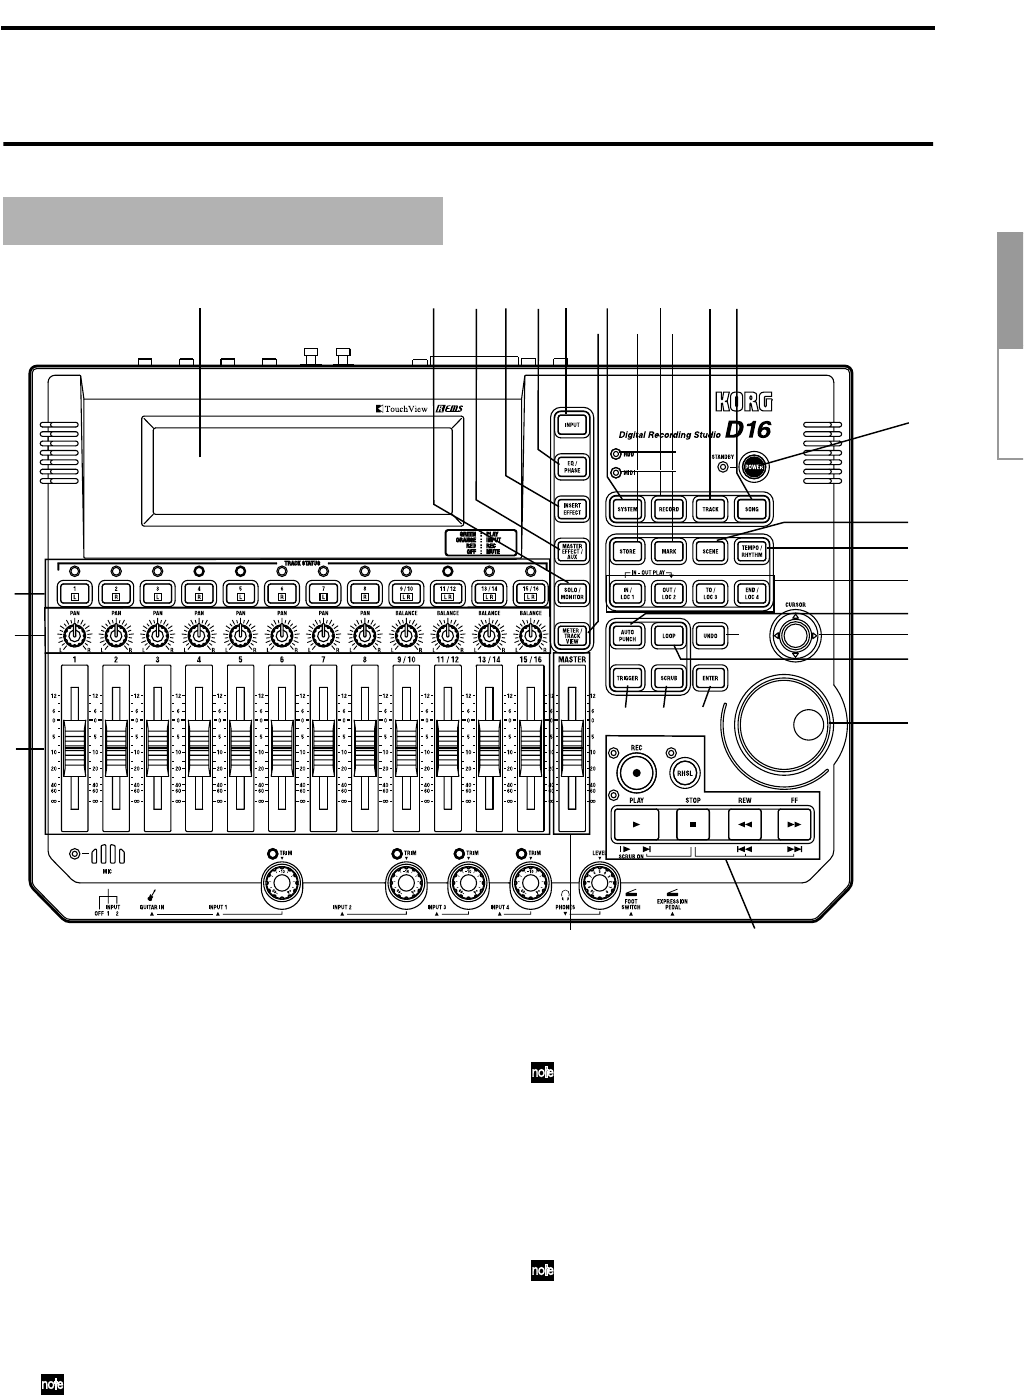
Panel overview of the D16
1 LCD screen
The D16 uses a TouchView system based on a
touch panel screen. By pressing objects that are
shown in the LCD screen, you can select pages,
tabs, and parameters, and set their values.
During recording/playback, this area displays vol-
ume data (level meters), time data (locator), and
various parameters. (→p.8)
2 [TRACK STATUS] keys
These keys are used to put each track into playback
or record status, or to mute (silence) it. Each time
you press a key, the track setting will alternate
(LED color lit, dark). (→p.86)
When recording from analog/digital input, you
can select up to eight recording tracks.
These settings can be paired.
3 [PAN] knobs (Ch 1…8)
[BALANCE] knobs (Ch 9…16)
These knobs adjust the stereo location of each
channel.
For channels 1–8 they adjust the pan of each chan-
nel. For channels 9–16 they adjust the balance.
(→p.86)
These settings can be paired, and registered in
a scene.
4 [CHANNEL] faders
(Ch1…8, Ch9/10…15/16)
These faders adjust the recording/playback vol-
ume of each channel.
Channels 9–16 are stereo faders. (→p.86)
These settings can be paired, and registered in
a scene.
5 [MASTER] fader
This fader sets the overall volume of all channels.
When bouncing, it sets the recording level of the
bounce destination tracks. (→p.86)
6 [INPUT] key
This key is used to select the mixer channel to
which the audio signal from each input will be
Top panel
1
2
3
4
5
678
910
11
12 13 1415
16
17
18
19
20
21
22
23
24 25
26
27
28
29
30
31
32
* For the mic and trim controls etc., refer to the “Front panel” section.


