


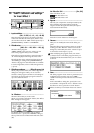

84
P1 Solo: Solo select
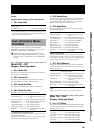
1. SelectSolo.......................[1…8, 9–10…15–16,
S1, S2, A1, R1, R2/On, Off]
Switch the solo function on/off.
Only the audio for which the “Solo” button is “On”
will be sent to the monitor bus. Use this function
when you wish to hear only a specific channel (or
channels) out of multiple audio sources, or to check
the send etc. The solo signal will be output to the
[MONITOR OUT L/R] jacks and to the [PHONES]
jack.
If one or more are “On,” the [SOLO/MONITOR]
key will blink.
On: Solo is on. Only the selected signal(s) will
be heard.
Off: Solo is off. If another signal is set to solo on,
signals for which solo is off will be muted.
1…8: Mixer channels 1–8
9–10…15–16: Mixer channels 9–10 – 15–16
S1, S2: Sends to master effects 1 and 2
A1: Send to external output [AUX OUT] jack
R1, R2: Return from master effect 1 and 2
To adjust the volume of each signal, use the corre-
sponding pages or knobs. Be aware that when you
switch the signal that is selected, some settings may
cause the monitor volume to change dramatically.
Please use caution.
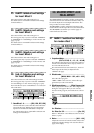
2. ClearAll..........................................................
This turns “Off” all “SoloSelect” settings that were
“On.”
3. SoloToMstOut.....................................[On, Off]
This specifies whether or not the solo signal will be
output from the [MASTER OUT L/R] jacks. Use
this setting if you have connected your monitor sys-
tem to the [MASTER OUT L/R] jacks and wish to
use it for soloing.
On: The solo signal will be output
from the [MASTER OUT L/R] jacks.
Off: Normal operation. The solo
signal will be output from the [MONITOR OUT L/
R] jacks and from the [PHONE] jack.
The “On” setting is valid only within the [SOLO/
MONITOR] page. When you exit this page, it will
automatically be turned “Off.”
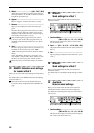
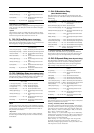
P2 Monitor: Monitor settings
Select the audio signals that will be output from the
monitor output ([MONITOR OUT L/R] jacks) and the
headphone output ([PHONES] jack).
1. SelectMonitor..................................................
[MasterLR, Cue, Rhythm, (Solo)/On, Off]
Select the audio signals that will be output from the
[MONITOR OUT L/R] jacks and the [PHONES]
jack.
On: The signal will be output for moni-
toring.
Off: The signal will not be output for
monitoring.
MasterLR: The master LR bus will be output for
monitoring. Normally you will select this.
Cue: The channels specified by “Level” will be out-
put for monitoring. Select this when you wish to
adjust the monitor volume and pan for comfort
during recording without affecting the recording
levels.
Rhythm: The built-in rhythm sound will be directly
output for monitoring. During a live performance,
you can use this to output the sound of the tracks
from the [MASTER OUT L/R] jacks, and use the
headphones to listen only to the rhythm. Normally
you will leave this off.
(Solo): If solo is turned “On” for even one source in
the “Solo” tab page, this will be selected automati-
cally, and it will not be possible to select “Mas-
terLR,” “Cue.” To select these, you must first turn
solo “Off” in the “Solo” tab page.
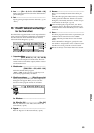
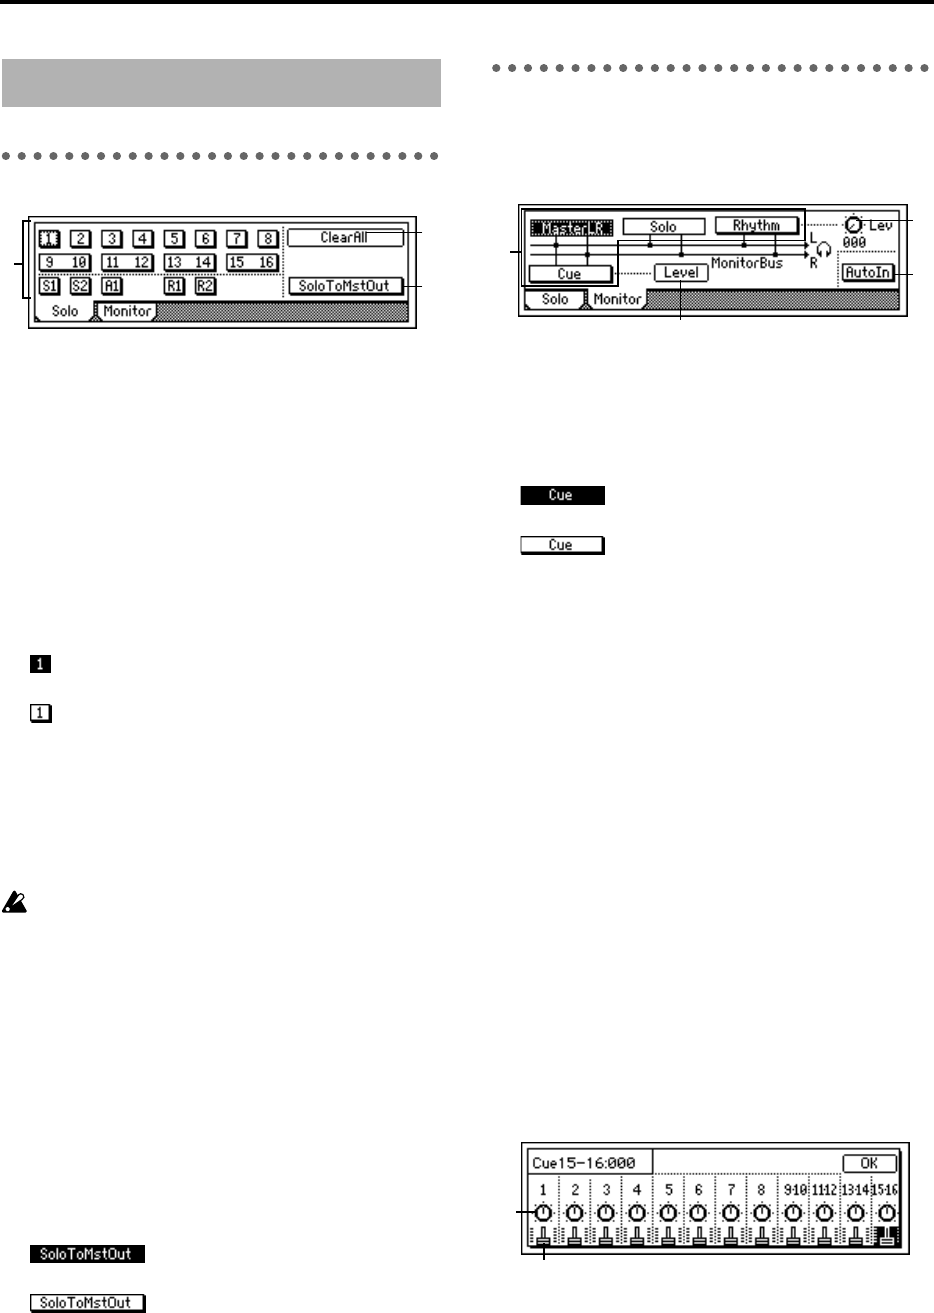
2. Level...............................................................
Set the volume level and panning of each mixer
channel when “Cue” is turned “On” in “SelectMon-
itor.” Press the “Level” button, and view and adjust
the settings in the “cue setting page.”
2a. Pan (Ch1–8)/Balance (Ch9–16)..................
[L63…CNT…R63]
Set the monitoring pan and balance for each chan-
nel/cue signal.
2b. Cue .........................................[000…100]
Set the monitoring output volume for each chan-
nel/cue signal.
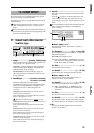
21. SOLO/MONITOR
1
2
3
2
1
3
4
2b
2a