124
To add the file, press the Insert button.
You can continue adding files until you press the Exit
button. The files will be added to the track list in the
order in which you selected them. If you want to add
all the WAVE files in the directory, press the Insert All
button.
When you have finished adding files to the list, press
the Exit button to close the dialog box.
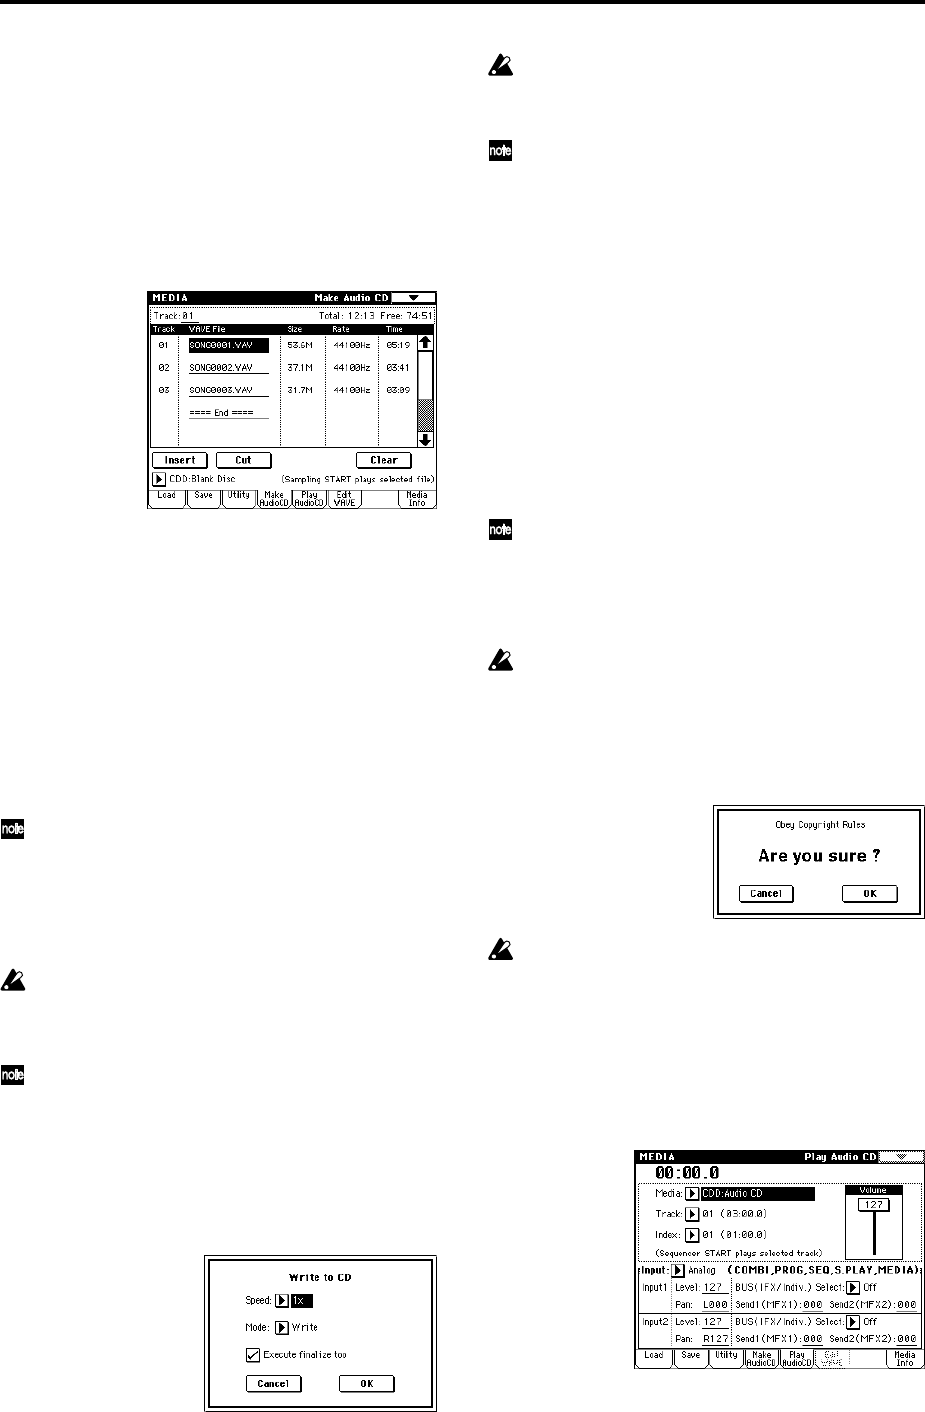
Notice that the WAVE files have been added to the
track list.
In this page as well, you can select a WAVE file and
press the SAMPLING [START/STOP] key to play back
the sample.
To add other WAVE files to the track list, press the
Insert button once again.
If you want to add another track, select the WAVE file
that follows the track you want to add. If you want to
add the track to the end of the track list, select
“====End====.” Then press the Insert button.
To delete a WAVE file from the track list, select the
WAVE file that you want to delete, and press the Cut
button.
Subsequent tracks will be moved forward in the list.
For details on editing operations such as Clear and
Swap Track, refer to PG p.195.
3 Insert a blank CD-R or CD-RW disk into the drive.
In the Make Audio CD page, use “Media Select” to
select your CD-R/RW drive. The CD-R/RW drive is
shown as “CDD: Blank Disc.”
An audio CD cannot be created on a disc that con-
tains data other than audio (e.g., files). In this case, it
will not be possible to select the page menu com-
mands “Write to CD” or “Finalize Audio CD.”
Even when the recommended CD-R/RW media is
used, some audio CD players may be unable to play
back the disc. Also, since some audio CD players are
unable to play back CD-RW media, we recommend
that you use CD-R media.
4 Select the page menu command “Write to CD” to
access the dialog box, and specify how the CD will be
written.
Use “Speed” to set the writing speed. This will indicate
the speeds supported by the CD-R/RW drive you are
using.
In this example, set “Speed” to 1x.
Be aware that if you use a faster writing speed in a
slower system, writing errors will occur.
Use “Mode” to specify the writing method.
Depending on the drive you are using, it may not be
possible to write at the specified speed. We recom-
mend that the first time you write, you select Test to
perform a writing test in order to determine the
speed capabilities of your drive. Test will not write
data to the CD-R/RW media, but will perform all
other processing just as when data is actually written.
If an error occurs, the display will indicate “Error in
writing to medium.”
Press the OK button to execute the writing test.
After verifying that data can be written correctly at
the specified speed, select Write.
“Execute finalize too” specifies whether Finalization
will be executed after the audio tracks have been writ-
ten to the CD-R/RW media. If finalization has been
executed, the disc can be played back on a CD player,
but it will no longer be possible to add more tracks.
If you only want to execute finalization, execute
“Finalize Audio CD.”
5 When you are ready to write to the CD-R/RW media,
or to execute a writing test, press the OK button. To
cancel without executing, press the Cancel button.
When you press the OK button, the “Obey Copyright
Rules” dialog box will appear.
Carefully read “About copyright” (☞QS p.iii). If you
accept the terms, press the OK button to write to the
CD or to perform the test. If you do not accept the
terms, press the Cancel button to cancel the opera-
tion.
In order to avoid causing errors, do not subject the
drive to physical shock or vibration while CD-R/RW
media is being written.
6 An audio CD to which audio tracks have been writ-
ten and which has been finalized can be played in the
Play Audio CD page, allowing you to hear the CD
you have created.
Press the Play Audio CD tab to access the Play Audio
CD page.
