


73
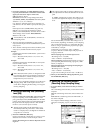
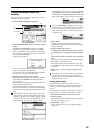
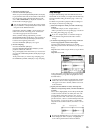
8 Adjust the recording level.
Press the SAMPLING [REC] key.
When you press the SEQUENCER [START/STOP] key
to play back the audio CD, the level meter will indicate
the volume that will be sampled. If the display indi-
cates “ADC OVERLOAD !!,” adjust the “Volume” in
the P5: Audio CD, Ripping page.
You can also adjust the level from the volume control
of your USB drive or the [LEVEL] knob located on the
rear panel of the TRITON Extreme.
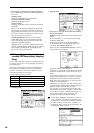
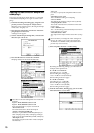
If the display indicates “CLIP!!,” use the VALUE con-
trollers to lower the “Recording Level” slider below
+0.0 until an appropriate level is reached.
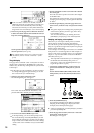
When you finish making adjustments, press the
SEQUENCER [START/STOP] key to stop playback of
the audio CD. Press the [LOCATE] key to return the
location to the beginning of the track.
Press the SAMPLING [REC] key once again.
9 Execute sampling.
Press the SAMPLING [REC] key.
Press the SEQUENCER [START/STOP] key to start
playback of the audio CD track.
At a point slightly earlier than where you want to sam-
ple, press the SAMPLING [START/STOP] key to begin
sampling.
At the point where you want to stop sampling, press
the SAMPLING [START/STOP] key to stop sampling.
Loop settings
Using the default settings after the TRITON Extreme is
first turned on, the sounds you sample will automatically
be looped (P0: Recording, Preference page “Auto Loop
On” On)
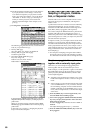
To edit the loop and other playback address settings for
the sample, use the P2: Loop Edit page.
1 Select the sample for which you wish to make loop
settings.
To select the sample, use the “Sample Select” or
“Index” parameters of P2: Loop Edit page or of the P0:
Recording, Recording page. (☞p.69)
If you use “Sample Select” to select the sample, be
aware that the assignment to the index will also
change.
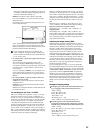
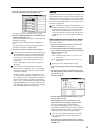
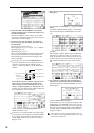
2 In the P2: Loop Edit page, use the “Loop” check box
to turn loop playback on/off for the sample.
Looping will be turned on if the box is checked.
This will operate between the addresses you specify in
step 3.
Loop On: Start→End→LoopS→End→ (LoopS→End is
repeated)
Loop Off: Start→End
To play the sample, press the key to which the sample
is assigned (the key range that is highlighted in “Key-
board & Index”).
A sample waveform that was sampled with “Sample
Mode” set to Stereo will be displayed in two levels.
The upper level is the L channel, and the lower level
is the R channel.
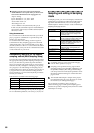
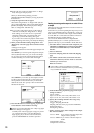
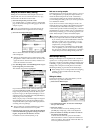
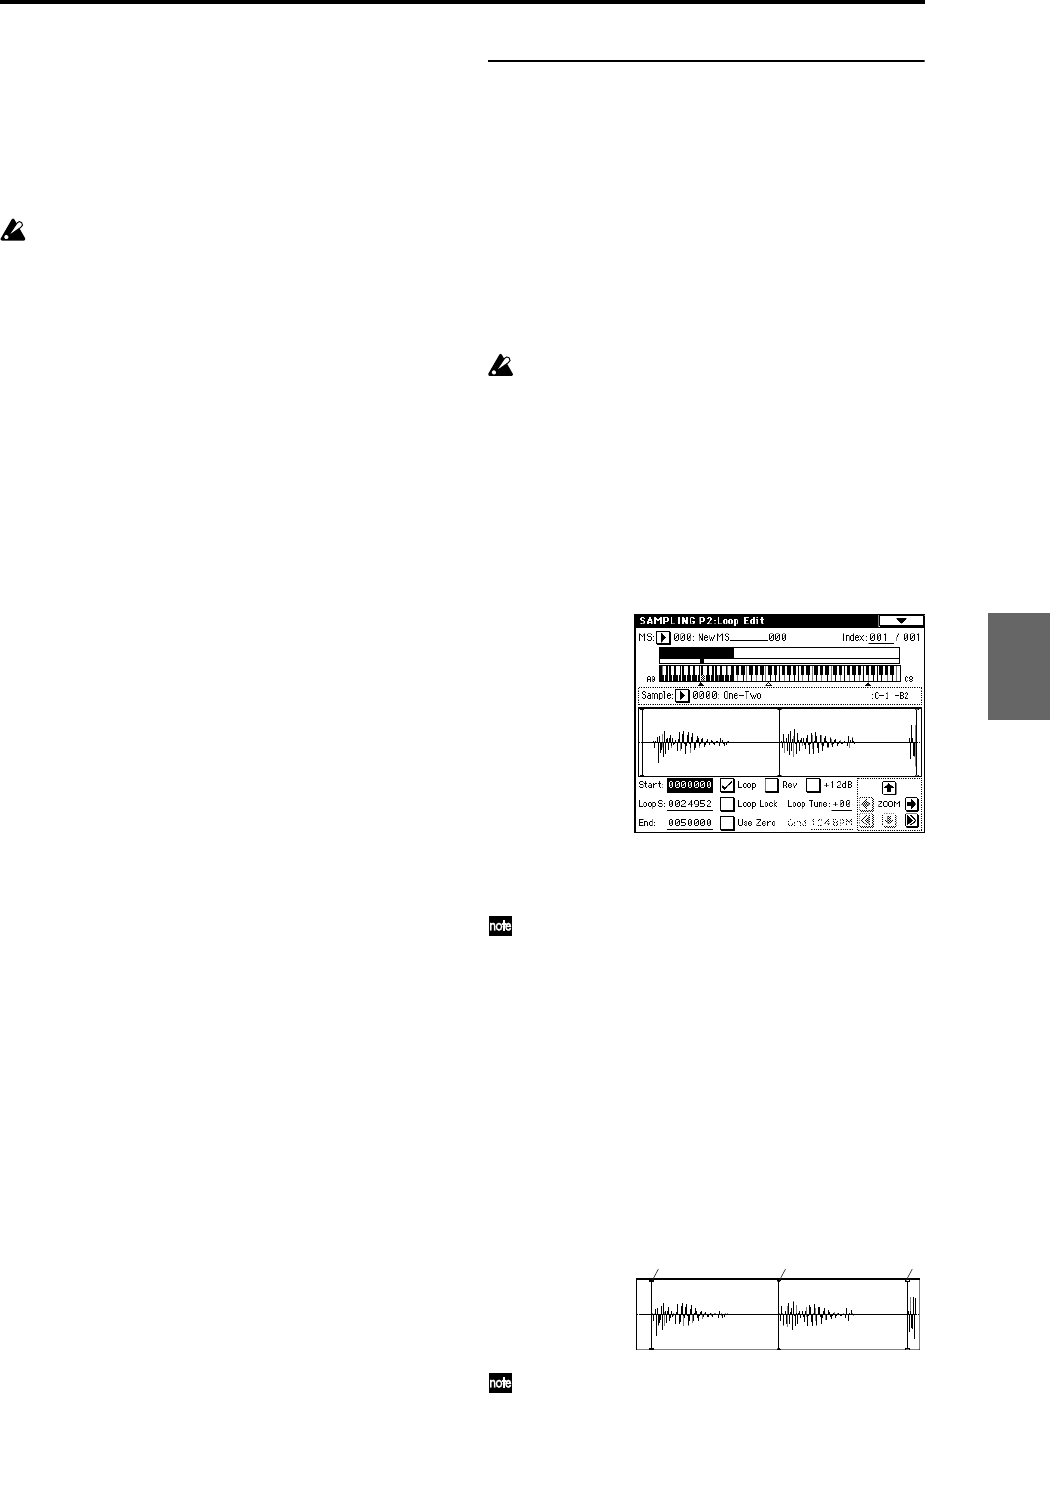
3 Specify the start address in “Start,” the loop start
address in “LoopS (Loop Start),” and the end address
in “End.”
Select “Start” (highlighted), and use the [VALUE] dial
or other VALUE controllers to modify the value. The
corresponding vertical line will move. Set “LoopS
(Loop Start)” and “End” in the same way. In the exam-
ple shown below, “Start” is set immediately before the
first waveform, “LoopS (Loop Start)” is set immedi-
ately before the second waveform, and “End” is set as
desired.
By using the ZOOM button you can change the range
that is displayed. When “S (Start)” is highlighted,
zoom will be performed from the start address.
Start LoopS (Loop Start) End
Program
Combination
SequencerSamplingSong PlayGlobalEffectMedia, etcPresetOther