71
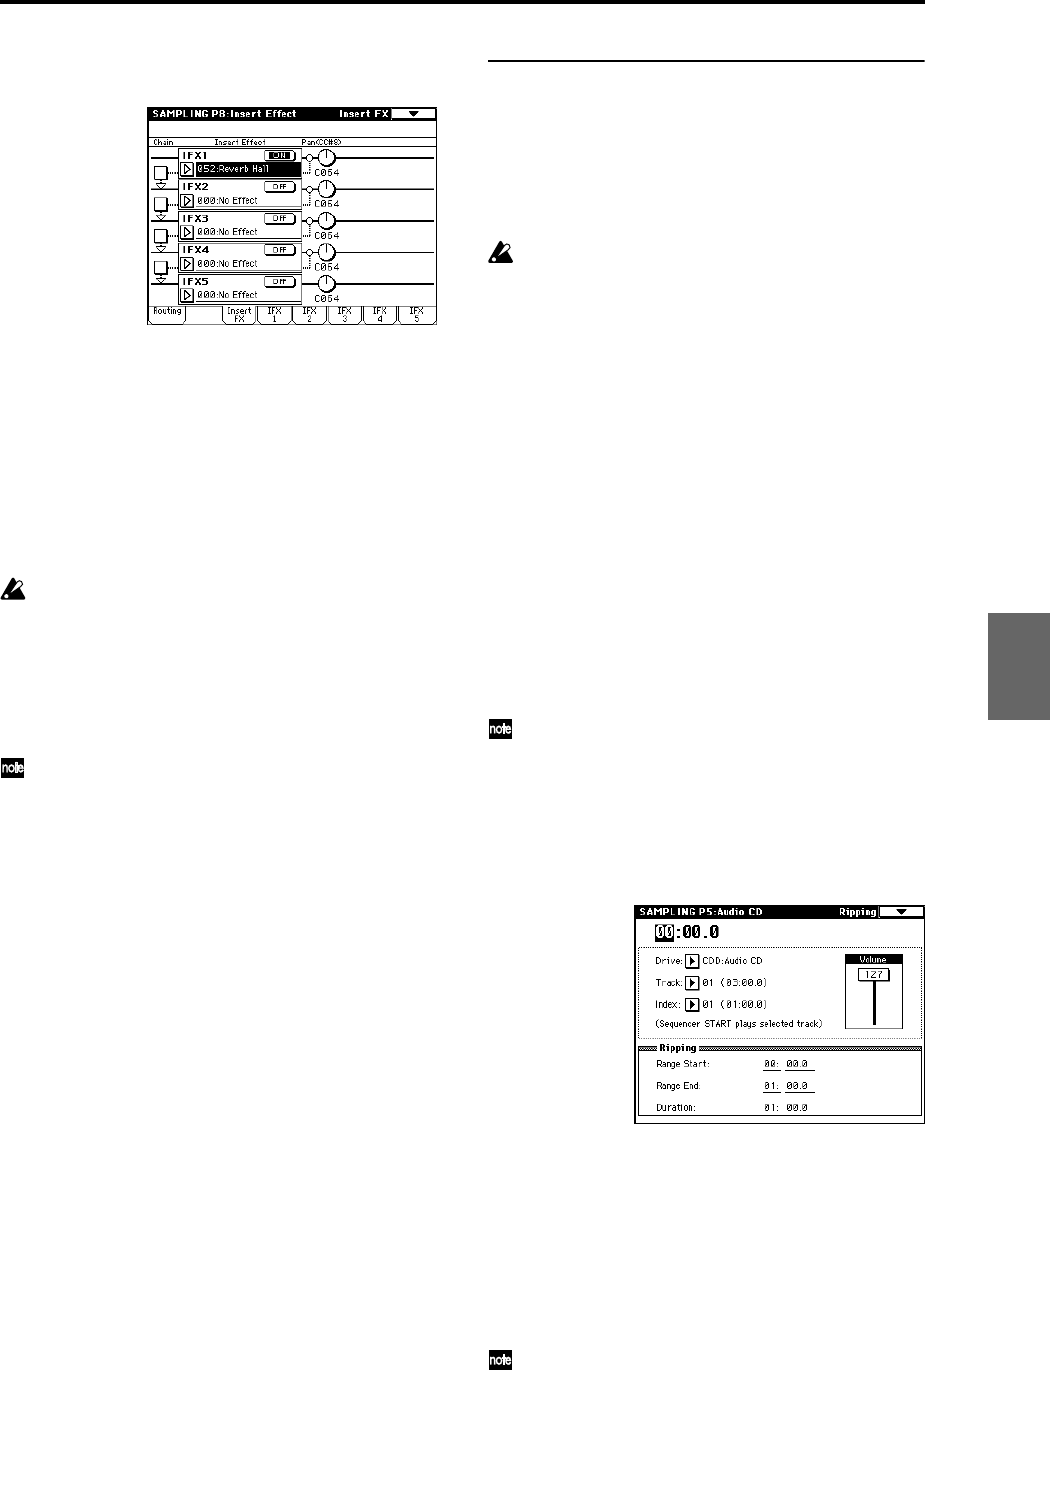
7 In the P8: Insert Effect, Insert FX page, set “IFX1” to
052: Reverb Hall, and turn “IFX On/Off” ON.
Press the C2 key, and verify that reverb is applied.
8 Press the SAMPLING [REC] key, and then the SAM-
PLING [START/STOP] key.
The sample assigned to C2 will play automatically, and
resampling will begin.
When the sample finishes playing, resampling will
end.
The sample that was created by resampling will auto-
matically be assigned to “Sample Select.”
9 Press the C2 key, and verify that reverb is applied.
In Sampling mode, the P8: Insert Effect, Routing page
“BUS (IFX) Select” parameter will automatically be
set to L/R when resampling ends. This prevents an
insert effect from being applied in duplicate when
you monitor the results of resampling through an
insert effect.
If you want to apply an insert effect once again, re-
select IFX1.
As an alternative to automatically resampling as
described above (“Resample” Auto), you can simply
sample the sounds that you play from the keyboard
(“Resample” Manual).
In “Sample Select,” assign the sample that you will
resample, and set “Resample” to Manual. Set “Trig-
ger” to Note On, and set “Sample Mode” to Stereo as
desired. Then set the bus and effect as described in
steps 2 and 7, press the SAMPLING [REC] and then
the [START/STOP] key, and then press the C2 key to
start resampling. When you want to stop resampling,
press the SAMPLING [START/STOP] key.
Ripping
Data from an audio CD in a CD-ROM or CD-R/RW drive
connected to the USB A connector can be loaded into the
TRITON Extreme as sample data. You can do this in either
of two ways; you can play back the audio CD and capture
the sound via the AUDIO INPUT, or you can load (“rip”)
it directly as digital data.
If you are using a CD-ROM or CD-R/RW drive con-
nected to the USB A connector, use an audio cable to
connect the audio output of your drive to the TRI-
TON Extreme’s AUDIO INPUT 1, 2 jacks. If you’re
using a drive that does not have audio output jacks or
a headphone jack, you won’t be able to monitor the
sound.
Ripping digital data from an audio CD as a sample
Here’s how digital data from an audio CD track can be
captured as a sample.
1 Insert an audio CD into the USB A connector CD-
ROM or CD-R/RW drive. (☞PG p.325)
2 In the Sampling mode P0: Recording, Input/Setup
page, make Input settings so that you can monitor the
audio that you want to rip.
Ripping will not be affected by these inputs.
3 Access the Sampling mode P5: Audio CD, Ripping
page.
4 In “Media” (media select), select the drive that con-
tains the audio CD, and use “Track” to select the track
that you want to rip.
Raise the “Volume.”
5 Press the SEQUENCER [START/STOP] key to play
back the audio CD track.
6 During playback, press the [ENTER] key at the
points where you want ripping to begin and end.
This will set “Range Start” and “Range End.”
If you press the [ENTER] key three or more times,
“Range Start” and “Range End” will respectively be set
to the next-to-last point at which you pressed the key,
and the last point at which you pressed the key.
You can use the method described above when the
edit cell is located at other than “Range Start” or
“Range End.”
If the edit cell is located at “Range Start” or “Range
End,” the setting will be reset each time you press the
[ENTER] key.
“Input”: Analog
Input1 “BUS (IFX/Indiv.) Select” L/R, “Level” 127,
“Pan” L000
Input2 “BUS (IFX/Indiv.) Select” L/R, “Level” 127,
“Pan” R127
Program
Combination
SequencerSamplingSong PlayGlobalEffectMedia, etcPresetOther


