


42
If you are using the TRITON Extreme’s Sequencer
mode as a 16-track multi-timbral tone generator, set
this parameter to INT or BTH. (☞”Status” PG p.72)
In general, you should set “MIDI Channel” to different
channels 1–16 for each track. Tracks that are sent to the
same MIDI channel will sound simultaneously when
either is recorded or played.
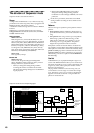
4 Adjust the effect settings.
Make settings for each effect in Sequencer P8: Insert
Effect and P9: Master Effect. (☞p.105, PG p.95, 98)
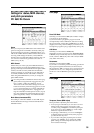
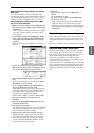
5 Set the tempo and time signature.
Make these settings in Sequencer P0: Play/REC.
“ (Tempo)” sets the tempo, and “Meter” sets the time
signature. (☞PG p.55)
6 As necessary, set “Reso” to specify the quantization
resolution. (☞PG p.57)
7 Make other settings as necessary.
As necessary, make arpeggiator settings (Sequencer P7:
Arpeggiator), MIDI filter settings (Sequencer P3: MIDI
Filter) and Valve Force (Sequencer P9: Master Effect).
(☞PG p.55–102)
When you are finished making these settings, the basic
setup is complete. Record as described in “Recording
methods” and following sections.
You can use the Tone Adjust page (Sequencer P5:
Track Edit, Tone 1.2–5.6) to make adjustments to each
program as appropriate for your song, for example
by making the bass a bit more mellow, or by speeding
up the attack of the strings. This lets you adjust the
sound and keep those changes as part of the song
data without having to move back to Program mode
to edit and write the settings.
[LOCATE] settings
By pressing the [LOCATE] key you can move to a speci-
fied location.
The location is specified by the Utility menu command
“Set Location.” You can also hold down the [ENTER] key
and press the [LOCATE] key to set the location even dur-
ing playback (☞PG p.61).
When you select a song, the “LOCATE” setting will auto-
matically be set to 001:01.000.
Normally you will leave this set to 001:01.000., to return
you to the beginning of the song.
Monitoring just a specific track/Muting
just a specific track (Solo/Mute functions)
The TRITON Extreme provides a Solo function that lets
you listen to only specific tracks, and a Mute function that
can silence specific tracks. These functions can be used in
various ways. For example you can intentionally mute or
solo specific tracks, or listen only to the rhythm section of
the previously-recorded tracks while you record new
tracks. Let’s try out the Mute and Solo functions.
1 Load a song.
As described on QS p.2, load the demo songs, and
select any song.
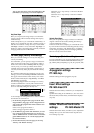
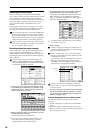
2 Access the Sequencer P0: Play/REC, Program T01–08/
T09–16 page.
Press the SEQUENCER [START/STOP] key.
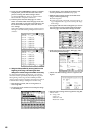
3 Press track 1 “PLAY/MUTE/REC.”
The display will change from “PLAY” to “MUTE,” and
the playback of track 1 will no longer be heard. In this
way, the “mute” function allows you to silence a speci-
fied track until the track is un-muted.
Press track 2 “PLAY/MUTE/REC.”
The display will change, and the playback of track 2
will also be muted.
To cancel muting, press “PLAY/MUTE/REC” once
again.
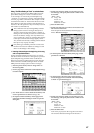
4 Press track 1 “SOLO ON/OFF.”
The display will change from “SOLO OFF” to “SOLO
ON,” and this time, only the performance of track 1
will be heard. To play back only a specified track by
itself in this way is known as “soloing” the track (turn-
ing Solo on).
If both Mute and Solo are used, the Solo function will
be given priority.
Press track 2 “SOLO ON/OFF.”
The display will change, and only the playback of
tracks 1 and 2 will be heard.
To switch Solo off, press “SOLO ON/OFF” once
again. Press “SOLO ON/OFF” for both tracks 1 and 2.
The display will change, and the playback of tracks 1
and 2 will be muted. If the Solo function is turned off
for all tracks, playback will be according to the “PLAY/
MUTE/REC” settings.
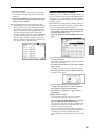
By using the page menu command “Solo Selected
Track,” you can listen to the sound of only the
selected track. This is convenient when you want to
set track parameters or to make effect settings. (☞PG
p.58)