


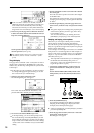


74
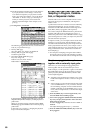
If the “Use Zero” check box is checked, only those
addresses where the waveform data crosses the zero
level will be found automatically when searching,
and can be set. This lets you easily make address set-
tings where noise is less likely to occur when looping.
4 If necessary, use the page menu command “Truncate”
to delete unwanted data that falls outside the start (or
loop start) and end addresses.
Set the parameters, and press the OK button to exe-
cute the operation. (☞PG p.119)
For cautions on the “Save to No.” and “Overwrite”
check boxes, refer to “About “Overwrite”” (☞PG
p.119).
The grid display
The page menu command “Grid” overlays the waveform
display with a grid based on the BPM tempo value. This
makes it easy to make loop settings that are synchronized
to the tempo.
In the same way, the grid display can also be used in
P1: Sample Edit page. The grid can help you to edit
the waveform in sync with the tempo.
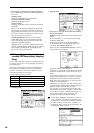
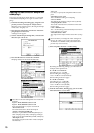
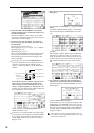
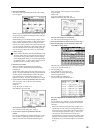
1 Select the page menu command “Grid”.
The following dialog box will appear.
Turn “Grid” On, set the desired “Resolution,” and
press the OK button. Dotted grid lines will appear.
2 Set “Grid” to the desired BPM tempo value.
In P0: Input Setup, you can use the tap tempo func-
tion to set the tempo. Press the [ENTER] key several
times while the sample plays, and the corresponding
tempo will be set for “Metronome Precount.” Setting
“Grid” to this value will make it easy to set the BPM
setting.
3 Set the end address so that it coincides with a dotted
line of the grid.
This will cause the loop interval to be the same length
as the BPM value.
The grid display will be based at “LoopS (Loop Start)”
if looping is on. If looping is off, the grid will be based
at “Start.”
4 To hide the grid display, select the page menu com-
mand “Grid”, uncheck “Grid,” and press the OK but-
ton.
The grid is displayed according to the playback pitch
of the base key (the key shown in gray in the “Key-
board & Index” area).
You can select the base key by holding down the
[ENTER] key and playing a note on the keyboard.
Sampling and looping a drum phrase
Here’s how you can sample a drum phrase (or similar
phrase) from an audio CD, and loop the playback.
You will need to provide a drum rhythm loop sample. Ini-
tially, it is a good idea to begin with a rhythm loop sample
that has a fairly simple beat.
As an example, we will sample one measure of a 140 BPM
drum phrase in a 4/4 time signature. In this example we
will use a CD player. For details on how you can digitally
sample or “rip” from the USB A connector CD-ROM or
CD-R/RW, refer to p.71.
This explanation assumes that you are starting from
the default state immediately after power-on.
If necessary, create a new multisample before you
begin this procedure. (☞p.69)
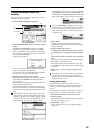
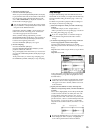
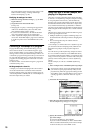
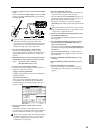
1 Connect the AUDIO INPUT 1, 2 jacks on the rear
panel to the LINE OUT L and R jacks of your CD
player.
Set the AUDIO INPUT [MIC/LINE] switch to the
LINE position, and set the [LEVEL] knob near the
center.
2 Press the [SAMPLING] key.
You will enter Sampling mode. Make sure that the
Sampling P0: Recording page is displayed. In this
example, choose the Input/Setup page.
If this is not displayed, press the [EXIT] key and then
press the InputSetup tab.
3 Press the page menu button, and choose “Auto Sam-
pling Setup” from the menu.
The dialog box will appear.
AUX OUT
R
L
CD player