


Quick Start
26
r
E-80 Music Workstation
key to its left is enough.
Note: The function that takes care of this easy fingering is
called “INTELLIGENT” (page 89). See also p. 273 for a list of
other chords that can be played using this system (augmented,
diminished, etc.).
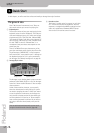
What you hear now is the “MAIN 1” pattern (the
[MAIN] and VARIATION [1] buttons light). This is the
simplest accompaniment of the selected Music Style.
Let’s listen to the accompaniment you could use for
your choruses:
(8) Press the VARIATION [2] button (the [MAIN] and [1]
buttons light and [2] flashes).
At the end of the VARIATION [1] pattern, the VARIA-
TION [2] button lights steadily and the Arranger plays
a different accompaniment.
(9) Now try out Variations 3 and 4.
Professional transitions: Fill In
So far, we have only used the main accompaniment
patterns (i.e. the phrases that are repeated over and
over until you stop the Arranger).
The various variations can be used for verses (1), second
verses (2), choruses (3 & 4) and other song parts.
Switching between these patterns is a matter of press-
ing the VARIATION [1]~[4] buttons. Yet, that produces
instant changes of the accompaniment, while “real”
musicians tend to “announce” new song parts by means
of roll in the drums or slightly different accompaniment
notes.
The E-80 allows you to make such “announcements” in
the following way:
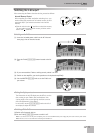
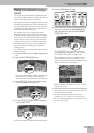
(1) Start playback of the MAIN [1] pattern (see above).
(2) Play a chord in the left half of the keyboard.
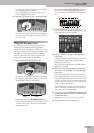
(3) Press the [AUTO¥FILL¥IN] button (it lights).
(4) Press a VARIATION [1]~[4] button to select another
MAIN pattern.
The [MAIN] button and the selected VARIATION [1]~[4]
button flash.
What happens now depends on when you press this
button:
• If you press it on any beat before the last of the cur-
rent bar, the Arranger plays a Fill-In pattern that lasts
until the end of the current bar. It then changes to
the newly selected pattern (at which point [MAIN]
and the selected numeric VARIATION button light
steadily).
• If you press it on the last beat of the current bar, the
Fill-In will start on the next downbeat and last an
entire bar, after which the Arranger automatically
selects the new pattern.
If you press the same numeric button ([1]~[4]) again,
the Fill-In is played according to the above rules. But
when it finishes, the Arranger returns to the pattern
you had been using up to that point.
(5) Switch off the [AUTO¥FILL¥IN] button if you do not
want the next pattern change to be preceded by a
Fill-In.
Note: The length of a Fill-In can be halved. See “Half Bar on Fill
In/Main” on p. 71, 75 and 77.
Intro & Ending
Now that we’ve got the transitions covered, you may
start wondering how to create more professional intros
for your songs – and how to end them in style. That is
what the [INTRO] and [END/RIT] buttons are for.
While the MAIN patterns keep repeating the same
accompaniment until you select another one or until
you stop Arranger playback, Fill-Ins (see above), Intros
and Endings are played only once.
Once the INTRO pattern is finished, the Arranger auto-
matically proceeds with the MAIN [1]~[4] pattern
(depending on which button flashes). At the end of the
Ending pattern, however, the Arranger stops.
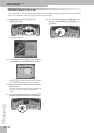
(1) Stop Arranger playback by pressing the
[START÷STOP] button (it goes dark).
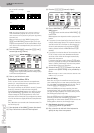
(2) Play a chord in the left half of the keyboard to
specify the key of the Intro pattern.
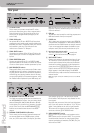
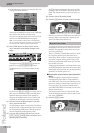
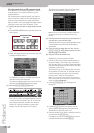
C major C minor
C7
Only the key that corresponds to
the chord's name.
Root note + third key to the
right.
Root note + second key to the left.
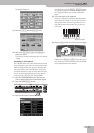
INTRO MAIN END/RIT START
START
STOP
STOP
BASS
INVERSION
AUTO
FILL IN
VARIATION
123 4
SYNC
STYLE CONTROL
INTRO MAIN END/RIT START
START
STOP
STOP
BASS
INVERSION
AUTO
FILL IN
VARIATION
123 4
SYNC
STYLE CONTROL