


Quick Start
40
r
E-80 Music Workstation
Working with the Music Assistant
The E-80’s Music Assistant is also related to the
Arranger/Style section. It is a collection of registrations
for given songs that select the most appropriate Music
Style and sounds for the Keyboard parts (along with a
whole bunch of other settings).
The E-80 ships with more than 650 pre-programmed
Music Assistant registrations and also allows you to
program new ones.
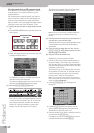
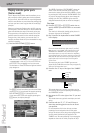
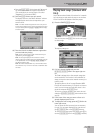
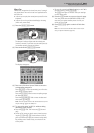
(1) Press the [MUSIC¥ASSISTANT] button.
The display now looks as follows:
(2) If the name of the registration you want to use is
already displayed, press its field.
The E-80 now recalls the settings for this registration.
(3) Press the [START÷STOP] button to start playback of
the automatically selected Style.
If the desired registration is not displayed…
• Press the [√][®] fields in the display or rotate the
[DATA÷ENTRY] dial to scroll through the list.
Pressing the [DATA÷ENTRY] dial will select the regis-
tration in the top line. (This only works if no registra-
tion has been selected yet.) If you select a registration
and then change any of its settings (like selecting
another sound, for example), pressing the
[DATA÷ENTRY] dial recalls the original Music Assis-
tant settings.
You can also use the DATA ENTRY [ß][†] buttons to
select a registration among the ones that are cur-
rently visible in the display (the buttons don’t allow
you to change pages).
To save time…
There are other ways of locating the registration you
are after. As you see, there are three button icons:
[NAME], [ARTIST] and [GENRE].
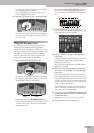
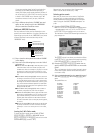
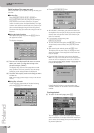
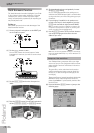
• Press the [GENRE] field to sort the Music Assistant
entries alphabetically by musical genre. This reshuf-
fles the list.
• Press the [ARTIST] field to sort the Music Assistant
entries alphabetically by artist name. This reshuffles
the list.
The genre names (right column) disappear and are
replaced by the artists’ names, which are displayed in
alphabetical order.
• Press the field of the registration you want to use.
• Press the [START÷STOP] button to start playback of
the automatically selected Music Style.
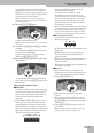
Using the Finder
Yet another way of locating the desired registration
goes like this:
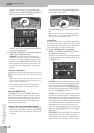
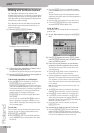
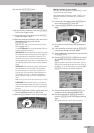
(1) On the “Music Assistant” page, press the [FINDER]
field.
(2) Press [NAME] (registration name), [ARTIST] (artist
name) or [GENRE] (musical genre) to specify which
entry you want to look for.
(3) Enter only as many characters as you think are
necessary to find the registration you are after.
The character string you enter can be used in two
ways (see below).
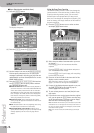
• Use the [ø] and [˚] fields to select the position for
which you wish to enter a new character.
• Use the alphanumeric keypad to enter the desired
characters. This keypad works exactly like the keypad
of a cellphone: you may have to press an alphanu-
meric field several times to select the desired charac-
ter or number.
Note: The Finder makes no distinction between upper- and
lower-case letters.
• The [Delete] field allows you to delete the selected
character. Press and hold it to clear all characters.
• Press [Space] to insert a blank (or the number “0”).
• If you forgot to insert a character, use [ø] or [˚] to
select the position where the missing character
should be inserted. Then press [Insert], followed by the
character you wish to insert.
• If you only want to enter numbers, activate the
[NUM¥LOCK] field.
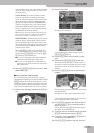
(4) Decide how the Finder should look for the files:
• Press the [Alphabetic¥Order] field to search for all
entries that start with the characters you entered
(“BEA”, for example). Names that match the specified
criteria will be displayed at the top of the list.
MUSIC
ASSISTANT