To Load Data from Disks
(Drive Select)
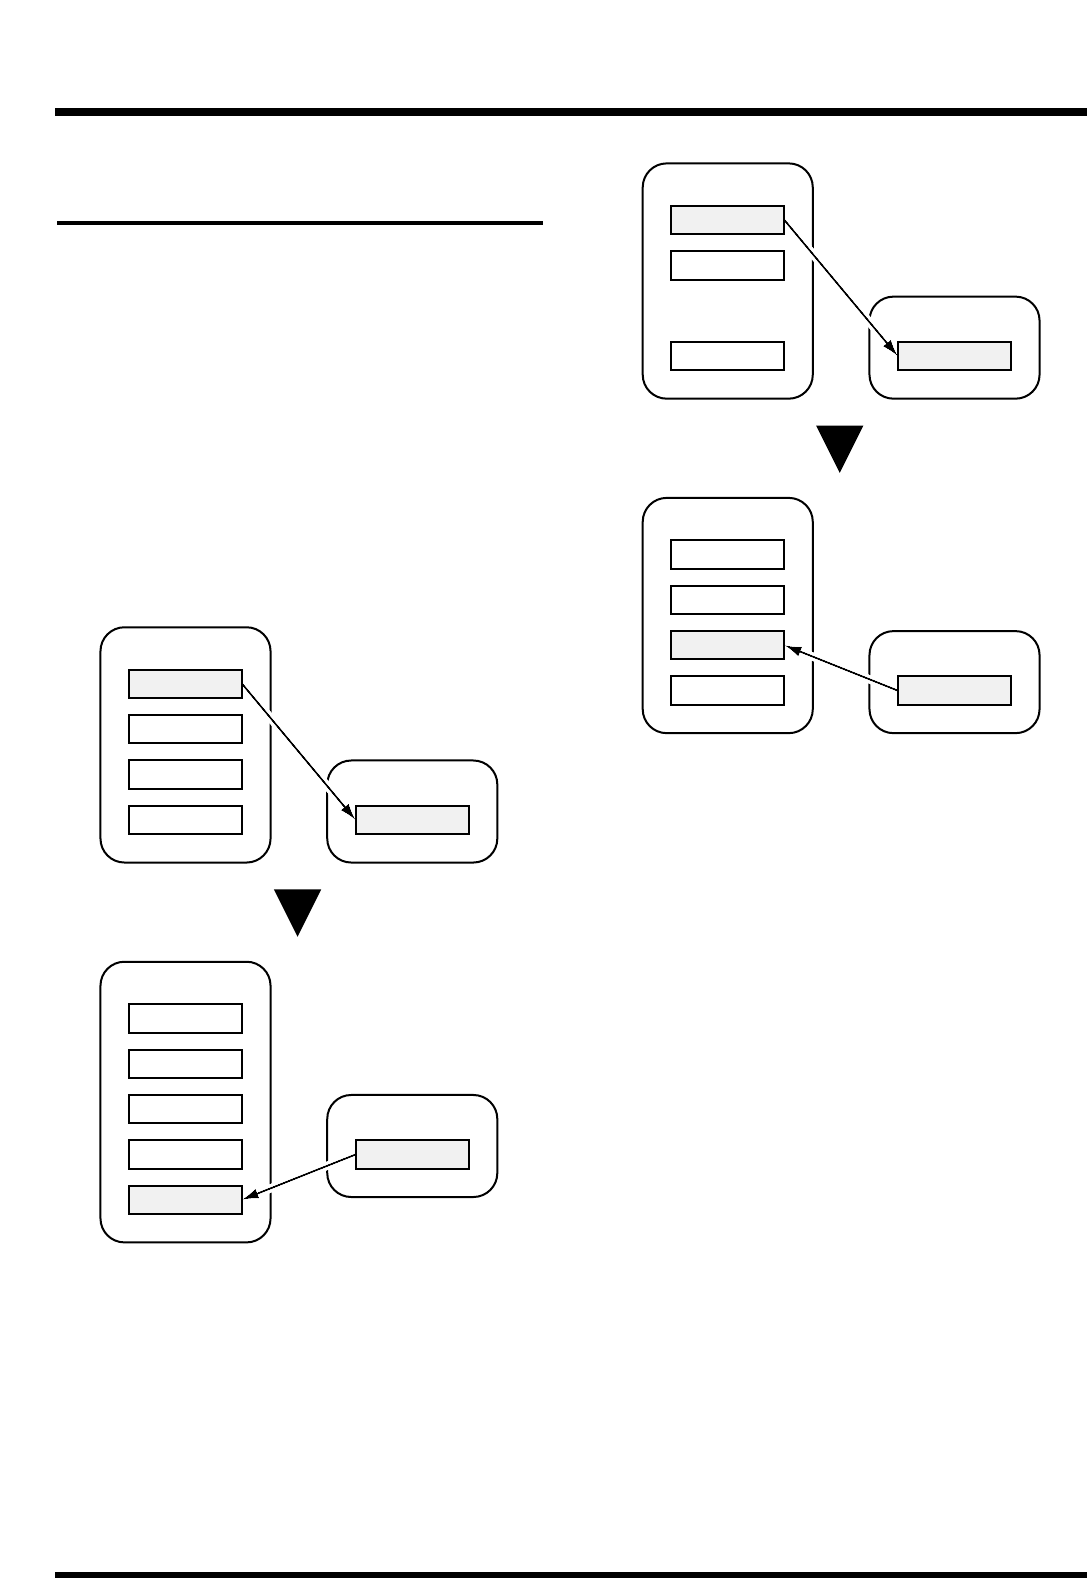
If you want to take playable songs that have been
copied to Zip disks and load them onto the VS-
880EX’s hard disk, first switch the current drive to the
Zip drive (Drive Select). This is referred to as Drive
Select. Afterwards, you can make playable copies
onto the internal hard disk from the Zip disk.
* Even if you remake a playable copy of a song from the Zip
disk to the internal hard disk without first deleting an
existing playable copy of the song from the hard disk (even
if you return it to the hard disk), the original song is not
overwritten. In this case, a new song is created with the
same song name as that of the original and is written to
the lowest available song number.
1. Confirm that power of both the Zip drive and the
VS-880EX is turned on.
2. Insert a disk into the Zip drive.
3. Press [SYSTEM] several times until “SYS Drive
Select” appears in the display.
4. Press [YES].
The connected disk drives will be detected.
5. Rotate the TIME/VALUE dial. Select the disk
drive to which you want to change. The internal
hard disk will be shown as “IDE,” and external
disk drives will be shown as “SC0–SC7.” The
number following each disk drive indicates the
partition number. For example if you wish to
switch to the Zip drive, select “SC5:0.”
6. Press [YES].
A confirmation message appears on the screen.
7. Press [YES].
“STORE Current?” (Store the current song?) appears
in the display.
8. If you wish to save the current song, press [YES];
if not, then press [NO]. If you have selected a
demo song, then press [NO].
9. After you have switched the current drive, return
to Play condition.
Song 2
Song 3
Song 4
Internal Hard Disk
Zip Disk
Song 1
Song 1
Song 2
Song 3
Song 4
Internal Hard Disk
Zip Disk
Song 1
Song 1
Song 1
Song 2
Song 4
Internal Hard Disk
Zip Disk
Song 1
Song 1
Song 2
Song 4
Internal Hard Disk
Zip Disk
Song 1
Song 1
Song 1
Chapter 7 Use with a Zip Drive
104


