


2. Press [SYSTEM] several times until “SYS MIDI
PRM ?” appears in the display.
3. Press [YES].
4. Press PARAMETER [ ] several times until
“SYS MID: MIDIThr=” appears in the display.
5. Rotate the TIME/VALUE dial.
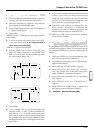
MIDI Thru (MIDI Thru Switch)
This selects the function of the MIDI OUT/THRU con-
nector. For now, select “Out.”
Out: The connector transmits MIDI messages from
the VS-880EX. Select this when you want to
transmit metronome Note messages or mixer
parameter settings (control change messages or
exclusive messages).
Thru: MIDI messages received at the MIDI IN con-
nector will be retransmitted from the connector
without change.
6. Press [SYSTEM] several times until “SYS
Sync/Tempo ?” appears in the display.
7. Press [YES].
8. Press PARAMETER [ ] several times until
“SYS Gen.=” appears in the display.
9. Rotate the TIME/VALUE dial.
Gen. (Generator)
This selects the type of synchronization signal that will
be transmitted from the MIDI OUT connector. At this
point, select “MIDIClk.”
Off: Synchronization signals are not transmitted.
MTC: MIDI Time Code is transmitted.
MIDIClk: MIDI Clock according to the Tempo Map is
transmitted.
SyncTr: MIDI Clock data recorded on the sync track
is transmitted.
10. Press [PLAY (DISPLAY)].
Return to Play condition.
11. Set your MIDI sequencer so that it can operate
according to the MIDI Clock messages received
from external devices, and set it so that it can play
back MIDI song data. When playback begins on
the VS-880EX, the MIDI sequencer begins play-
back as well.
Various Operations Related to
Synchronized Operation
There may be times when you want to use MIDI Clock
to synchronize with an external MIDI sequencer or
other device, even without recording using the
metronome. In such instances, to synchronize with the
tempo of the recorded song, first set a Marker. You can
then create a sync track or tempo map beginning at
that Marker.
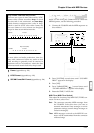
Setting Markers Along with the Tempo
1. Press [ZERO].
2. Press [PLAY] to begin playback of the song.
3. While listening to the song, press [TAP] at the
downbeat at the each beat.
4. When you have finished setting the Markers,
press [STOP].
* To correctly place Markers on the downbeats of other
song, we recommend using the Preview and Scrub func-
tions.
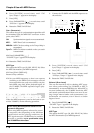
Creating a Sync Track from the
Marker
A sync track can be generated from markers that were
assigned according to the tempo of a previously
recorded performance. This is convenient when you
have already recorded a performance of an acoustic
instrument such as guitar or vocal, and now you wish
to synchronize a MIDI sequencer etc. to the recording.
1. Press [SYSTEM] several times until “SYS
Sync/Tempo?” appears in the display.
2. Press [YES].
3. Press PARAMETER [ ] several times until
“SYS MIDI PRM ?” appears in the display.
4. Press [YES].
5. Rotate the TIME/VALUE dial.
CV (Convert)
Here you can select how the sync track / tempo map
will be created. For this example, select “CV1.”
CV1=Tap
→S.Tr: Create the sync track from mark
points.
CV2=Tap→T.Map: Create the tempo map from mark
points.
CV3=S.Tr→T.Map: Create the tempo map from the
sync track.
CV4=Time→S.Tr: Automatically create the sync
track.
Chapter 9 Use with MIDI Devices
123
Chapter 9