


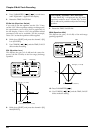


EFFECT1 (Effect 1 Send Select Switch)
This sets how the signal is sent to the EFFECT 1 bus.
Here, select “PstFade” (post-fader) to apply reverb to
the sound after the output of the channel fader.
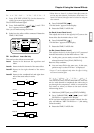
Off: The signal is not sent.
PreFade: The signal before passing through the
channel fader is sent.
PstFade: The signalafter passing through the chan-
nel fader is sent.
* If the effect has been inserted into another channel, the
effect cannot be used. But, the signal from the channel
will be sent to EFFECT bus.
9. Press PARAMETER [ ].
“EFFECT1 Send=” appears in the display.
10. Rotate the TIME/VALUE dial.
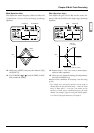
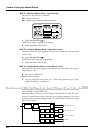
EFFECT1 Send (Effect 1 Send Level)
This adjusts the level (0–127) of the signal sent to the
EFFECT 1 bus. Set the initial value to “100.”
11. Press PARAMETER [ ].
“EFFECT1 Pan=” appears in the display.
12. Rotate the TIME/VALUE dial.
13. In the same way as in steps 7–12, make settings so
that reverb is applied to tracks 2–4 as well.
14. Press [PLAY (DISPLAY)].
Return to Play condition.
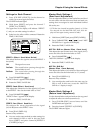
EFFECT1 Pan (Effect 1 Send Pan)
This adjusts the stereo placement of the signal
(L63–0–R63) sent to the EFFECT 1 bus.
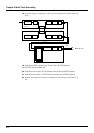
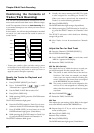
Specify the Tracks for Playback and
Recording
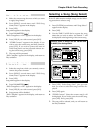
15. Press [CH EDIT (SELECT)] for Track 5.
16. Press PARAMETER [ ] [ ] until
“Channel link =” appears in the display.
17. Use the TIME/VALUE dial to select “On.”
18. Press [PLAY (DISPLAY)].
19. While pressing [STOP], press the STATUS buttons
for Tracks 1–4.
The STATUS indicators light green.
20. Press the STATUS buttons for Track 5 (or 6) to let
the STATUS indicators light orange.
21. While pressing the STATUS button for Track 5 (or
6), press the SELECT buttons on Track Channels
1–4.
The SELECT indicators blink.
22. Press [FADER (EDIT)] several times to light red
the FADER indicator.
23. While pressing the STATUS button for Track 5 (or
6), press the Channel 7 [FX RTN (SELECT)].
The SELECT indicators blink.
24. Usually, the source entering the INPUT 5–6 jacks
is also assigned for recording on Tracks 5. When
you want to record only the material on Tracks
1–4, use the following procedure.
25. Press [FADER (EDIT)].
The FADER indicators light orange. (Input Mixer)
26. While pressing the STATUS button for Track 5,
press the SELECT buttons on Channels 5 and 6.
The SELECT indicator which had been blinking
orange will go dark.
27. Now you have set it up so that you can monitor
Tracks 1–4 and Effect 1 Return on Channels 5–6.
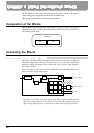
Record and Check the Content
28. Carry out track bouncing by following the proce-
dure described in “Combining the Contents of
Tracks” (p. 60).
Chapter 3 Multi-Track Recording
62